15 Fun Spring Break Nails Ideas That Bring All the Sunny Vibes
Spring break is almost here in your mind, and your nails should be ready for it! The right spring break nails can lift your whole look, whether you are heading to a beach, a road trip, or just a week at home. In this guide, you will find 15 fun ideas, from soft and simple to loud and bold. You will also get easy steps, cost and time details, care tips, and answers to common questions. Grab your favorite drink, scroll down, and find the set that feels like you.
Why Spring Break Nails Are Trending Right Now
Spring break nails have turned into a real fashion moment. People now plan their manicure the same way they plan their outfits and their trip photos. Bright colors, sheer jelly finishes, and tiny 3D charms keep showing up in nail art feeds. Many people also love “vacation nails,” which means a set that looks great in sunlight and in pictures. That is why this season feels so playful and creative.
Seasonal color is a big part of the story. Spring brings pastels, fresh greens, and sunny yellows, while beach trips bring ocean blues and coral pinks. Short, rounded nails are popular because they are easy to live with during travel. Long nails still have fans, but many people want a style that will not snap while packing a suitcase. Nail art has a long history of following the seasons, and spring break is one of the most exciting times to try something new.
How to Pick the Right Spring Break Nails for You
Start with your nail shape and length. Short nails look great with simple colors, tiny designs, and glossy finishes. Longer nails give you more room for scenes, charms, and detailed art. If your nails are very short, try vertical lines or a single accent nail, because they make fingers look longer. If you bite your nails or they break often, a soft, short gel set is a smart place to begin.
Next, think about your skin tone. Warm undertones glow with coral, peach, golden yellow, and olive green. Cool undertones shine in lilac, baby blue, icy mint, and raspberry pink. Neutral undertones can wear almost anything, so you get to follow your mood. When you are not sure, hold a nail color sample against your hand in daylight and see which one makes your skin look fresh.
Table of Contents
- Pastel Rainbow Tips
- Ocean Wave Blue Swirls
- Sunny Citrus Fruit Art
- Tropical Palm Leaf Accents
- Neon Pop Color Block
- Pearly Seashell Chrome
- Daisy Flower Power
- Sunset Ombre Glow
- Milky Jelly Pink Gloss
- Mini Smiley and Doodle Fun
- Coral Reef French Tips
- Sparkle Sand Glitter Fade
- Gingham Picnic Check
- Aura Glow Airbrush
- Tiny Charm Vacation Set
- How to Do This at Home
- Cost and Time
- Care Tips
- FAQ
15 Spring Break Nails Ideas
Finally, match your nails to your trip. A beach week is perfect for ocean tones, shells, and shimmer. A city trip loves clean lines, chrome, and neutrals. A party or festival week calls for neon, glitter, and bold art. And if you will be swimming, hiking, or working with your hands, pick a shorter, stronger set that can handle the fun.
1. Pastel Rainbow Tips for a Soft Spring Break Look
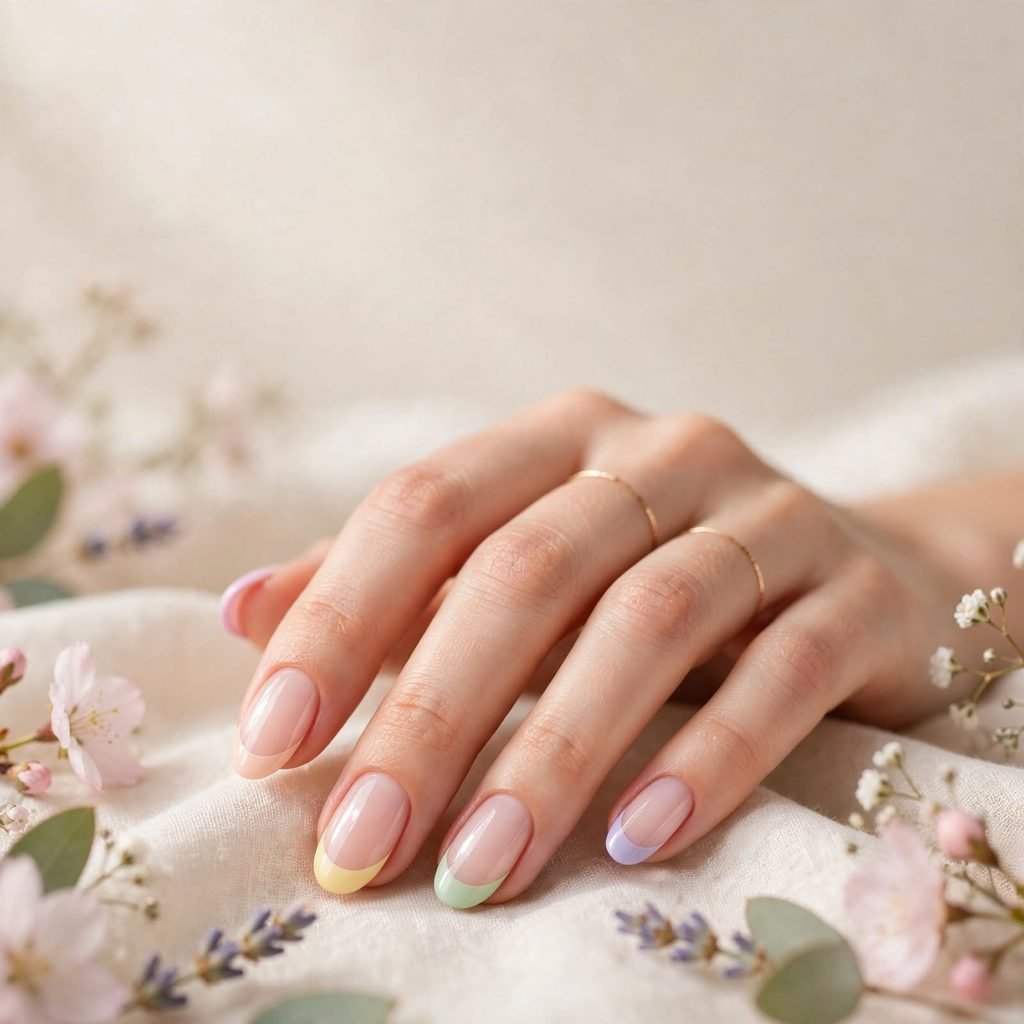
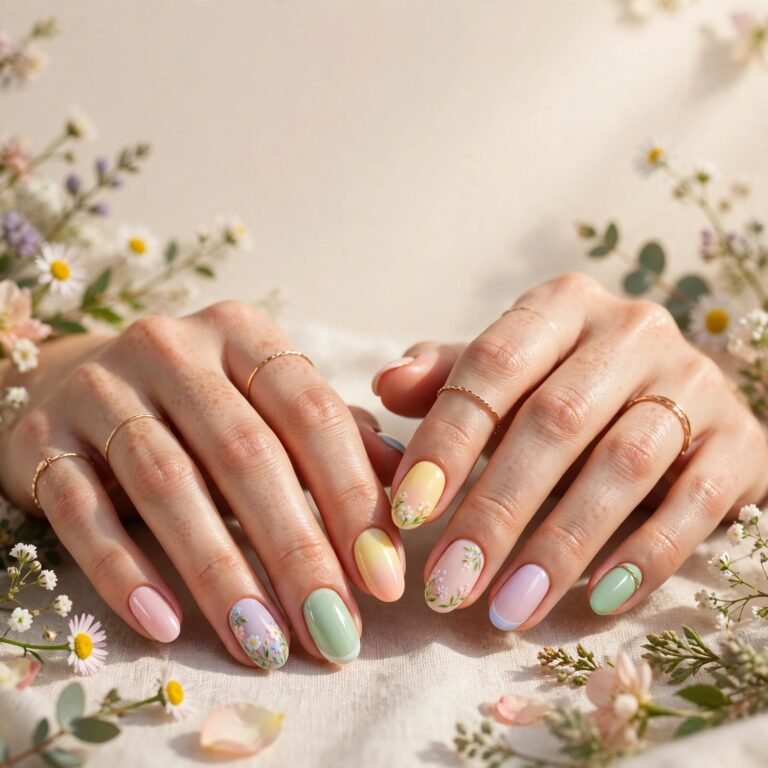
This idea gives each finger its own pastel color on the tip. Think baby pink, peach, butter yellow, mint, and lilac, all in a gentle fade. It feels happy without being loud, so it works with almost every outfit. The colors also hide small chips better than a solid dark shade would. Best of all, it is easy for a beginner to try because the tips do not need to be perfect.
Who it suits best: Short to medium nails, soft skin tones, and anyone who wants color without drama.
Quick styling tip: Keep the base a sheer nude so the pastel tips stand out and look clean.
2. Ocean Wave Blue Swirls for Beach Trips
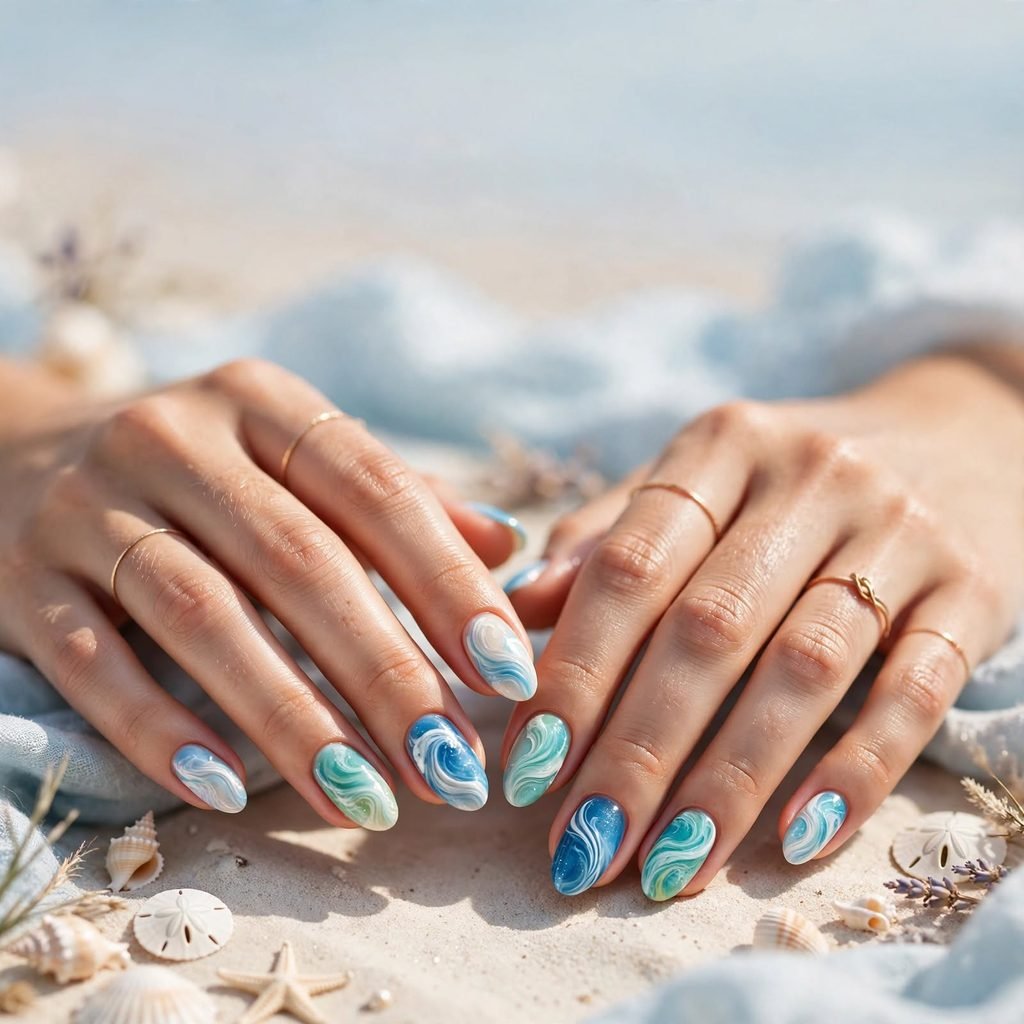
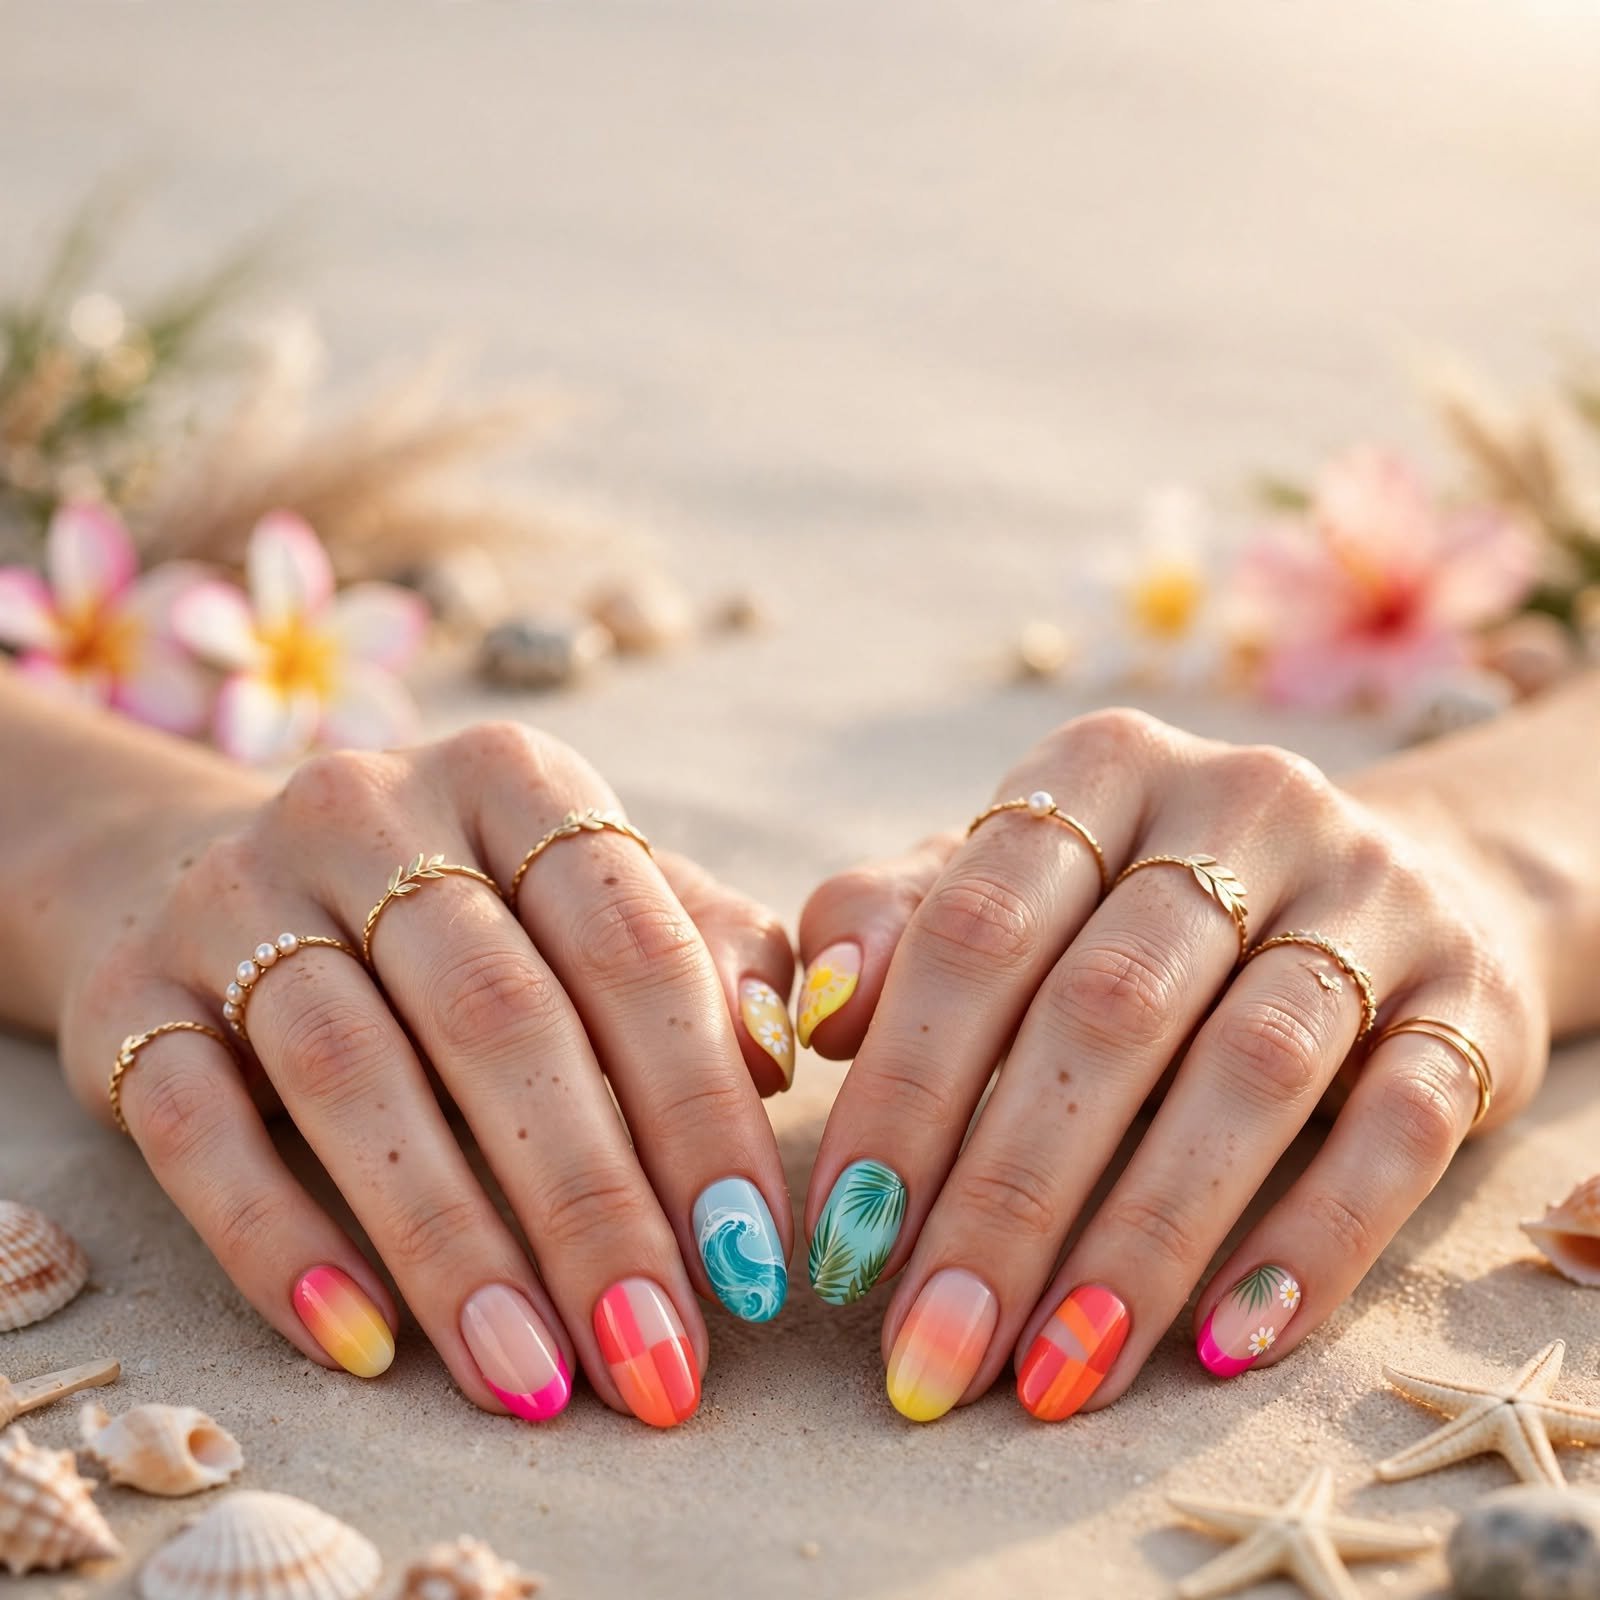
If your break is near the water, this set matches the view. You paint soft swirls of blue, white, and sea green so each nail looks like a tiny wave. A glossy top coat makes the design look wet and shiny, like the ocean in the sun. The swirls do not have to match from nail to nail, which makes this style very forgiving. It also looks great in vacation photos next to sand and sky.
Who it suits best: Beach lovers, cool undertones, and medium or long nails with room for the swirl.
Quick styling tip: Add one tiny dot of silver glitter on the ring finger to look like sea foam.
3. Sunny Citrus Fruit Art That Feels Fresh
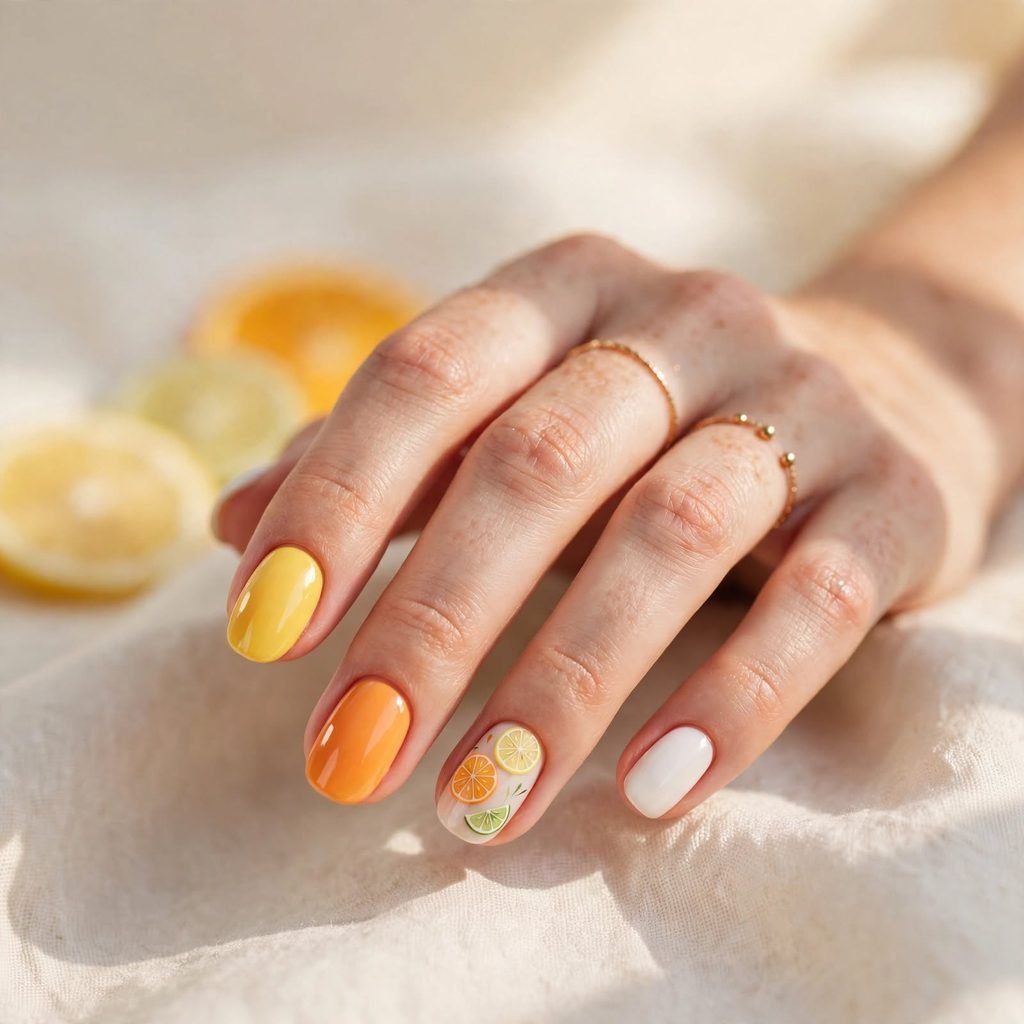
Lemons, oranges, and limes are small, bright, and full of fun. You can paint a slice on one or two nails and keep the rest in solid yellow, orange, or white. This style reminds people of cold drinks and warm afternoons. It is also a great talking point, because friends always ask who did your nails. If drawing fruit feels hard, use a simple circle with lines inside and it will still read as citrus.
Who it suits best: Warm undertones, short or medium nails, and fans of playful, cheerful art.
Quick styling tip: Use a white base on the accent nails so the fruit colors look extra bright.
4. Tropical Palm Leaf Accents for Vacation Vibes
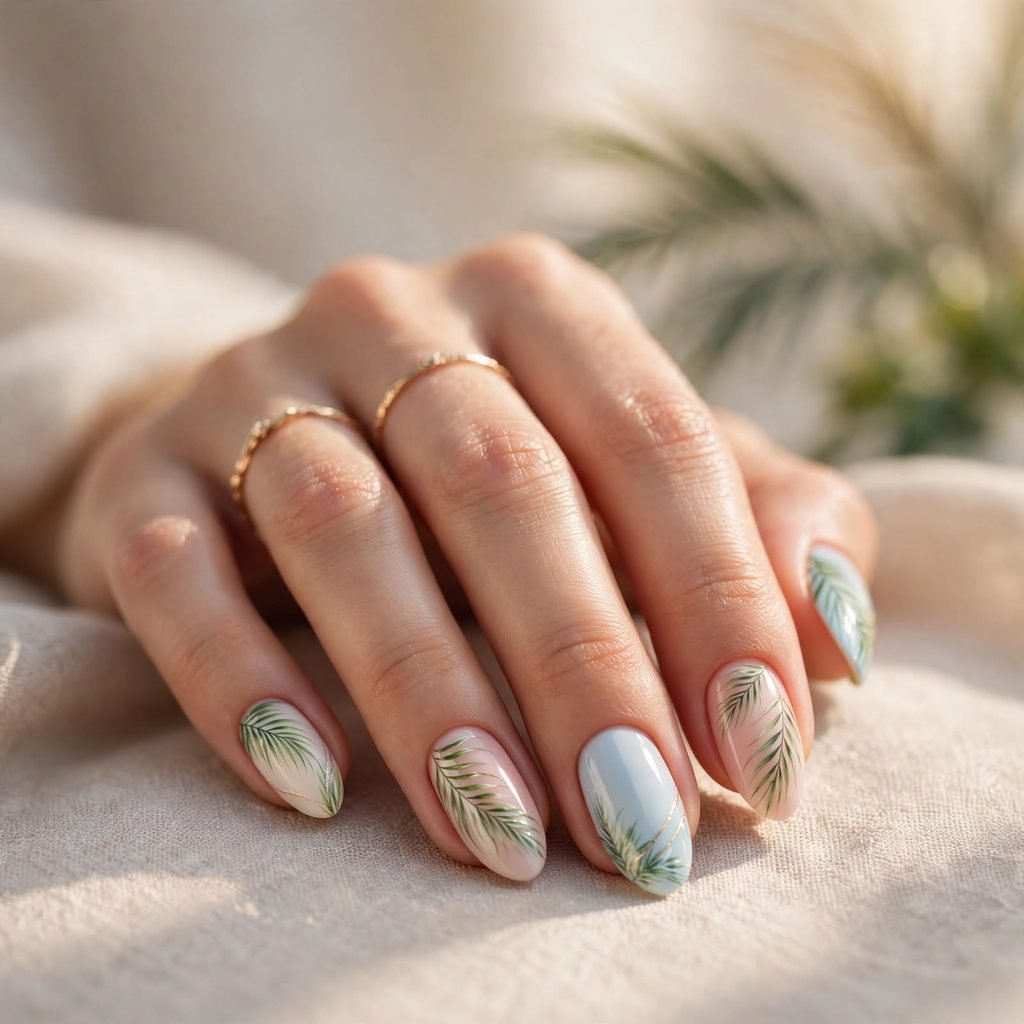
Palm leaves bring a fresh, island feeling to your hands. You can draw thin green leaves over a soft cream, pink, or sky blue base. The leaves look best when they are long and a little curved, like they are swaying in the wind. A single leaf on each nail keeps the design light and modern. Add a gold line or two, and the set looks like it came from a travel magazine.
Who it suits best: Medium to long nails, olive and warm skin tones, and tropical or resort trips.
Quick styling tip: Let the leaves run off the edge of the nail, so the design looks natural and relaxed.
5. Neon Pop Color Block for Bold Spring Break Nails
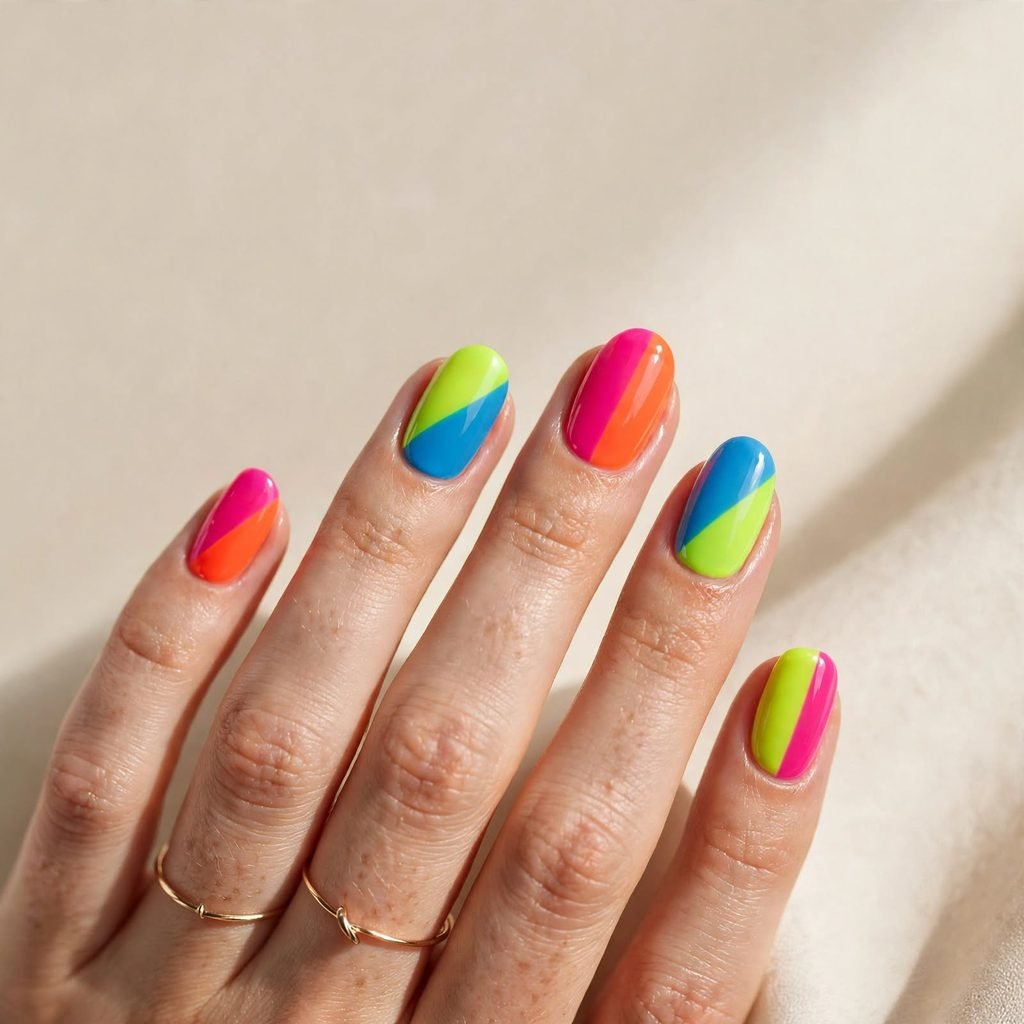
Neon colors are made for sunshine and good times. This look uses big blocks of hot pink, electric orange, lime, and bright blue on each nail. You can split one nail into two colors or give every nail a different shade. The sharp lines make the set feel graphic and fun. It is perfect when you want your hands to be the loudest part of the outfit.
Who it suits best: Short or medium square nails, tan or deep skin tones, and festival or party weeks.
Quick styling tip: Wear simple white or black clothes, so the neon becomes the star of the look.
6. Pearly Seashell Chrome for a Shimmery Beach Finish
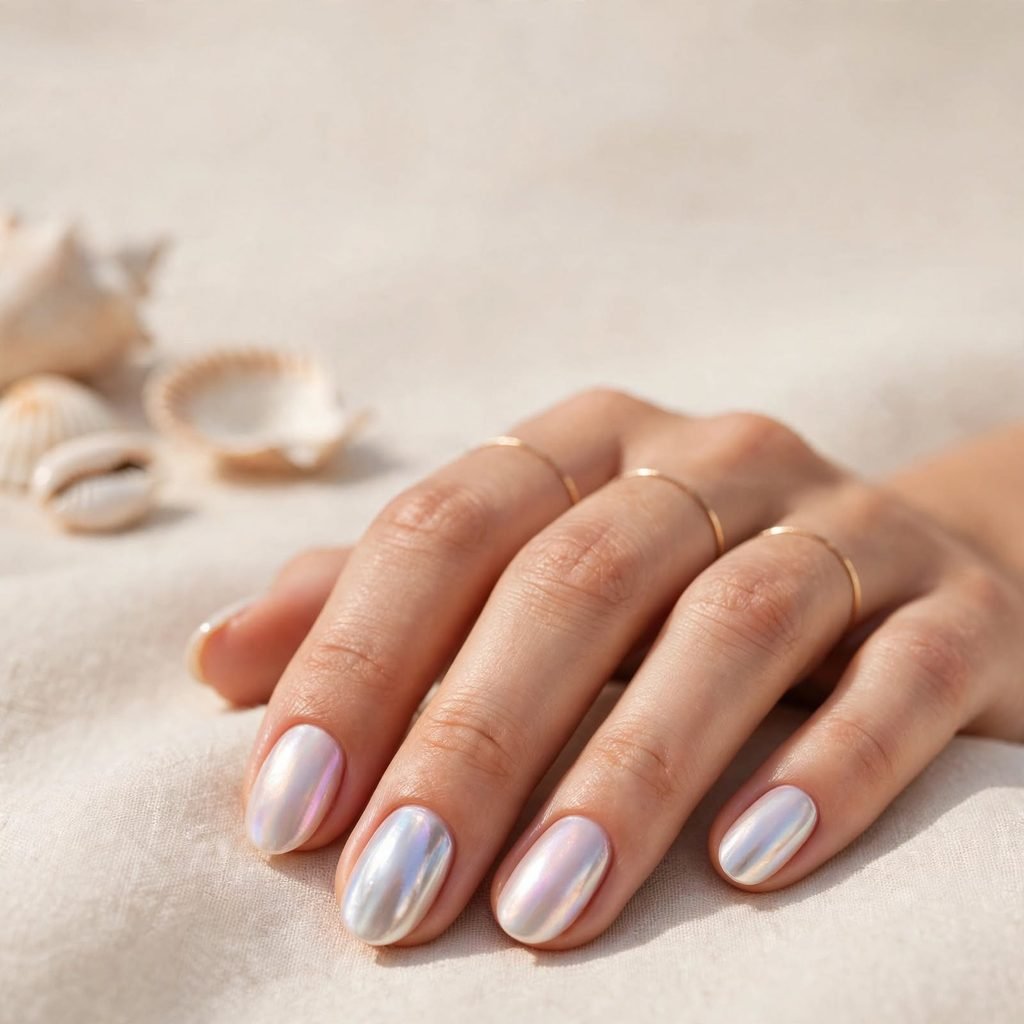
This set looks like the inside of a seashell, soft and shiny with a hint of pink and blue. You rub a pearl chrome powder over a light base to get that glowing, almost liquid look. The finish changes color as your hand moves, which makes it fun to watch. It feels fancy, but it is also quiet enough for daytime. Many people love it because it goes with every swimsuit and every outfit in the suitcase.
Who it suits best: All nail shapes, cool and neutral undertones, and anyone who likes an elegant, low-key sparkle.
Quick styling tip: Pair it with silver or pearl jewelry to make the glow look even softer.
7. Daisy Flower Power for a Fresh Spring Feel
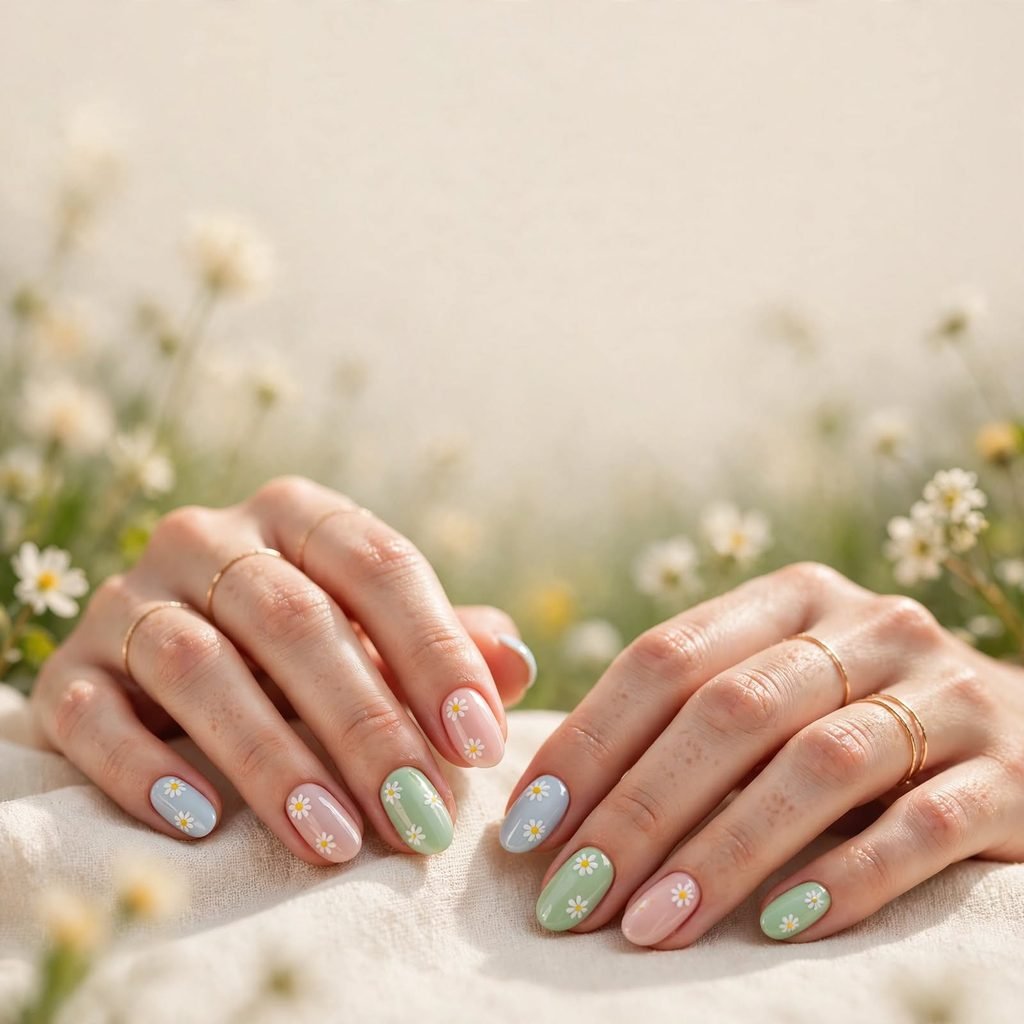
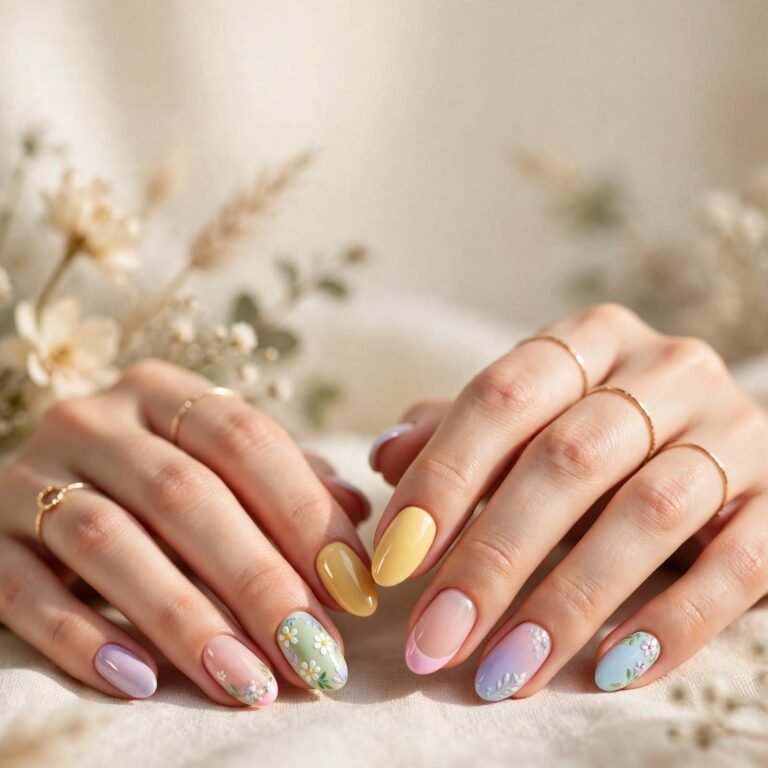
Daisies are the classic spring flower, and they are very easy to paint. All you need is white petals around a small yellow center. Scatter a few across a pale blue, pink, or green base, and your hands look like a meadow. You can keep the flowers tiny for a neat look or make them bigger for more drama. Because the shape is so simple, even a first-time nail artist can make it look cute.
Who it suits best: Short to medium nails, light and medium skin tones, and anyone who loves a sweet, cheerful style.
Quick styling tip: Draw the petals with a dotting tool, and press gently so each one stays round.
8. Sunset Ombre Glow for Golden Hour Lovers
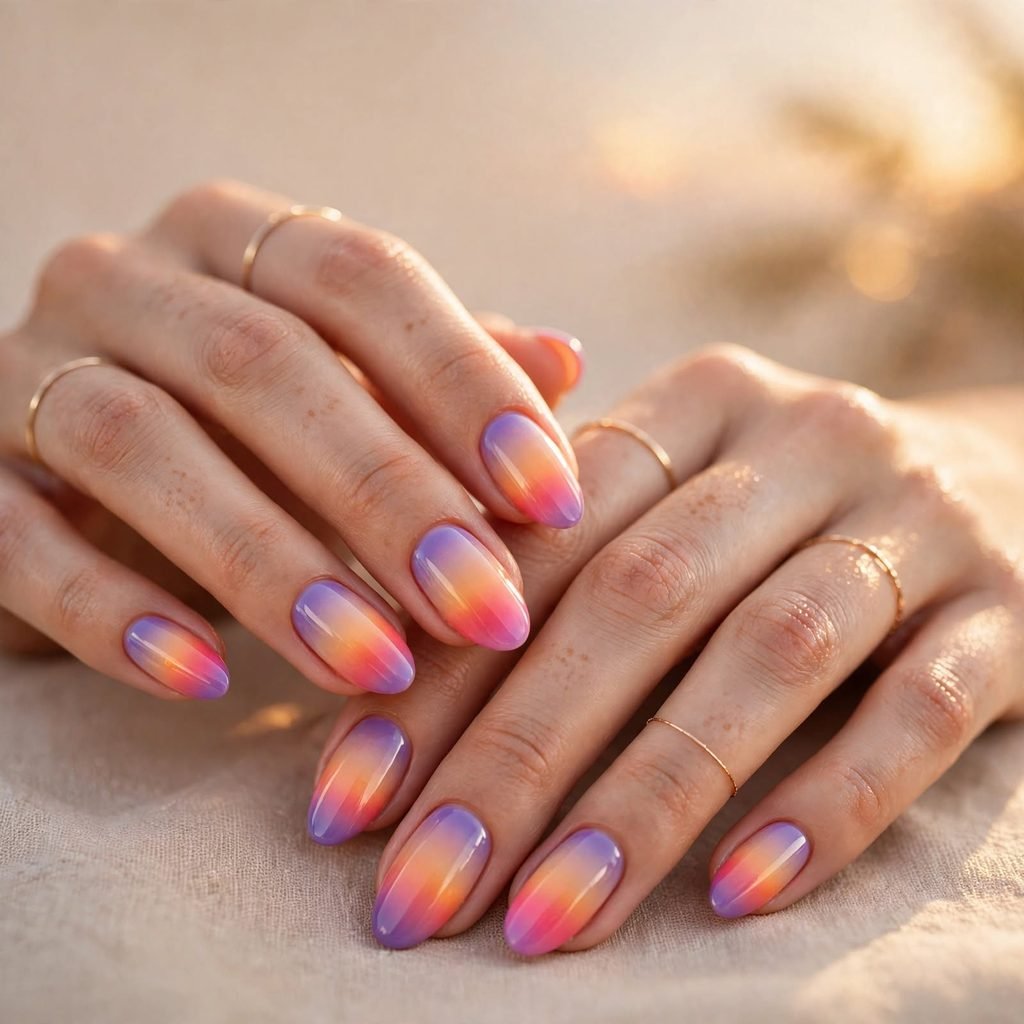
This style blends pink, orange, and soft purple from the bottom of the nail to the tip. It looks like the sky right after the sun goes down at the beach. The smooth blend feels dreamy and calm, but the colors are still bright enough for a trip. You can do a full ombre on every nail or just on one or two. It also grows out nicely, which helps if your break is a long one.
Who it suits best: Medium to long almond or oval nails, warm undertones, and sunset chasers.
Quick styling tip: Dab the colors together with a small makeup sponge for the softest blend.
9. Milky Jelly Pink Gloss for a Clean, Easy Look
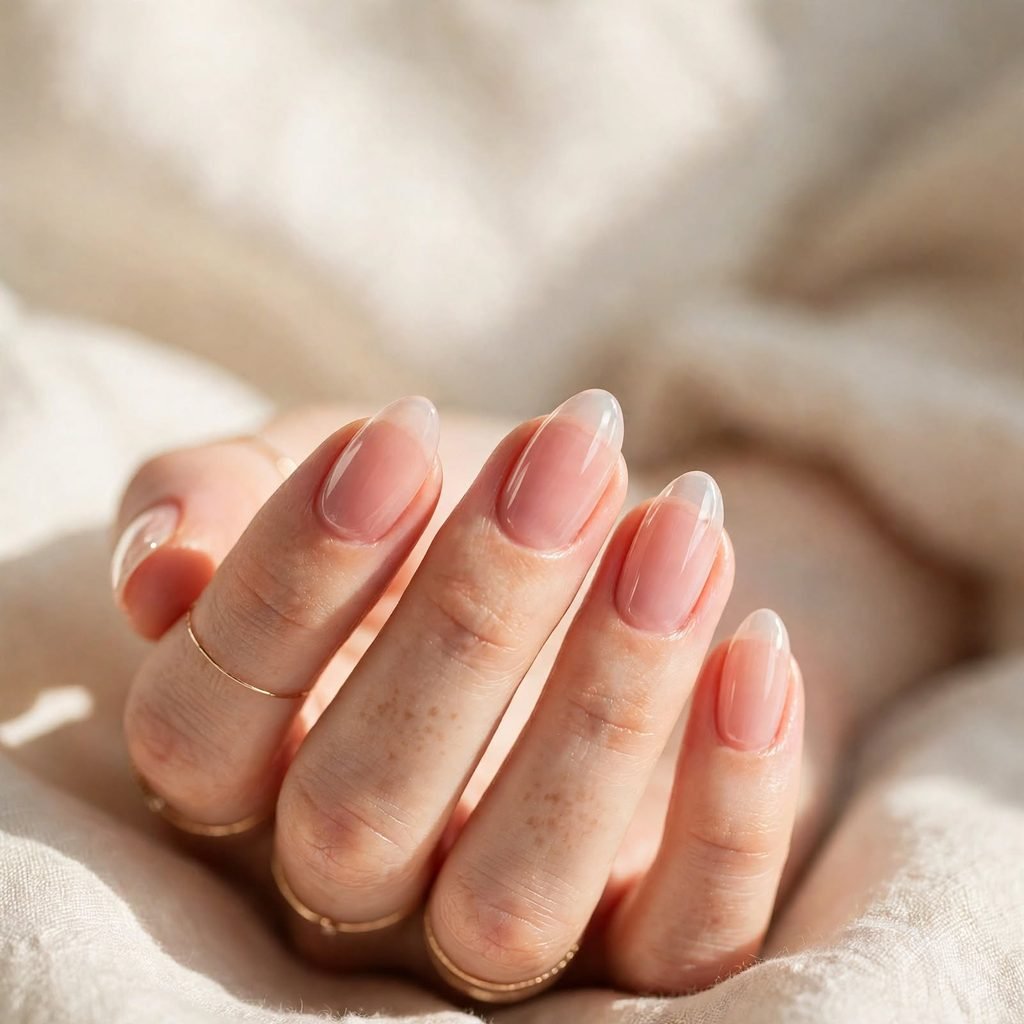
Some people want pretty nails without any fuss, and this is the answer. A sheer, milky pink or peach with a glassy shine looks fresh and healthy. The jelly finish lets a bit of your natural nail show through, so growth lines are less obvious. It is gentle on the eyes and goes with every outfit you pack. When you want something clean, quiet, and polished, this set will never feel wrong.
Who it suits best: Short nails, busy travelers, and anyone who prefers a natural, “my nails but better” style.
Quick styling tip: Apply two thin layers of color instead of one thick layer for an even, glassy finish.
10. Mini Smiley and Doodle Fun for Playful Spring Break Nails
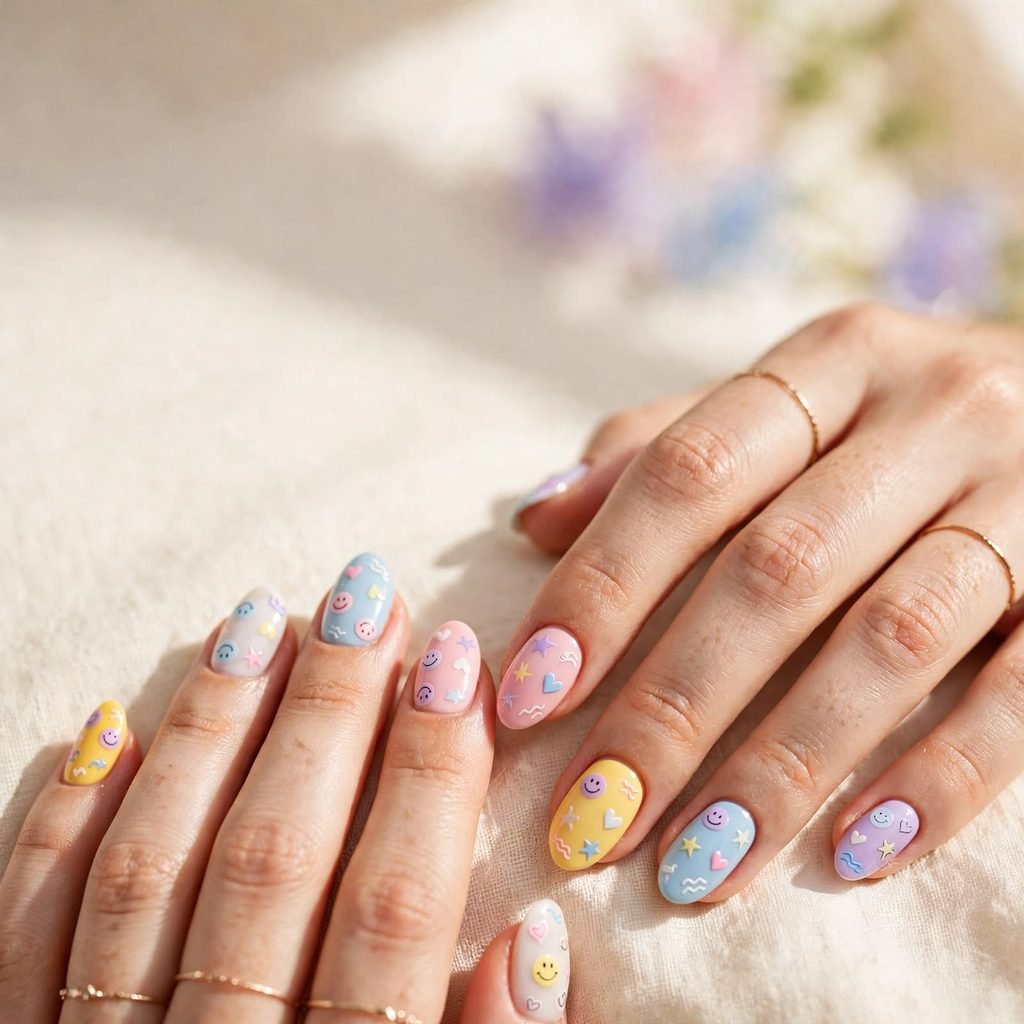
If you love cute and quirky art, this one is for you. Small smiley faces, hearts, stars, and squiggles float on a bright or pastel base. Each nail can have a different doodle, so the set feels like a tiny sticker sheet. The designs do not need to be neat, because the messy hand-drawn look is part of the charm. It is a happy style that matches a happy week away.
Who it suits best: Short or medium nails, teens and young adults, and people who like to be silly and colorful.
Quick styling tip: Use a thin black or dark brown nail art pen to outline each doodle so it pops.
11. Coral Reef French Tips for a Twist on a Classic
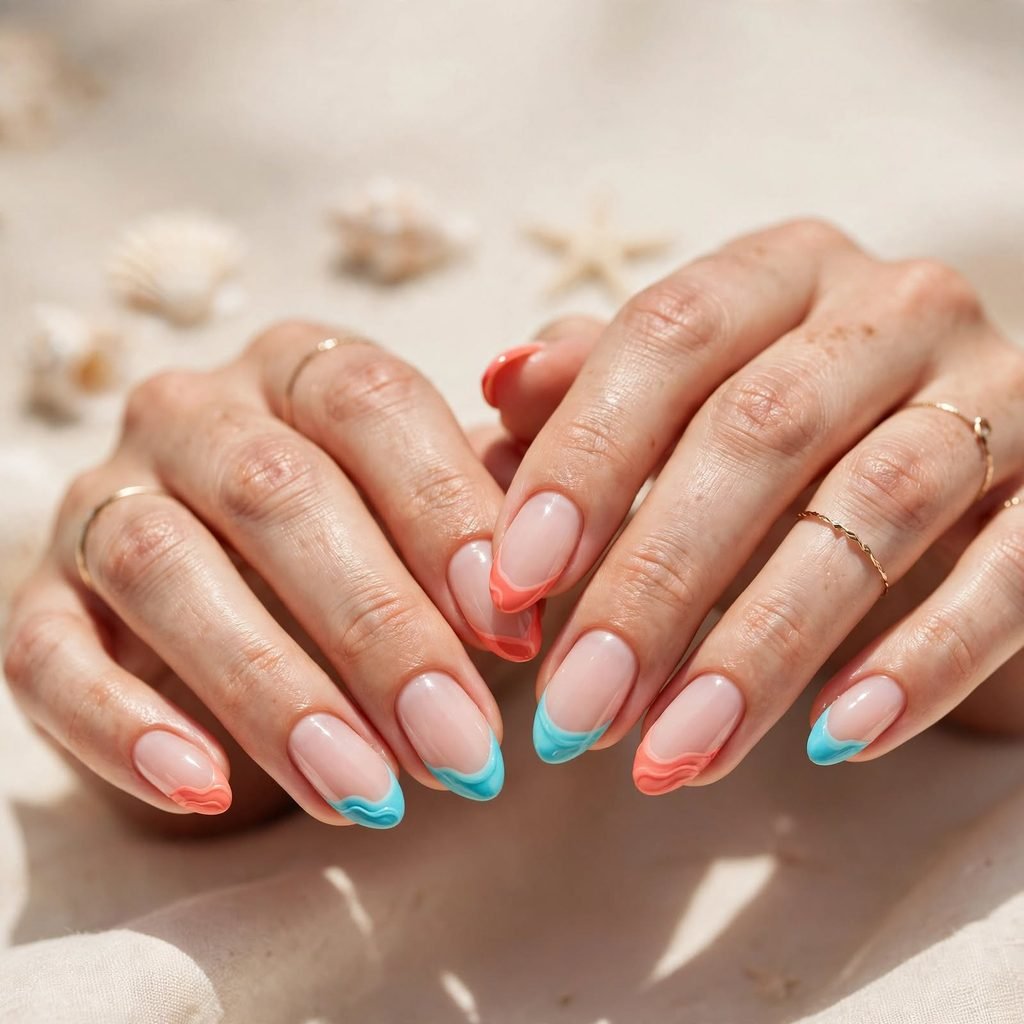
A French manicure gets a summer-style upgrade with coral, turquoise, or aqua tips. The base stays sheer and clean, while the tip adds the pop of color. You can draw the tip straight, curved, or even a little wavy, like water. The look is neat enough for dinner and fun enough for the beach. It is a smart pick if you like classic nails but want something more exciting.
Who it suits best: Short to medium nails, all skin tones, and people who like tidy, polished hands.
Quick styling tip: Add a thin line of gold or silver under the tip to make the color look richer.
12. Sparkle Sand Glitter Fade for Easy Glam
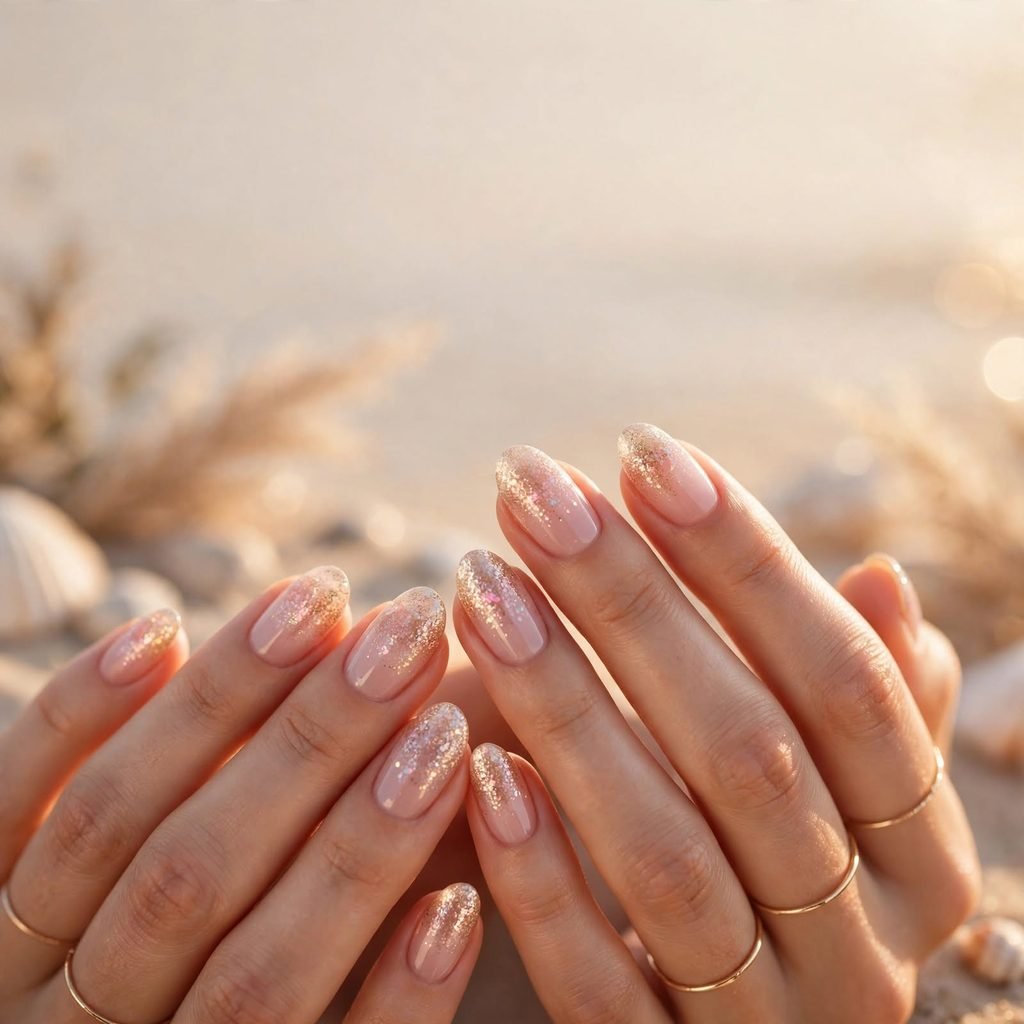
This style starts with glitter at the tips and slowly fades into a sheer base. It looks like sunlight on wet sand, soft and shiny at the same time. Gold, champagne, and pink glitter work well for a warm glow. Silver and holographic glitter give a cooler, icy sparkle. Since the fade hides regrowth, the set stays pretty for a long time.
Who it suits best: Medium to long nails, evening plans, and anyone who loves to sparkle without going over the top.
Quick styling tip: Press glitter on with a small sponge, and then seal it with a smooth top coat.
13. Gingham Picnic Check for a Cute Retro Mood
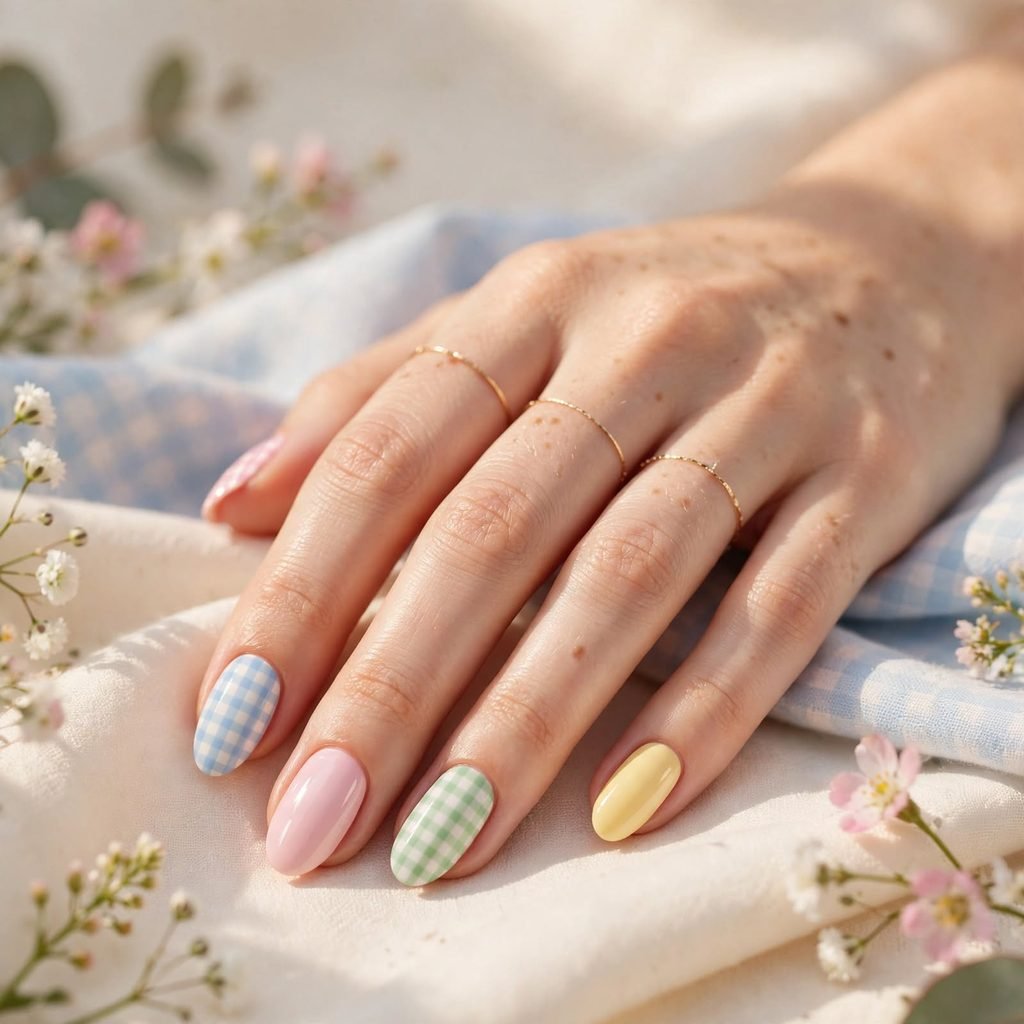
Gingham is the soft checkered pattern you see on picnic blankets and sundresses. On nails, it looks like tiny squares in pink, blue, green, or yellow over a white base. The pattern feels sweet, neat, and a little vintage. You can use it on every nail or mix it with solid colors for a lighter look. It is a great way to match your nails to a spring outfit.
Who it suits best: Medium nails, light and warm skin tones, and fans of cottage-style fashion.
Quick styling tip: Use a very thin brush to draw crossing lines, and let each layer dry a little before the next.
14. Aura Glow Airbrush for a Dreamy, Modern Style

An aura nail has a soft cloud of color in the middle that fades out toward the edges. It looks a bit like a glowing heart or a blurry sunset on each nail. Pink, lavender, blue, and peach are favorites for spring. The blend is gentle, so the finished set looks calm and artistic. It is also a nice way to use two or three of your favorite colors at once.
Who it suits best: Medium to long nails, cool and neutral undertones, and people who love soft, dreamy art.
Quick styling tip: Keep the center of the glow slightly off to one side for a more natural look.
15. Tiny Charm Vacation Set for Extra Fun

This idea adds small 3D charms to a simple base color. Think little pearls, tiny stars, mini shells, or small gold hearts placed on one or two nails. The base can be any shade, so you can match it to your suitcase or your favorite swimsuit. Charms give the set a playful, handmade feel that people love to notice. Just keep the nails a bit shorter, so the charms do not snag on clothes or bags.
Who it suits best: Short to medium nails, people who like extra detail, and anyone heading to a party or a photo-heavy trip.
Quick styling tip: Place charms on the ring and thumb nails only, so your hands stay easy to use.
How to Do This at Home
You can make most of these spring break nails with simple tools and a little patience. You do not need to be a pro, and you do not need fancy gear. The steps below work for almost every idea on this list, with small changes for each design. Set aside about an hour and pick a bright, quiet spot to work. Put on a show or some music, and enjoy the process.
- Remove old polish, then wash and dry your hands well.
- Push back your cuticles gently and trim your nails to your favorite shape.
- File the surface lightly, so the color sticks, and wipe away dust.
- Apply a thin base coat and let it dry fully.
- Paint your main color in two thin layers, letting each one dry between coats.
- Add your design with a thin brush, a dotting tool, a sponge, or a nail art pen.
- Let the art dry, then seal everything with a glossy top coat, covering the tip edge too.
- Clean the skin around your nails with a small brush and a little remover.
- Rub cuticle oil into each nail to finish.
Cost and Time
Doing your nails at home is the cheapest choice, and it gives you full control. A basic set of polish, a base coat, a top coat, and a few brushes can cost about $15 to $40 in total. The same supplies will last through many manicures, so each set gets cheaper over time. At home, most of these designs take 45 minutes to 2 hours, depending on how much art you add. A simple set like milky jelly pink is fast, while gingham or fruit art takes longer.
A salon manicure with nail art usually costs about $35 to $90, and fancy gel sets with charms or chrome can cost more. Salon visits often take 1 to 2 hours. Regular polish at home lasts about 5 to 7 days, while a gel set from a salon often lasts 2 to 3 weeks. That makes gel a handy pick for a long trip, because you will not need a touch-up halfway through. Prices change by city and by artist, so always ask before you book.
| Option | Rough cost | Time to do | How long it lasts |
| DIY regular polish | $15 to $40 to start | 45 minutes to 2 hours | 5 to 7 days |
| Salon gel with simple art | $35 to $65 | 1 to 1.5 hours | 2 to 3 weeks |
| Salon gel with detailed art or charms | $60 to $90 or more | 1.5 to 2.5 hours | 2 to 3 weeks |
Care Tips
Good care keeps your spring break nails looking fresh for the whole trip. Water, sun, and sand can be rough on polish, so a few small habits really help. Wear gloves for dishes and cleaning, and avoid using your nails as tools. Keep a mini nail kit in your bag so you can fix small problems fast. With a little attention, your set can look salon-fresh until the last day.
- Add a thin layer of top coat every two or three days to keep the shine.
- Rub cuticle oil on your nails and the skin around them each night.
- Use hand cream after swimming, since salt and chlorine dry out your skin.
- Do not peel or pick at polish or gel, because it can pull off layers of your natural nail.
- Fix a small chip with a dab of matching color and a fresh top coat.
- Take a break between sets, so your nails can rest and stay strong.
Frequently Asked Questions
What are the best colors for spring break nails?
Pastels, neons, and ocean tones are the top picks. Soft pink, mint, lilac, and butter yellow feel fresh and light. Hot pink, orange, and lime are great when you want bold nails. Aqua, coral, and sea green work well for beach trips. Choose colors that make your skin glow and match the clothes you plan to pack.
How far ahead should I get my nails done before a trip?
One to three days before you leave is a good window. That gives the polish time to harden fully, and your nails still look brand new. If you pick gel, you can go a bit earlier, since it holds up longer. Getting them done too early means more wear before the fun starts. Always book a spot early, because spring break weeks fill up fast.
Is gel or regular polish better for vacation?
Gel is usually the better choice for travel. It resists water, sand, and daily bumps, and it can last two to three weeks. Regular polish is cheaper and easier to remove, but it chips faster. If you plan to swim a lot, gel gives you more peace of mind. Just make sure it is applied and removed with care, so your natural nails stay healthy.
What nail length works best for spring break?
Short to medium nails are the easiest to live with on a trip. They do not snag on clothes, bags, or towels. They also handle swimming, packing, and activities better than very long nails. If you love long nails, choose a strong shape like a soft square or almond. A rounded or squoval tip also helps prevent breaks.
How can I stop my polish from chipping at the beach?
Prep matters most, so start with clean, dry, lightly buffed nails. Use a base coat and two thin color coats instead of one thick one. Seal the tip edge with your top coat to lock in the color. Try to avoid long soaks in hot water in the first few hours after painting. Reapply a thin top coat every few days to keep the shine and the strength.
Can I do spring break nails if my nails are short or weak?
Yes, you absolutely can. Many of these designs, like pastel tips, milky jelly pink, and daisies, look great on short nails. Keep the shape simple and the length small to avoid breaks. Use a strengthening base coat and keep your cuticles moisturized. Over time, your nails will grow stronger and give you even more style options.
Final Thoughts on Spring Break Nails
Spring break nails are all about joy, color, and a little bit of fun. Whatever you choose, the best set is the one that makes you smile every time you look down. If you want something simple, try milky jelly pink, pastel tips, or a pearly chrome finish. These looks are clean, quick, and easy to wear with anything. They are also gentle choices for short nails and busy trips.
If you feel like glam, go for sparkle sand glitter, aura glow, coral reef French tips, or a tiny charm set. These styles add shine and detail while still feeling pretty and balanced. If you want bold, pick neon color blocks, sunny citrus art, mini smiley doodles, or ocean wave swirls. Those designs show off your personality and look amazing in photos. Mix and match ideas to make a set that is truly yours.
Thanks so much for reading, and I hope this list gave you plenty of inspiration. Pick your favorite, gather your tools, and have fun with it. Have a safe, sunny, and happy break, and enjoy every minute of it!