14 Stunning Nails Spring Ideas for a Fresh, Colorful Look
Spring is the season when everything feels fresh again. The days get longer, the flowers wake up, and we all want a little more color in our lives. Your hands are a great place to start! This guide shares 14 pretty ideas for nails spring lovers, from soft and simple to bold and bright. You will find easy steps, rough costs, care tips, and answers to common questions, so you can pick a look and try it with confidence.
Why Spring Nails Matter Right Now
People have decorated their nails for thousands of years, and each season brings its own mood. Winter nails are often dark, deep, and cozy. When spring arrives, we reach for lighter shades that match the world waking up outside. That shift is why nail trends spring up fastest in March, April, and May. It feels like a small reset that anyone can enjoy.
The big spring trends right now are soft and playful. Milky pastels, sheer jelly polish, and clean “your nails but better” shades are very popular. Tiny hand-painted flowers and thin curved lines add charm without feeling too busy. Mixed-metal touches and glossy finishes bring a modern edge to the soft colors. Best of all, most of these looks work on short, natural nails, so almost everyone can join in.
Spring nails also fit real life well. They look nice at school, at work, at weddings, and at weekend brunches. Light colors hide small chips better than dark ones, which is a bonus when you are busy. Pastels and neutrals also match almost every outfit in your closet. That makes nails spring looks a smart choice as well as a pretty one.
How to Pick the Right One for You
Start with your nail shape and length. Short, round nails look sweet with soft pastels and tiny details. Long almond or oval nails can carry gradients, chrome, and bigger art. Square nails show off clean French tips and bold blocks of color. If your nails are very short, keep the design small and the color light, so your fingers look longer.
Next, think about your skin tone. Fair skin often glows with soft pink, lilac, and baby blue. Medium and olive skin tones usually shine in peach, butter yellow, and mint green. Deeper skin tones look stunning with bright coral, lavender, and neon shades that pop. These are only guides, so always trust the color that makes you smile.
Table of Contents
- Milky Pink Nails for a Clean, Fresh Look
- Pastel French Tips for a Playful Twist
- Tiny Hand-Painted Flowers for a Garden Feel
- Sheer Jelly Pastels for a Glassy Glow
- Butter Yellow Nails for Sunny Mornings
- Lilac Ombré Nails for a Dreamy Fade
- Mint Green Minimal Nails for a Cool Breeze Look
- Sky Blue Cloud Nails for a Soft Daydream
- Peachy Coral Nails for a Warm Spring Glow
- Pearl Chrome Nails for a Glossy Shine
- Gingham Picnic Nails for a Cute Print Look
- Watercolor Wash Nails for a Rainy-Day Art Vibe
- Mix-and-Match Pastel Nails for Pure Fun
- Neon Pop Nails for a Bold Spring Burst
FAQ and the closing summary follow the list. Use the document outline to jump straight to any idea.
14 Spring Nail Ideas to Try
Finally, match your nails to your life. If you type a lot or work with your hands, choose short nails and a simple finish that lasts. For a wedding, a graduation, or a party, you can go for sparkle or chrome. If you love to change your look often, pick colors that are easy to repaint at home. Ask yourself if you want calm, pretty, or loud, and let that answer point you to the right idea below.
1. Milky Pink Nails for a Clean, Fresh Look

Milky pink is the easy favorite that never gets old. It is a soft, see-through pink that makes nails look healthy and neat. The color works like a gentle filter and hides small flaws and ridges. It looks tidy on short nails and elegant on long ones. If you want a simple start to your nails spring routine, this is it.
Who it suits best: Beginners, office workers, and anyone with short or growing-out nails.
Styling tip: Finish with a glossy top coat and a little cuticle oil for a just-left-the-salon shine.
How to Do This at Home
- Push back your cuticles and shape your nails with a file.
- Wipe nails clean and add a thin base coat.
- Paint one thin coat of milky pink and let it dry for two minutes.
- Add a second thin coat for even color.
- Seal with a glossy top coat, wrapping it over the tip.
Cost & Time: DIY costs about 5–15 for polish, and a salon visit runs about 25–50. It takes around 30 minutes at home and lasts 5–7 days with regular polish or 2–3 weeks with gel.
Care Tips: Add a fresh layer of top coat every three days. Wear gloves for dishes and moisturize your hands daily.
2. Pastel French Tips for a Playful Twist

The classic French manicure gets a spring makeover with colored tips. Instead of white, try lavender, mint, or baby pink on the edge. The base stays sheer and clean, so the tips do all the talking. It feels polished and playful at the same time. Because the color sits only at the tip, it also grows out with grace.
Who it suits best: Square, squoval, and almond nails, and anyone who likes a neat look for school, work, or brunch.
Styling tip: Match the tip color to a favorite spring top or scarf for a put-together feel.
How to Do This at Home
- Apply a sheer nude or pink base and let it dry.
- Dip a thin brush or dotting tool into pastel polish.
- Paint a slim, curved line across each nail tip.
- Fix wobbly lines with a small brush dipped in remover.
- Seal everything with a clear top coat.
Cost & Time: DIY runs about 8–20, and salons charge about 35–65. Plan on 45–60 minutes, with wear of about one week for regular polish or up to three weeks for gel.
Care Tips: Avoid using your tips to open cans or scrape things. Reapply top coat every few days to protect the edge from chips.
3. Tiny Hand-Painted Flowers for a Garden Feel
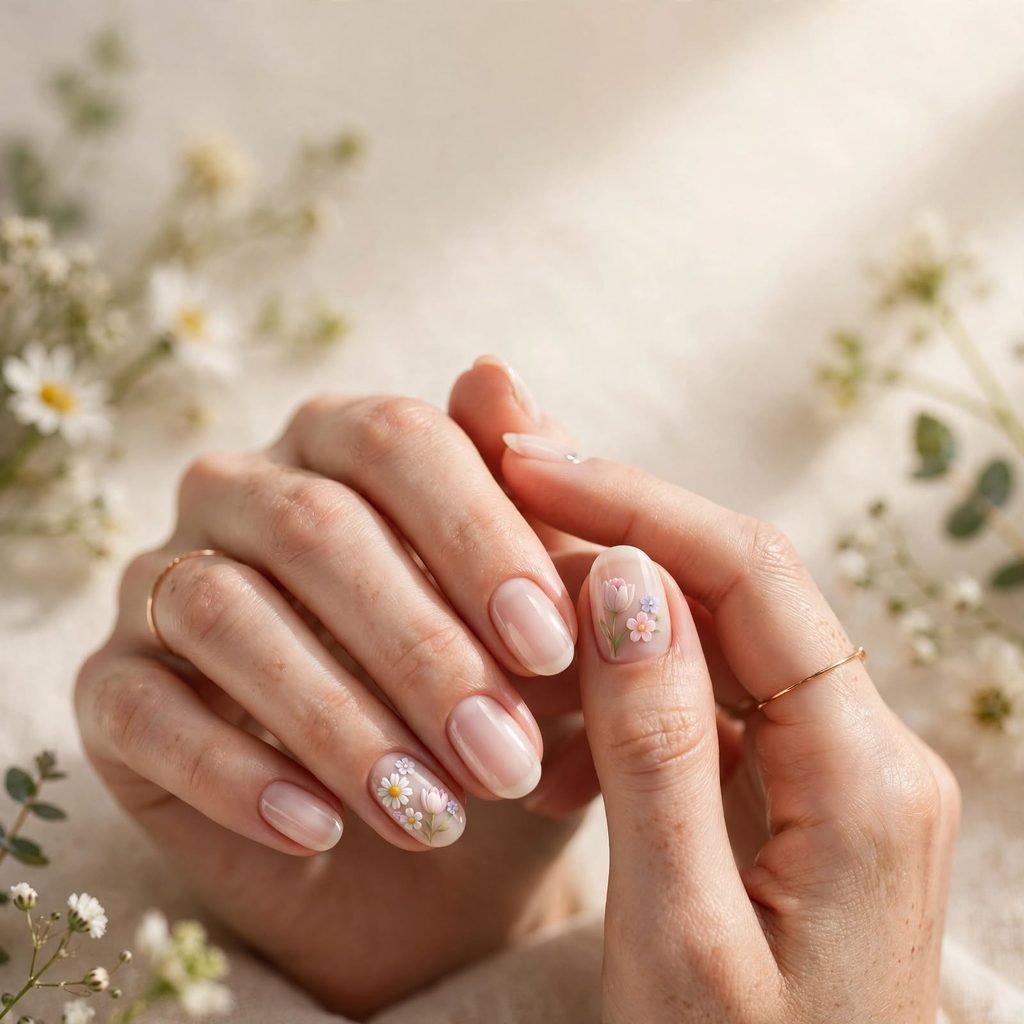
Little flowers say spring better than almost any other design. A few small petals on one or two nails look sweet, not busy. You can paint daisies, tulips, or simple five-dot blossoms. Soft backgrounds like cream or pale pink make the colors stand out. The result feels like a tiny garden on your fingertips.
Who it suits best: Short to medium nails, and anyone dressing up for a picnic, wedding, or birthday.
Styling tip: Paint flowers on the ring finger only and keep the other nails plain.
How to Do This at Home
- Paint a light base color and let it dry fully.
- Dot five petals in a small circle with a dotting tool or toothpick.
- Add a yellow dot in the center of each flower.
- Draw thin green stems and leaves with a fine brush.
- Seal gently with top coat so the paint does not smear.
Cost & Time: DIY costs about 10–25 with a small dotting tool, while salon nail art runs about 45–80. It takes 45–75 minutes and lasts 5–10 days, or up to three weeks with gel.
Care Tips: Use a light touch when applying top coat, since fresh art can drag. Limit long soaks in water, and oil your cuticles each night.
4. Sheer Jelly Pastels for a Glassy Glow

Jelly nails look like glossy, sweet candy. The polish is see-through with a soft, squishy shine. Colors like peach, light pink, and baby blue look juicy and light on the nail. Thin layers build depth slowly, so you control how bold it gets. It is playful, modern, and very easy to wear.
Who it suits best: Almost everyone, especially fans of relaxed everyday looks and beach trips.
Styling tip: Add a thin layer of clear glitter on one nail for a sparkly twist.
How to Do This at Home
- Apply a thin base coat and let it set.
- Paint one sheer coat of jelly polish.
- Wait two minutes, then add a second thin coat.
- Add a third coat if you want deeper color.
- Finish with a thick, glossy top coat for the glassy effect.
Cost & Time: DIY costs about 6–18, and salons charge about 30–55. It takes 35–45 minutes and lasts 5–7 days, or 2–3 weeks with gel.
Care Tips: Wipe hand sanitizer and lotion off your nails, since they can dull the shine. Refresh the top coat every few days to keep that glassy look.
5. Butter Yellow Nails for Sunny Mornings

Butter yellow is a soft, creamy shade that feels like morning sunshine. It is gentler than bright yellow, so it suits many more skin tones. The color looks warm and rich without being loud. It pairs nicely with white, denim, and green outfits. For nails spring fans who want something a little different, this shade is a sweet pick.
Who it suits best: Medium, olive, and deep skin tones in particular, and anyone heading to a casual day out or a garden party.
Styling tip: Add one tiny gold dot near the cuticle for a classy touch.
How to Do This at Home
- Prep your nails and apply a base coat to prevent staining.
- Paint a very thin coat, because pale yellow can look streaky.
- Let each coat dry for two to three minutes.
- Build up to three thin coats for smooth, even color.
- Seal with a glossy top coat.
Cost & Time: DIY costs about 6–15, and salons charge about 30–55. It takes 40–50 minutes and lasts 5–7 days, or 2–3 weeks with gel.
Care Tips: Pale shades can stain from foods like turmeric, so always wear a base coat. Use gloves when cooking, and clean under the tips gently.
6. Lilac Ombré Nails for a Dreamy Fade
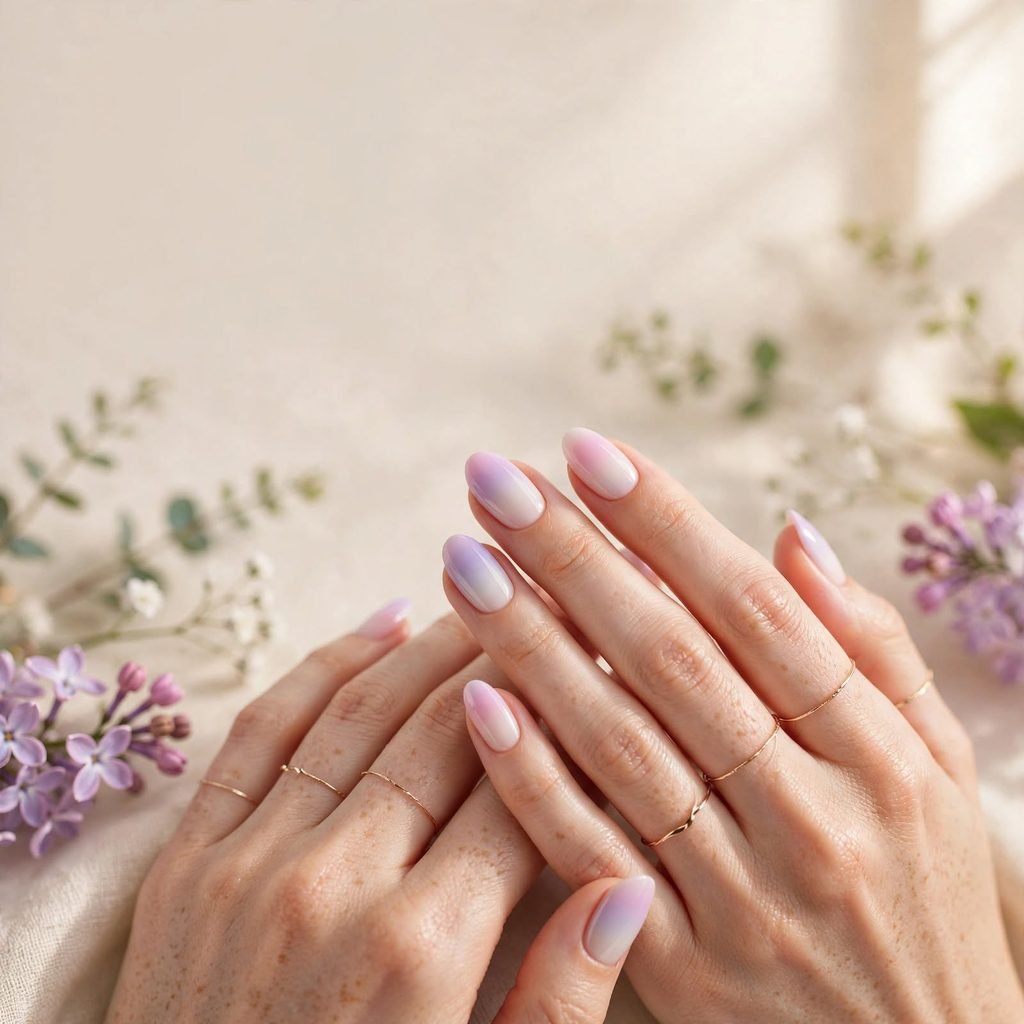
Ombré blends one color into another so the shade fades smoothly. A soft lilac that melts into white or pale pink looks like petals in the breeze. The gentle blend makes nails look longer and more graceful. It also hides the grow-out line better than a solid color. This look feels dreamy, calm, and a little bit magical.
Who it suits best: Medium to long nails, fair and medium skin tones, and anyone planning a date night or a graduation.
Styling tip: Fade the lilac upward from the tips, so the color is strongest at the edge.
How to Do This at Home
- Paint a white or sheer pink base and let it dry.
- Dab lilac and white polish side by side on a makeup sponge.
- Press the sponge lightly onto the nail in small taps.
- Repeat two or three times until the blend looks smooth.
- Clean the skin around the nail with remover, then add a thick top coat to smooth the texture.
Cost & Time: DIY costs about 8–20, and salons charge about 40–70. It takes 45–60 minutes and lasts 5–7 days, or 2–3 weeks with gel.
Care Tips: Use a thick top coat, because the sponge leaves a slightly bumpy finish. Skip peeling at the edges, and add cuticle oil every night.
7. Mint Green Minimal Nails for a Cool Breeze Look
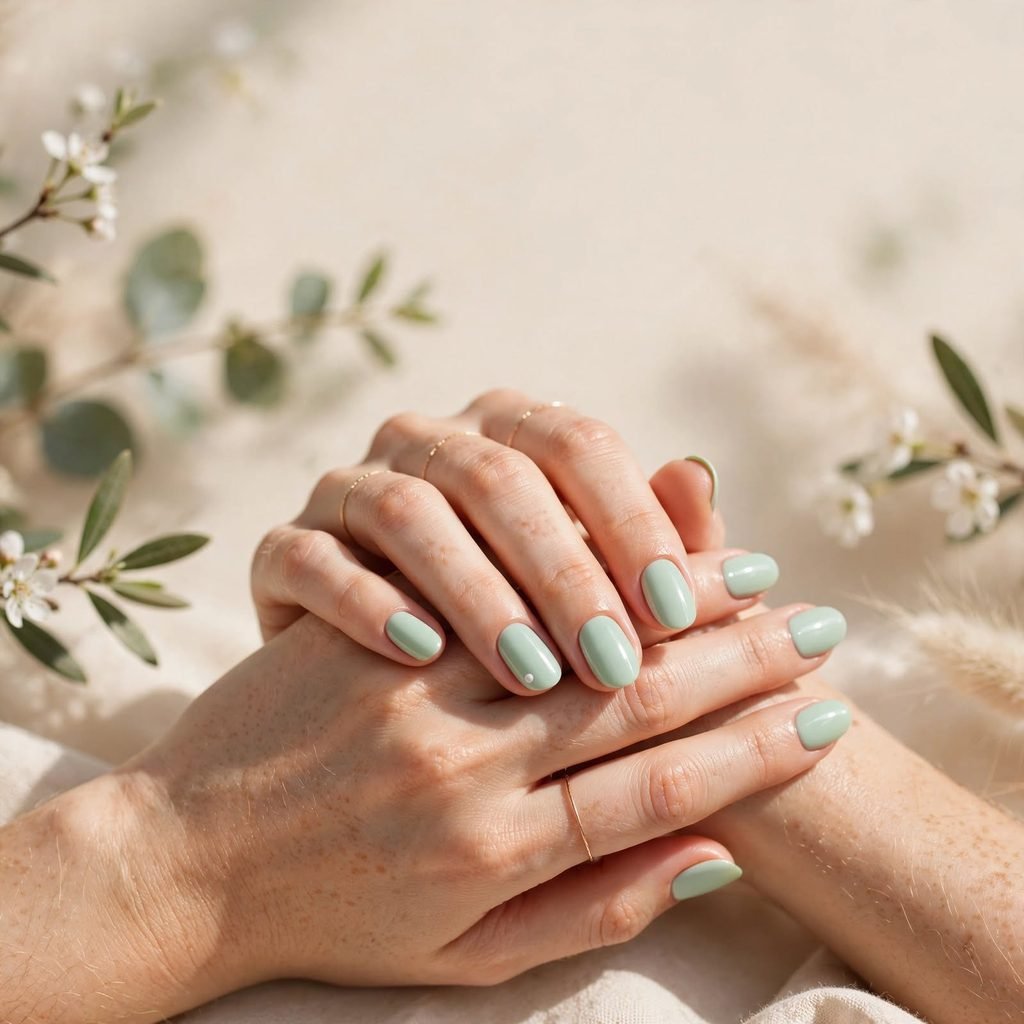
Mint green feels like fresh grass and cool spring air. It is a calm color that looks clean on short, natural nails. A simple, two-coat finish is all you need for a neat look. You can keep it plain or add one tiny detail for charm. Among all the nails spring colors, mint is one of the easiest to wear every day.
Who it suits best: Fair and deep skin tones, students, and anyone who loves a quiet, tidy style.
Styling tip: Add one thin white stripe down a single nail for a clean, modern touch.
How to Do This at Home
- Apply a thin base coat.
- Paint a thin coat of mint polish and let it dry for two minutes.
- Add a second coat for smooth, even color.
- For the stripe, press a thin strip of tape onto one dry nail and paint white along it.
- Peel off the tape, then seal with top coat.
Cost & Time: DIY costs about 6–15, and salons charge about 30–55. It takes 35–45 minutes and lasts 5–7 days, or 2–3 weeks with gel.
Care Tips: Wear gloves when using strong cleaners, since they can dull the color. Moisturize your hands daily to keep nails flexible.
8. Sky Blue Cloud Nails for a Soft Daydream
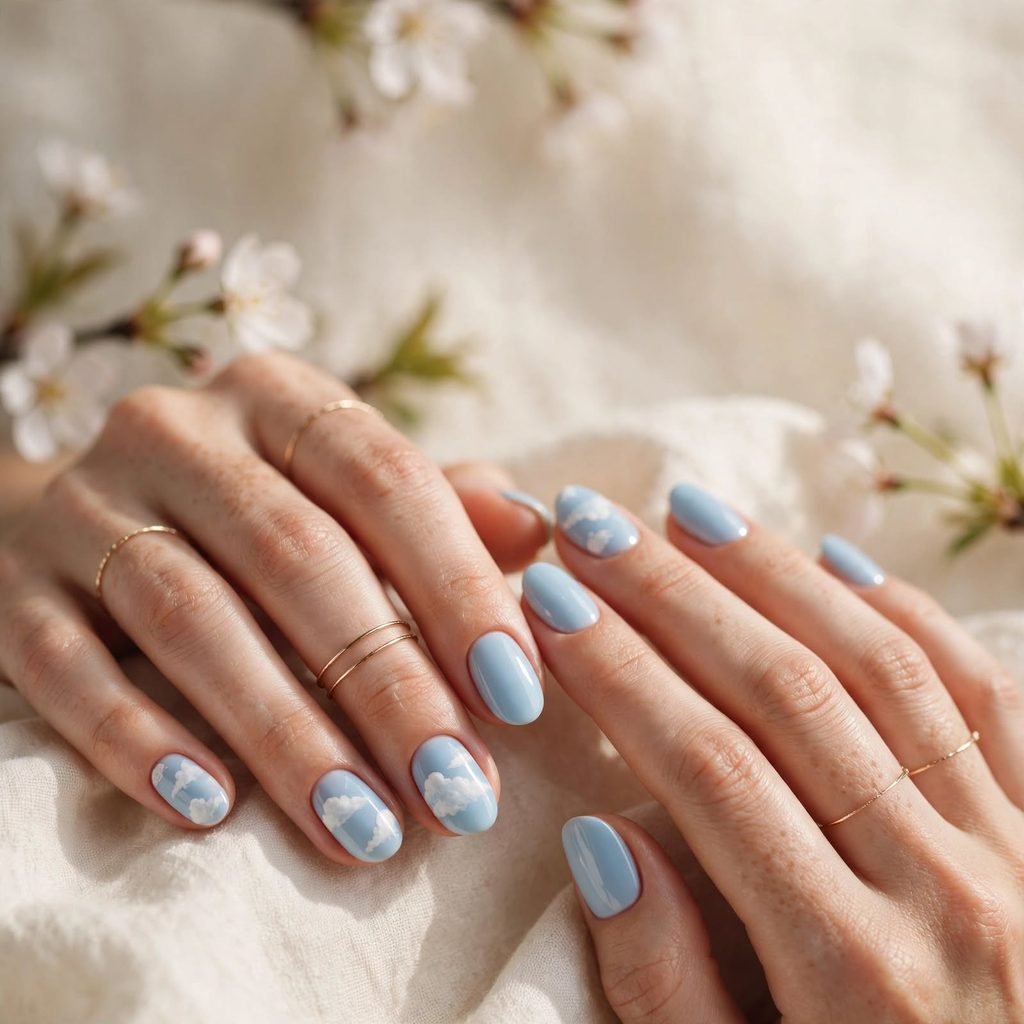
Cloud nails put a bright, sunny sky right on your fingertips. A baby-blue base with soft white puffs looks light and happy. The design is simple, but it still feels creative and fun. Each hand ends up a little different, which adds to the charm. It is a great way to make plain nails feel like a daydream.
Who it suits best: Creative people, short to medium nails, and anyone heading to the beach or on a trip.
Styling tip: Add a tiny sparkle dot above one cloud for a little sunshine.
How to Do This at Home
- Apply a base coat, then two thin coats of baby blue, letting each dry fully.
- Dab a little white polish onto a makeup sponge.
- Tap the sponge lightly on the nail to make soft cloud puffs.
- Use a small brush to shape any odd edges.
- Seal with a clear top coat once everything is dry.
Cost & Time: DIY costs about 8–18, and salons charge about 40–70 for nail art. It takes 40–60 minutes and lasts 5–7 days, or 2–3 weeks with gel.
Care Tips: Let the white paint dry fully before the top coat to avoid streaks. Avoid hot water for the first hour after painting.
9. Peachy Coral Nails for a Warm Spring Glow
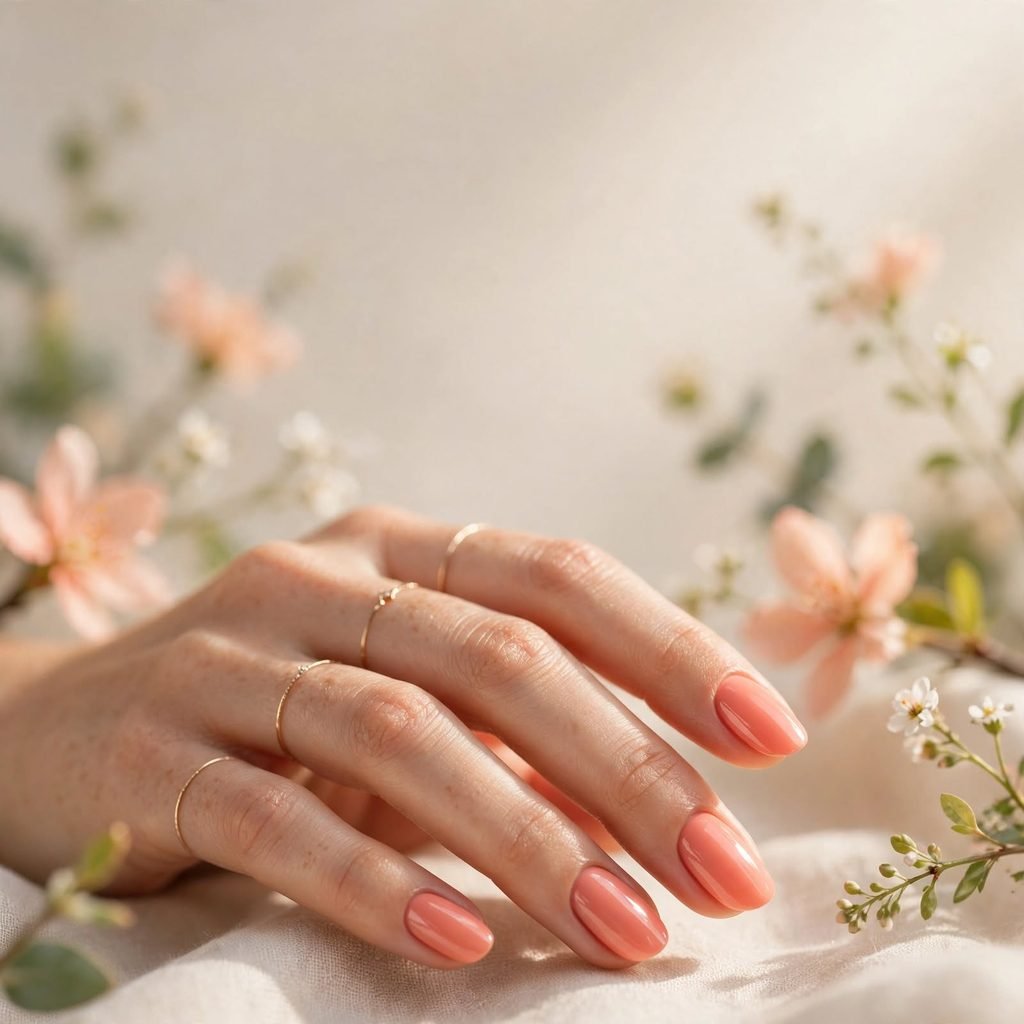
Peachy coral looks like a soft sunrise on your hands. It is warm, friendly, and bright without feeling too loud. This shade flatters many skin tones and looks lovely against a light tan. It pairs well with white tops, floral dresses, and gold jewelry. Think of it as a little burst of happiness for your day.
Who it suits best: Medium, olive, and deep skin tones, and anyone dressing for daytime events or vacations.
Styling tip: Pick a glossy finish, since shine makes warm colors look even fresher.
How to Do This at Home
- Prep your nails and add a thin base coat.
- For brighter color, paint one thin white coat first and let it dry.
- Apply a thin coat of peach-coral polish.
- Add a second coat once the first is dry to the touch.
- Finish with a glossy top coat.
Cost & Time: DIY costs about 6–16, and salons charge about 30–55. It takes 35–50 minutes and lasts 5–7 days, or 2–3 weeks with gel.
Care Tips: Use sunscreen on your hands, since strong sun can fade some polish over time. Reapply top coat every few days to keep the shine.
10. Pearl Chrome Nails for a Glossy Shine
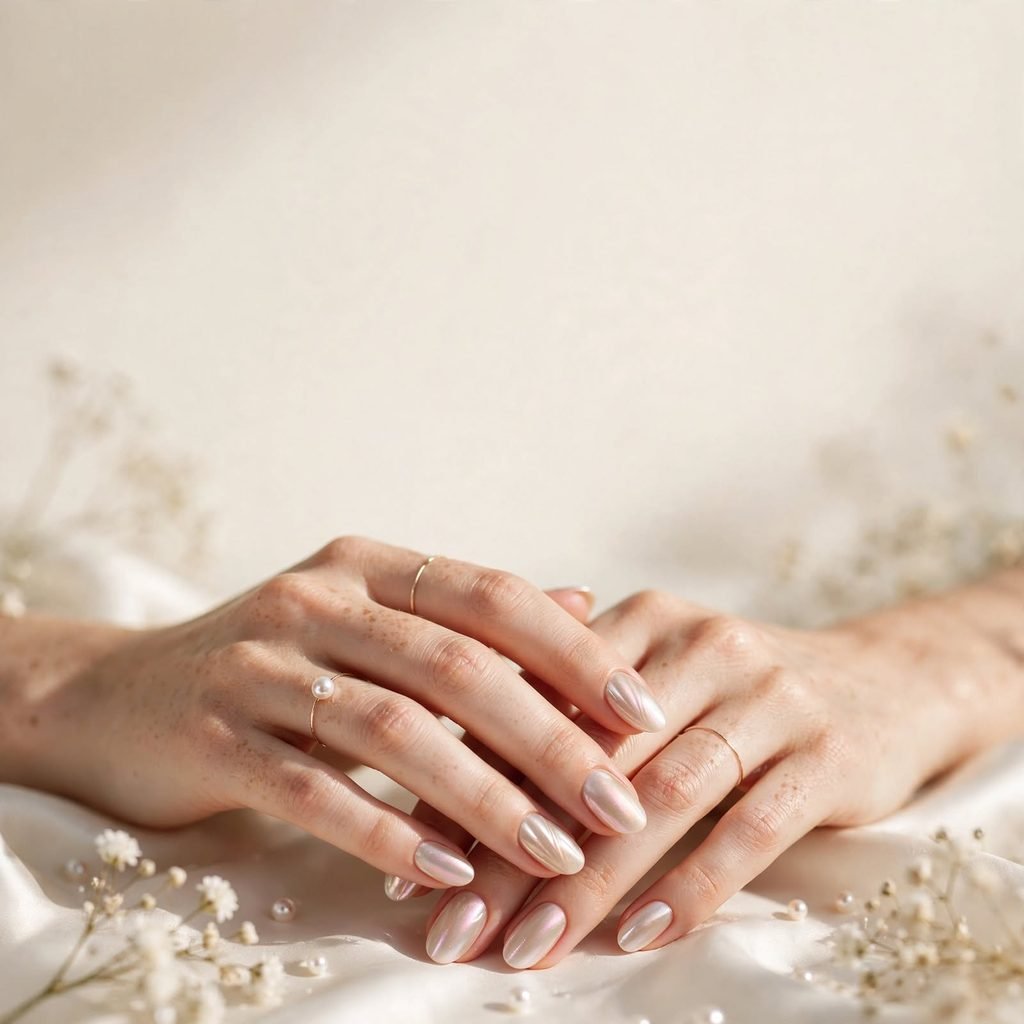
Pearl chrome gives nails a soft, glowing finish like the inside of a seashell. It shows a gentle shimmer that shifts as your hand moves. The look is elegant, but it is not heavy or flashy. It works beautifully over pale pink, white, or sheer nude. This is a lovely pick for special occasions in the nails spring season.
Who it suits best: Medium to long nails, and anyone dressing up for a wedding, a party, or a night out.
Styling tip: Keep the rest of your look simple and let the glow be the star.
How to Do This at Home
- Paint a light pink or white base and let it dry, or cure it if you use gel.
- Add a no-wipe top coat and cure it under a lamp, if you use gel.
- Rub a tiny amount of pearl chrome powder over each nail with a sponge tip.
- Brush off the extra powder with a clean, soft brush.
- Seal with a second layer of top coat. No lamp? Use a pearly shimmer polish instead.
Cost & Time: DIY costs about 15–35 with a small lamp and powder, and salons charge about 45–80. It takes 45–60 minutes and lasts 2–3 weeks with gel.
Care Tips: Do not peel gel off, since it can damage the nail. Soak it off gently, and rest your nails with oil between manicures.
11. Gingham Picnic Nails for a Cute Print Look
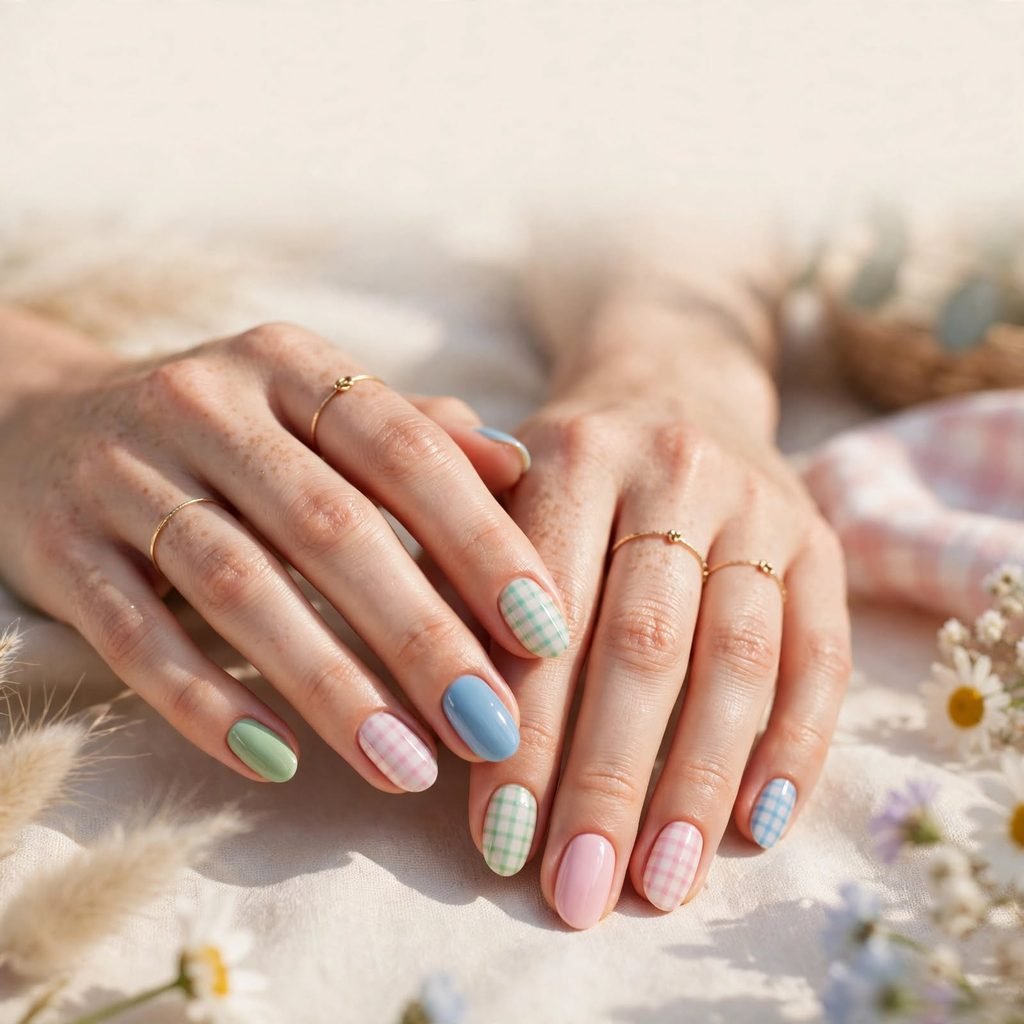
Gingham is the checked pattern you see on picnic blankets and sundresses. On nails, it looks fresh, cheerful, and a little bit retro. A white base with pink, blue, or green checks is the most popular combo. The pattern looks tricky, but it is really just crossing lines. Once you try it, it becomes a fun spring habit.
Who it suits best: Medium to long nails, and anyone who loves cozy, cottage-style outfits and weekend outings.
Styling tip: Paint gingham on one accent nail and keep the others in the matching solid color.
How to Do This at Home
- Paint two coats of white polish and let them dry fully.
- Use a fine brush to paint three or four thin vertical stripes in a pastel color.
- Let the stripes dry for a few minutes.
- Paint matching horizontal stripes across the first set to form the checks.
- Seal with a clear top coat.
Cost & Time: DIY costs about 10–22, and salons charge about 45–75. It takes 50–75 minutes and lasts 5–7 days, or 2–3 weeks with gel.
Care Tips: Wait until the stripes are fully dry before adding top coat. Avoid scraping your nails, since thin lines can chip first.
12. Watercolor Wash Nails for a Rainy-Day Art Vibe

Watercolor nails look like soft paint blending on wet paper. Pastel shades melt into one another with no hard lines. No two nails look exactly alike, which makes the set feel special. It is a lovely way to bring art into your everyday style. Even a messy try often looks pretty, so there is no need to stress.
Who it suits best: Artists, dreamers, and anyone with any nail shape who likes a loose, free look.
Styling tip: Stick to two or three colors that sit near each other for the smoothest blend.
How to Do This at Home
- Paint a white or very sheer base and let it dry.
- Place small drops of two or three pastel polishes on each nail.
- Dip a clean brush into a little remover.
- Tap and drag the brush gently so the colors blend at the edges.
- Let it dry, then seal with a smooth top coat.
Cost & Time: DIY costs about 8–20, and salons charge about 40–70. It takes 40–60 minutes and lasts 5–7 days, or 2–3 weeks with gel.
Care Tips: Use a thick top coat so the art stays smooth. Keep your hands out of hot water for a few hours after painting.
13. Mix-and-Match Pastel Nails for Pure Fun
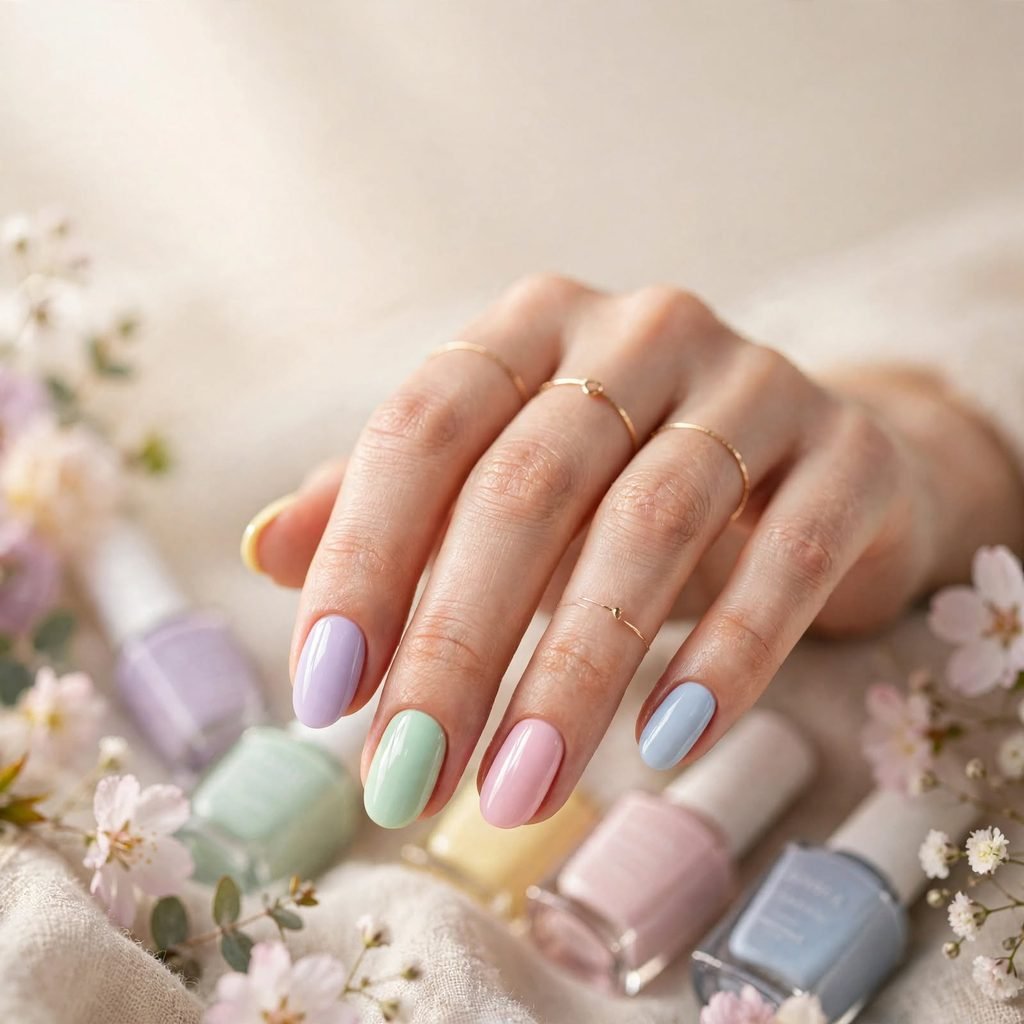
Why pick one color when you can wear five? Mix-and-match nails give each finger its own pastel shade. The look is cheerful and playful, and it matches nearly any outfit. It is also a clever way to use up all those half-full polish bottles. Anyone who loves color will have a great time with this one.
Who it suits best: Short or medium nails, teens, and anyone heading to a festival, a party, or a day out with friends.
Styling tip: Choose shades with the same softness, so the set looks matched, not messy.
How to Do This at Home
- Pick five pastel shades that look good together.
- Apply a thin base coat to every nail.
- Paint each finger in a different shade with two thin coats.
- Keep one nail white or clear if you want a calmer look.
- Seal all nails with the same glossy top coat to tie the set together.
Cost & Time: DIY costs about 10–25 for several polishes, and salons charge about 30–60. It takes 40–55 minutes and lasts 5–7 days, or 2–3 weeks with gel.
Care Tips: Refresh the top coat every few days. Remove polish one finger at a time to avoid mixing up colors.
14. Neon Pop Nails for a Bold Spring Burst
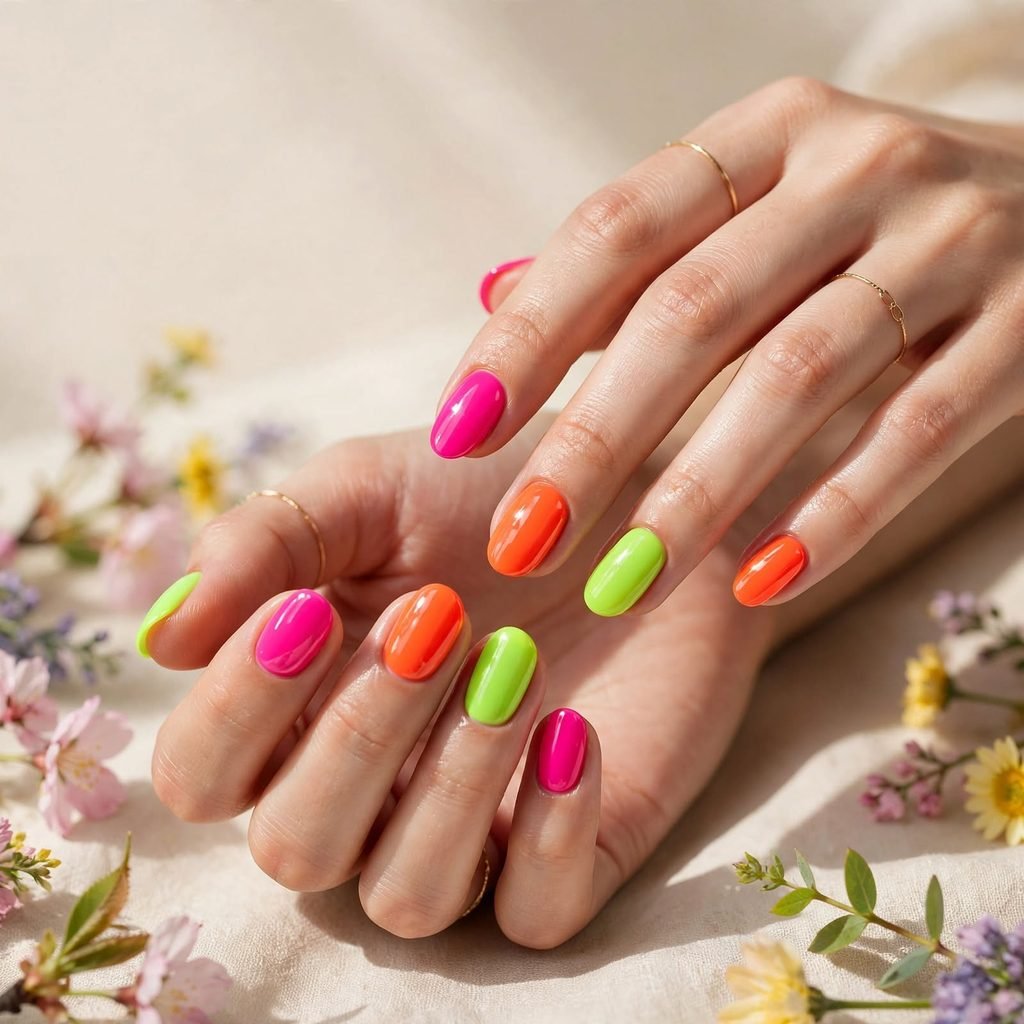
Neon nails are made for people who love to stand out. Hot pink, bright orange, and lime green feel like the loudest flowers in the garden. These shades look amazing against a tan and with summer-style outfits. They also lift your mood the moment you look down. If you want the boldest nails spring has to offer, this is your pick.
Who it suits best: Bold personalities, deep and tan skin tones, and anyone planning a vacation or a music event.
Styling tip: Wear a simple, neutral outfit so your nails get all the attention.
How to Do This at Home
- Apply a base coat to protect your nails from staining.
- Paint one thin white coat so the neon shade looks brighter.
- Add a thin coat of neon polish and let it dry for two to three minutes.
- Apply a second thin coat for solid, even color.
- Finish with a strong glossy top coat to slow fading.
Cost & Time: DIY costs about 6–16, and salons charge about 30–55. It takes 40–50 minutes and lasts 5–7 days, or 2–3 weeks with gel.
Care Tips: Neon shades can fade in strong sun, so refresh your top coat often. Always use a base coat, and give your nails a short rest after you remove the color.
Frequently Asked Questions
What are the best colors for nails in spring?
Soft pastels lead the way every spring. Think milky pink, lilac, mint, baby blue, and butter yellow. Warm shades like peach and coral are also popular for a sunny feel. If you love bold looks, neon brights are a fun choice. The best color is always the one that makes you feel happy.
How can I make my nail polish last longer?
Good prep is the secret to long-lasting color. Wash your hands, push back your cuticles, and wipe each nail clean before you start. Always use a base coat and a top coat, and paint in thin layers. Seal the tip of each nail with a swipe of top coat to stop chips. Refresh the top coat every two or three days to keep the shine.
Which nail shape is best for spring designs?
Almost every shape works, so pick the one that feels good to you. Round and oval shapes look soft and sweet with flowers and pastels. Almond nails are great for gradients and chrome. Square and squoval nails show off French tips and gingham well. Choose a shape that fits your daily life, since comfort matters most.
Can I try these looks on short nails?
Yes, you absolutely can! Many of the ideas here, like milky pink, mint, and jelly pastels, are made for short nails. Light colors can even make short nails look longer. Keep nail art small and simple, such as one flower or a thin stripe. Short nails are also easier to keep strong and chip-free.
Why does my pastel polish look streaky?
Pastel polish is often very thin, so it can look uneven. The fix is to paint thin coats and let each one dry for a few minutes. A white or nude undercoat can help the color look smoother and brighter. Do not try to cover everything in one thick layer, since that causes bubbles and streaks. Patience is your best tool for a smooth finish.
How often should I give my nails a break?
A short break every few weeks is a healthy habit. Gel and strong removers can dry out your nails if you use them again and again. Between manicures, go bare for a few days and use cuticle oil twice a day. Never peel off polish or gel, since that pulls away layers of the nail. Healthy nails make every spring design look better.
Final Thoughts: Pick Your Spring Vibe
If you like simple and clean, start with milky pink, mint green, or butter yellow. These shades are quick to paint and easy to repair. They suit school, work, and everyday life. Sheer jelly pastels fit here too, since they add shine without effort. You can wear any of these with almost every outfit.
If you want glam and pretty, try pearl chrome, lilac ombré, or pastel French tips. These looks feel dressy and polished for weddings, parties, and date nights. Tiny flowers and peachy coral also bring a soft, romantic touch. A little extra time gives you a big payoff. Keep the rest of your outfit simple, and let your nails shine.
If you feel bold and playful, go for gingham, watercolor, mix-and-match pastels, or neon pop. These designs bring color, fun, and a lot of personality. They are great for trips, festivals, and days with friends. Cloud nails also fit here, since they feel creative and cheerful. Whichever vibe you choose, your nails spring look will be a happy way to welcome the new season.
Thank you for reading, and have fun trying these ideas! Take your time, enjoy the process, and do not worry about small mistakes. Nails grow back, and polish comes off, so you can always try again. Treat your hands kindly, and they will look lovely all season long. Happy painting, and enjoy every sunny, flowery day ahead!