13 Christmas Nails Simple Ideas You Can Wear All Season
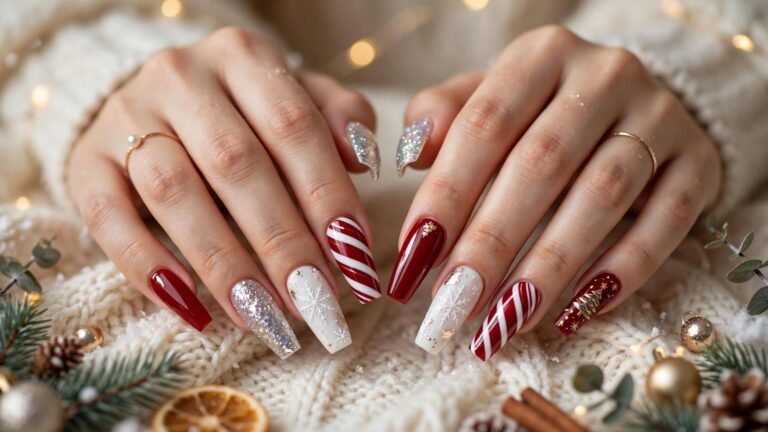
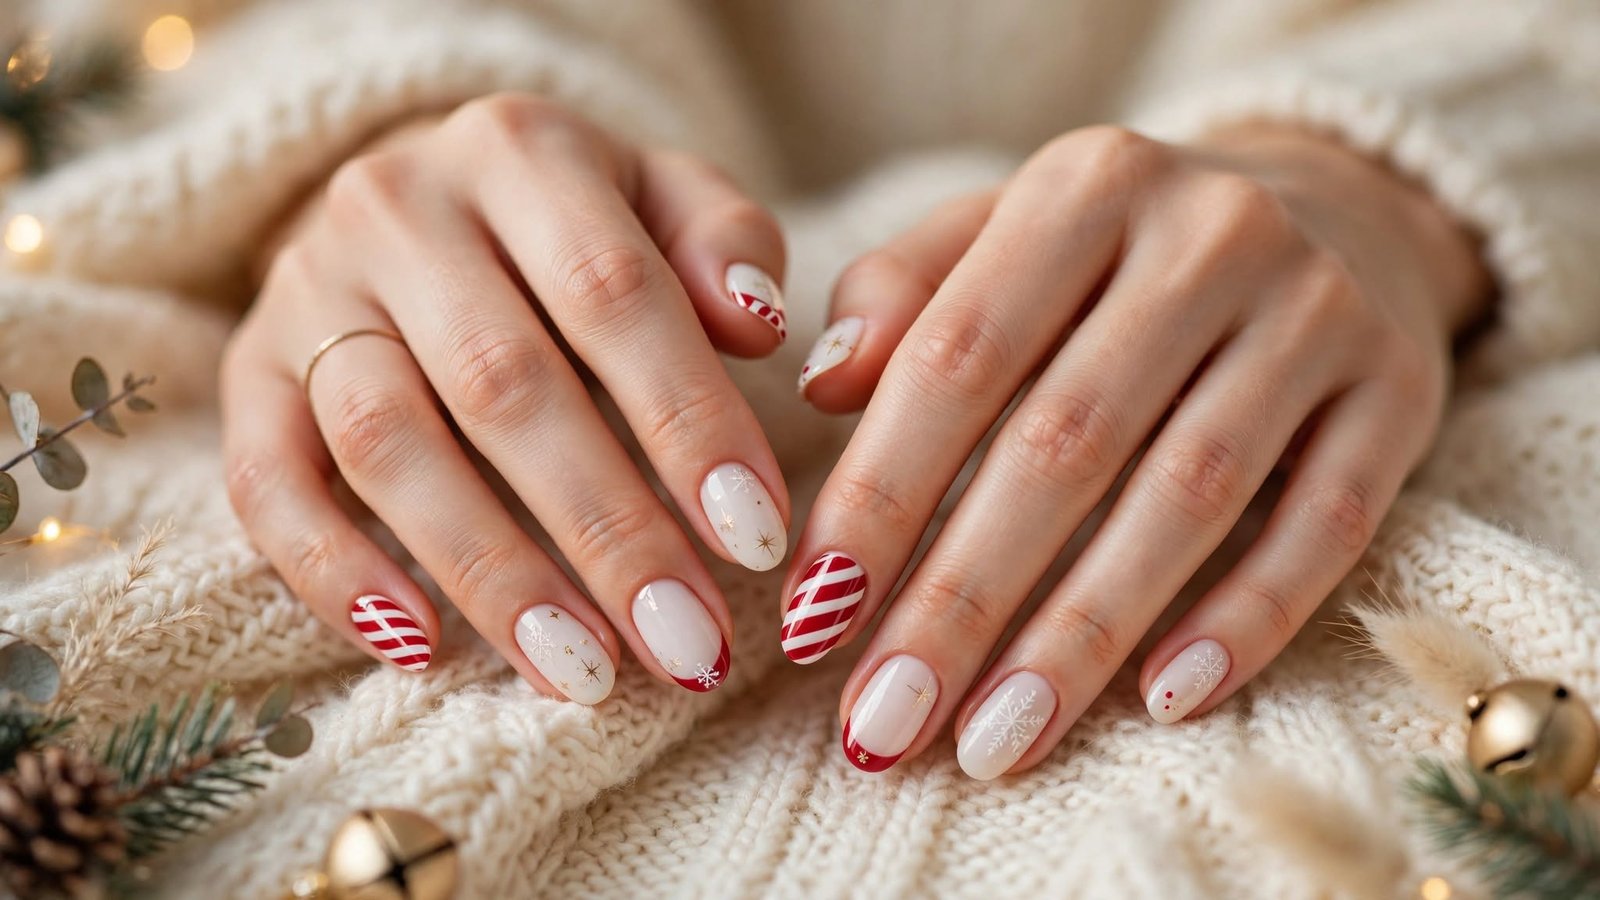
Looking for Christmas nails simple enough to do on a busy weekend? You are in the right place. The holidays bring parties, cozy dinners, and a long to-do list, so your nails should be the easy part. In this guide, you will find 13 festive ideas that look neat without taking all day. We also cover trends, how to choose your look, and easy steps you can try at home.
Why Simple Holiday Nails Are Everywhere Right Now
Simple holiday nails are having a big moment this year. People are moving away from busy, over-the-top designs and choosing clean looks that feel calm and polished. Short nails, soft shapes, and one small accent are all over social media. This fits the way most of us live, since we want nails that match every sweater and every party. Christmas nails simple in style also grow out nicely, so you will not stress about chips.
Color trends lean toward deep reds, forest greens, creamy whites, and a little gold. Sheer and milky finishes are popular because they look soft and expensive. A glossy top coat keeps things fresh, while a matte finish adds a cozy touch. Holiday nail art has a long history too, from painted candy canes to tiny stars. The good news is that simple versions of these ideas are easier than ever to copy at home.
How to Pick the Right One for You
The best Christmas nails simple design is the one that fits your real life. Start by thinking about your nail length. Short nails look lovely with solid colors and tiny details, while longer nails can carry a French tip or a soft fade. If your nails are thin or peel easily, pick a sheer shade, because it hides small flaws. Keep your daily routine in mind too, since typing, cooking, and cleaning all wear on polish.
Skin tone matters a little as well. Warm tones often glow in rich reds, golds, and olive greens. Cool tones tend to shine in blue-based reds, silver, and icy whites. Neutral tones can wear almost anything, so you have lots of room to play. Finally, think about the occasion, because an office party may call for soft shades and a family dinner can handle a bit more sparkle.
Table of Contents
- Classic Red Cream Polish for a Timeless Look
- Candy Cane Stripe Accent Nail
- Milky White Nails That Look Like Fresh Snow
- One Tiny Snowflake on a Pale Base
- Deep Forest Green With a Glossy Shine
- Burgundy Wine Nails for Easy Glamour
- Thin Gold Line French Tips
- Soft Glitter Fade at the Tips
- Tiny Holly Berry Dots
- Sheer Nude With a Red French Tip
- Matte Black With One Gold Star
- Silver Chrome Dusting for an Ornament Shine
- Mini Plaid Accent Nail
13 Christmas Nails Simple Ideas
1. Classic Red Cream Polish for a Timeless Look
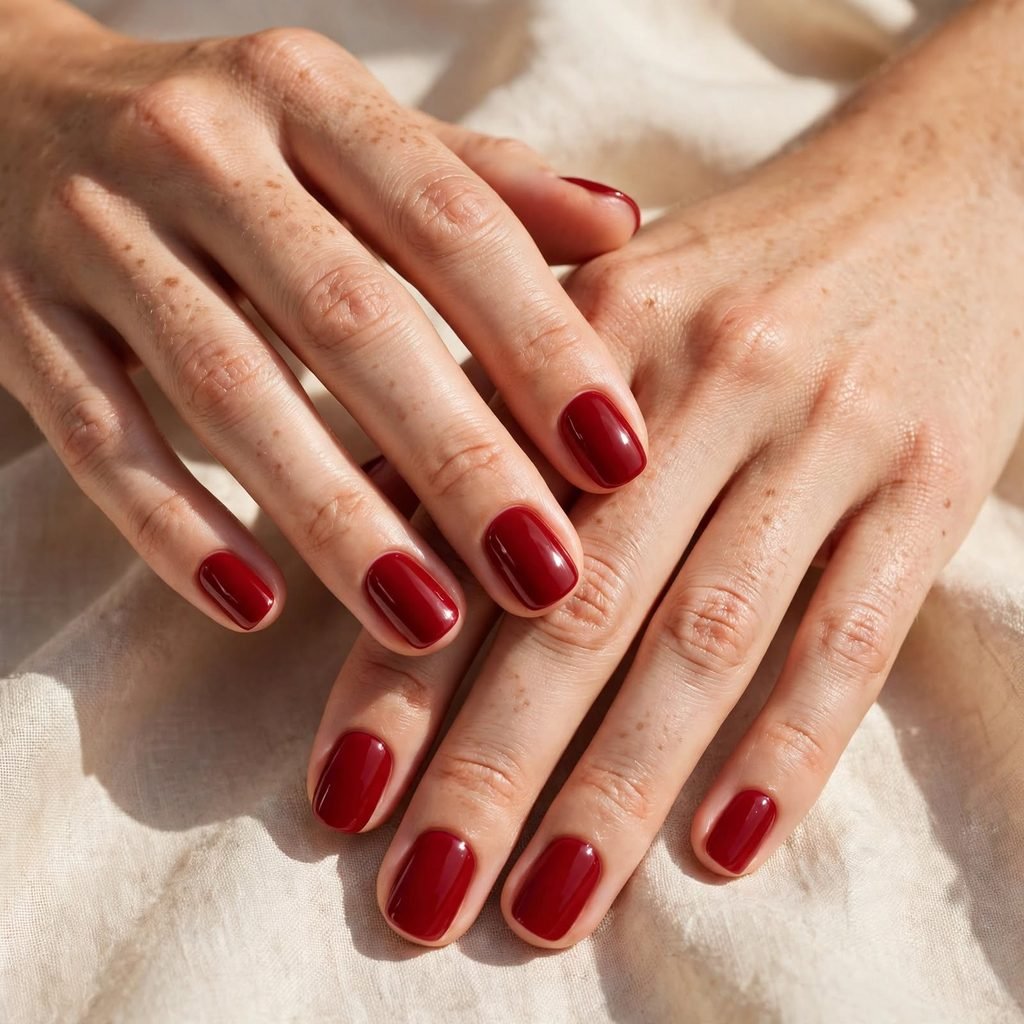
Nothing says Christmas like a perfect red manicure. A cream finish gives you bold color with no extra steps. It looks sharp on short nails and long nails alike. Red also pairs with every outfit, from a velvet dress to a plain white tee. If you only try one of these Christmas nails simple ideas, make it this one.
Who it suits best: Everyone, especially beginners and anyone who wants a no-fail look.
Quick styling tip: Pick a true red or a warm cherry, then finish with a glossy top coat.
How to do this at home:
- Push back your cuticles, shape your nails with a file, and buff the surface lightly.
- Brush on a thin base coat and let it dry.
- Paint two thin coats of red, waiting a minute between coats.
- Seal with a top coat and wrap it over the nail tip.
Cost & time: DIY runs about 5–12 and takes 30–40 minutes. A salon visit is roughly 25–60. Regular polish lasts 5–7 days, and gel lasts 2–3 weeks.
Care tips: Wear gloves for dishes, add a fresh top coat every two or three days, and rub cuticle oil in at night.
2. Candy Cane Stripe Accent Nail
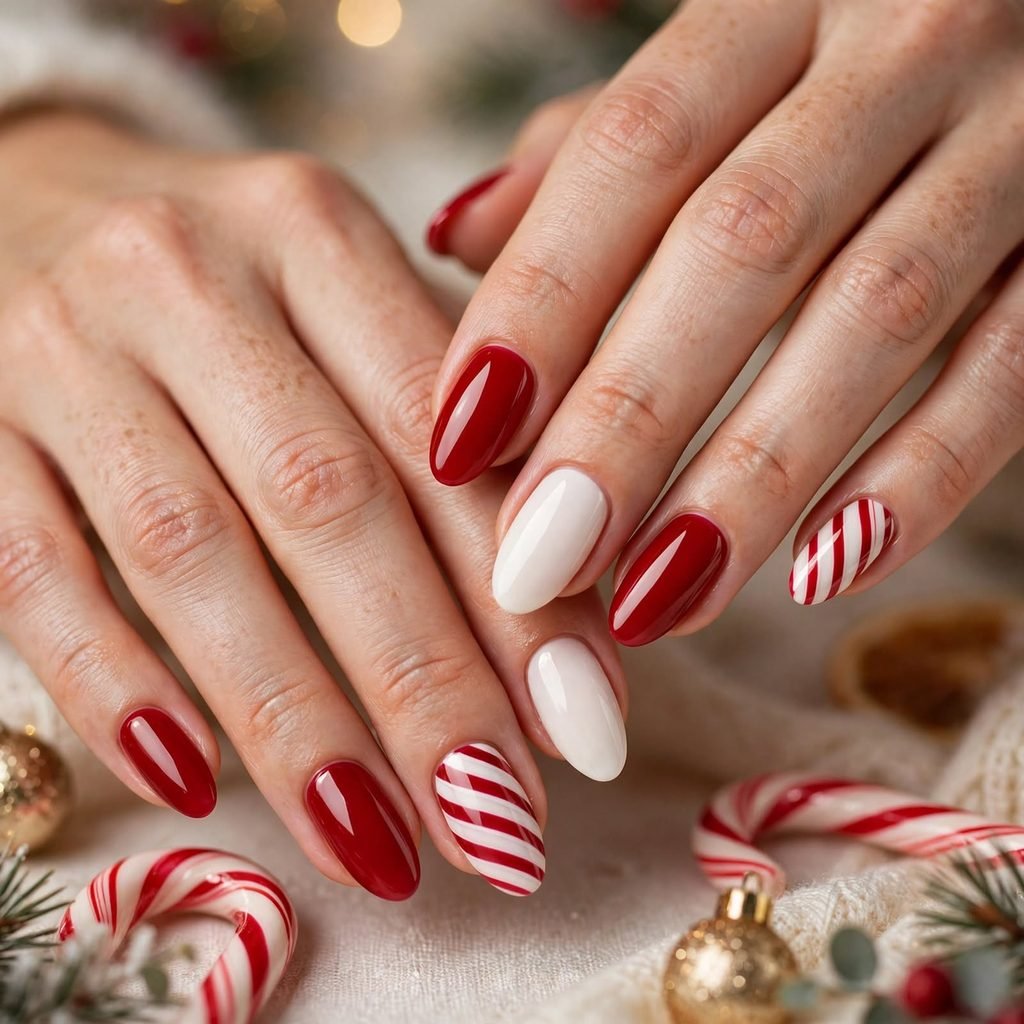
A single candy cane nail adds fun without crowding your hand. Paint your nails in a soft white or pale pink, then add thin red stripes on one finger. The stripes can be straight, curved, or even a little wobbly. That small imperfection looks charming and handmade. Everything else stays plain, which keeps the whole look clean.
Who it suits best: Playful people, kids’ parties, and anyone who likes a little cheer.
Quick styling tip: Put the stripes on your ring finger so they show when you hold a mug.
How to do this at home:
- Paint all nails with a white or pale pink base and let them dry fully.
- Use a thin brush or a toothpick dipped in red polish to draw diagonal lines on one nail.
- Add a glossy top coat over everything.
Cost & time: DIY costs about 6–15 and takes 35–45 minutes. Salon nail art adds 5–15 per nail. Expect 5–10 days with regular polish.
Care tips: Avoid hot water right after painting, and skip sticky hand scrubs that can dull the top coat.
3. Milky White Nails That Look Like Fresh Snow
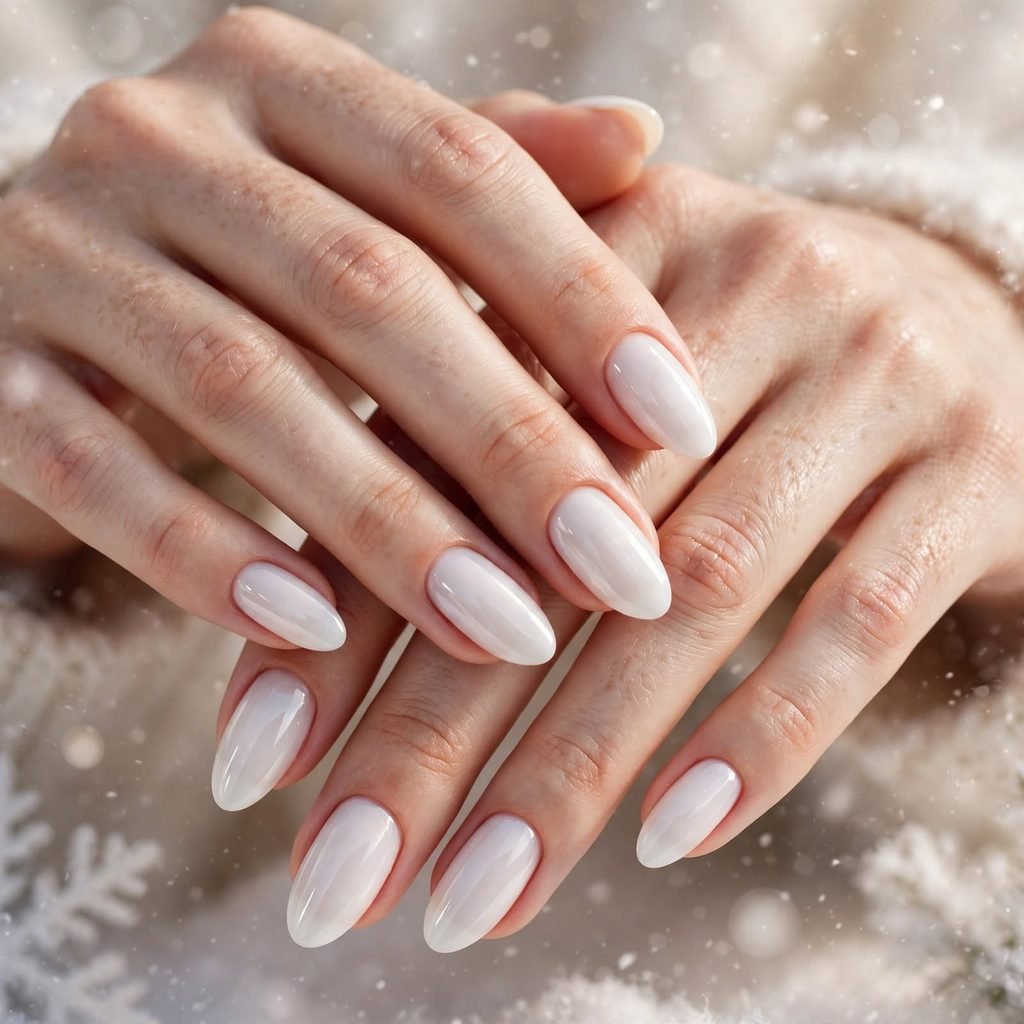
Sheer milky white nails look like a soft snowfall. The color is calm, quiet, and easy to wear to work. It also makes a great base if you want to add glitter or foil later. This shade hides small streaks, so beginners often do well with it. Add a shimmery top coat and it feels festive in a very gentle way.
Who it suits best: Short or thin nails, office settings, and anyone who likes a clean, fresh look.
Quick styling tip: Pair it with a cozy gray or cream knit for a soft winter outfit.
How to do this at home:
- Prep with a file and a light buff, then wipe nails clean.
- Apply a thin coat of sheer milky white, then a second coat if you want more cover.
- Finish with a shiny or lightly shimmery top coat.
Cost & time: DIY costs 5–10 and takes 25–35 minutes. Salon prices are about 25–55. It lasts about a week, or two to three weeks with gel.
Care tips: Sheer shades show stains, so wear gloves when you handle foods like tomato sauce or turmeric.
4. One Tiny Snowflake on a Pale Base
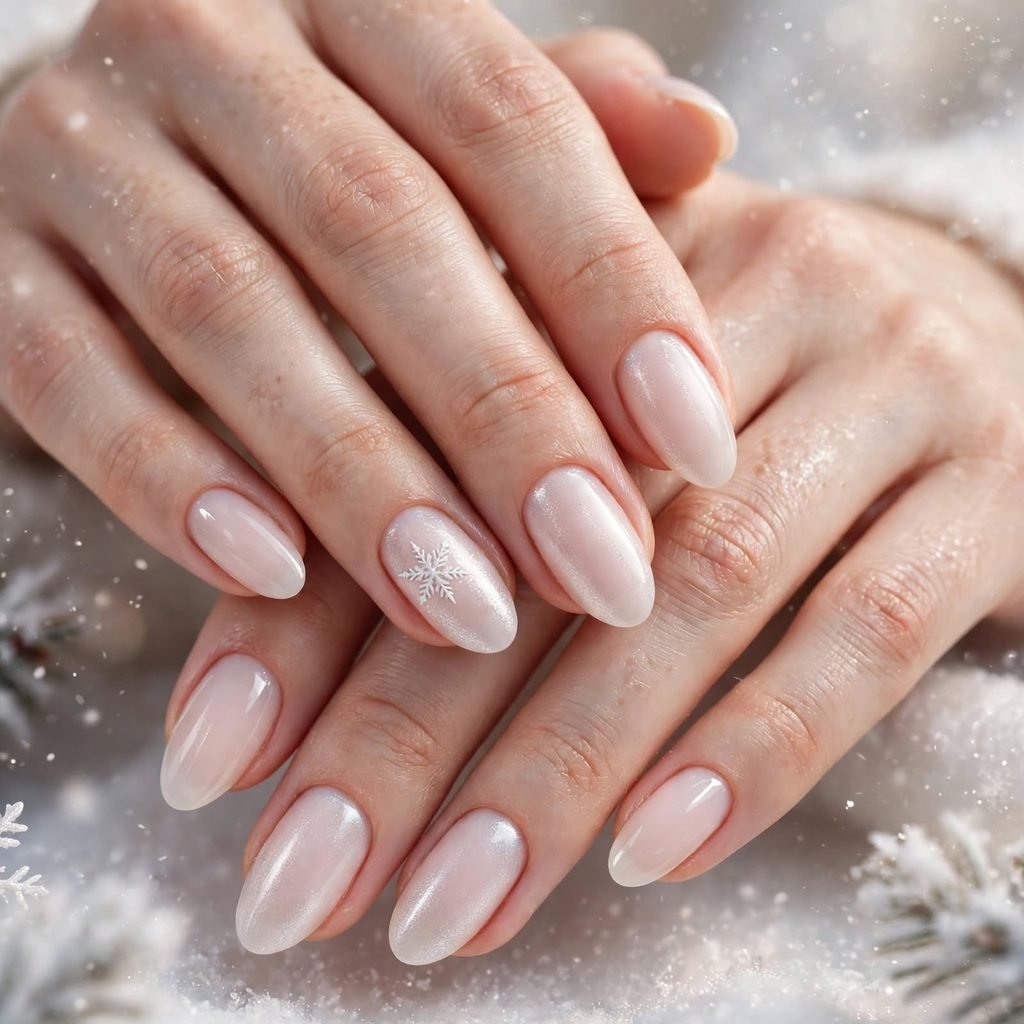
One tiny snowflake on a bare or pale nail is pure winter magic. You do not need to be an artist for this one. A few thin lines crossing at the center make a perfect little flake. Add a dot at the end of each line for extra sparkle. Keep the other nails plain so the snowflake stands out.
Who it suits best: Anyone who loves delicate details, plus those who want a very small dose of nail art.
Quick styling tip: Use white on a sheer pink base, or silver on a pale blue base for a icy twist.
How to do this at home:
- Paint your base color on all nails and let it dry.
- Use a thin brush or a dotting tool to make three crossing lines on one nail.
- Add a small dot at each line tip, then seal with a top coat.
Cost & time: DIY costs about 6–12 and takes 30–40 minutes. A salon may add 5–10 for the art. Expect about a week of wear.
Care tips: Use a quick-dry top coat so the thin lines do not smudge, and try not to pick at the tiny design.
Internal link of pink christmas nails
5. Deep Forest Green With a Glossy Shine
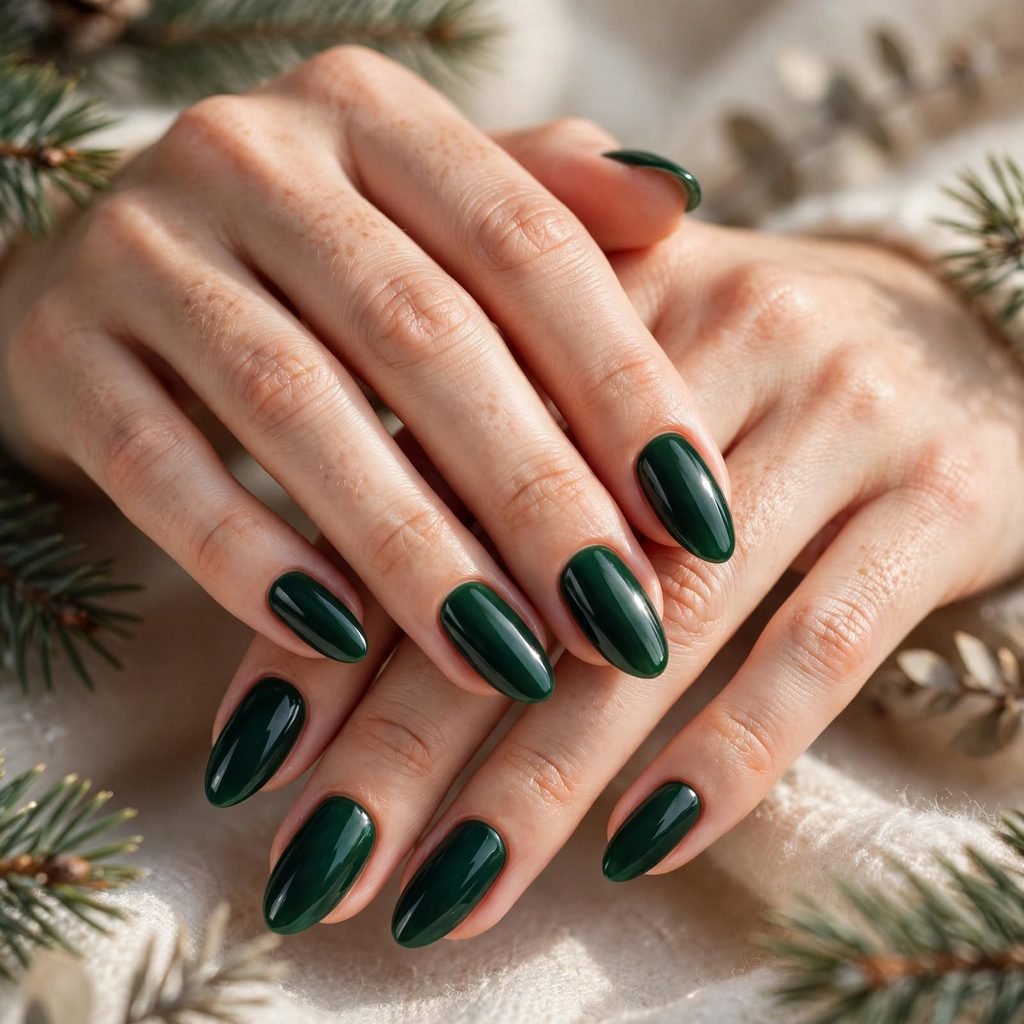
Deep forest green feels like a pine tree in a cozy cabin. It is rich, calm, and a little unexpected. The color looks great with gold jewelry and cream sweaters. A glossy finish makes it shine like a jewel. It is a smart pick if you want something classic but not red.
Who it suits best: Warm and neutral skin tones, plus anyone who loves earthy colors.
Quick styling tip: Wear it with gold rings or a camel coat for a rich, wintry mix.
How to do this at home:
- File and buff your nails, then add a thin base coat.
- Paint two thin coats of green, drying a minute or two between each.
- Cap the tips and add a glossy top coat.
Cost & time: DIY runs 5–12 and takes 30–40 minutes. Salon visits cost around 25–60. It lasts 5–7 days with regular polish.
Care tips: Dark shades can leave faint stains on bare nails, so use a base coat and remove the polish within two weeks.
6. Burgundy Wine Nails for Easy Glamour
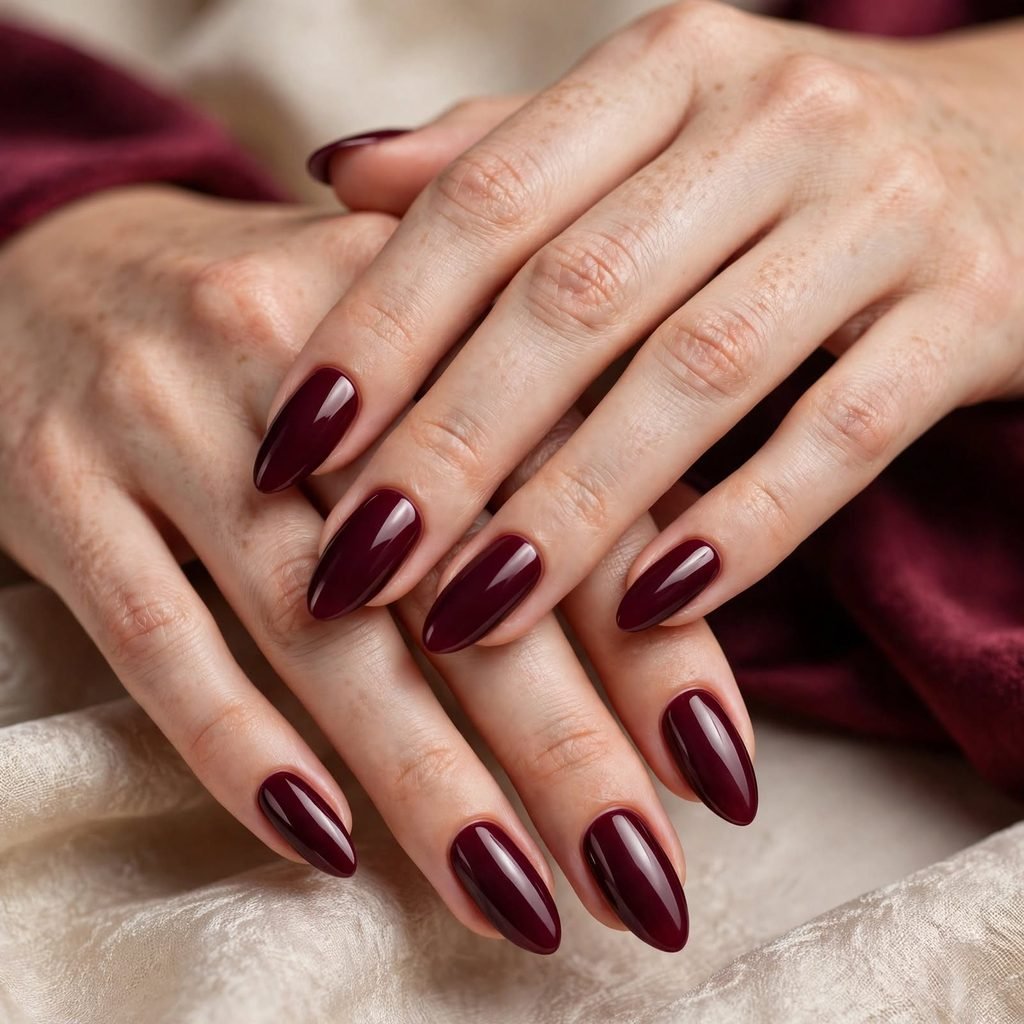
Burgundy wine nails bring moody, grown-up glamour. The dark red-purple shade looks fancy on short square or round nails. It also hides small chips better than lighter colors. Many people find it softer than bright red but just as festive. It works from the first snow right through New Year’s Eve.
Who it suits best: Cool and neutral skin tones, plus anyone dressing up for evening events.
Quick styling tip: Match it with a dark lip or a black dress for a polished party look.
How to do this at home:
- Clean and shape your nails, then apply a base coat.
- Use two thin coats of burgundy, keeping the polish away from your skin.
- Seal with a high-shine top coat.
Cost & time: DIY costs 5–12 and takes about 30–40 minutes. Salon prices are roughly 25–60. Gel can hold for up to three weeks.
Care tips: Clean up edges with a small brush and remover right away, because dark polish shows mistakes more.
7. Thin Gold Line French Tips
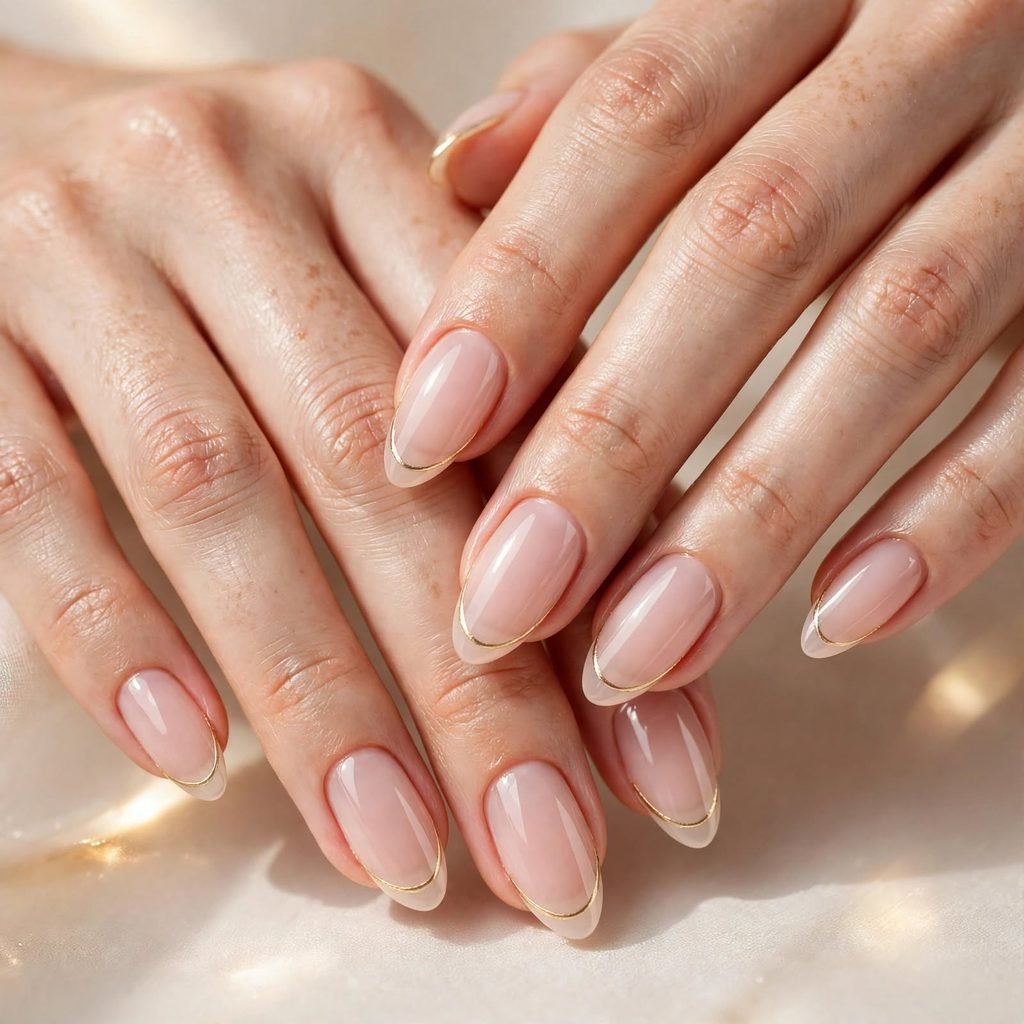
A thin gold line on the tip gives a classic French manicure a holiday glow. Start with a nude or sheer pink base so the gold pops. The line can be straight or a tiny curve. It feels dressy but stays light and easy. This is a great pick for parties and photos.
Who it suits best: Anyone who likes a clean look with a bit of shine, especially on medium to long nails.
Quick styling tip: Keep the gold line very thin so it looks like jewelry on your nails.
How to do this at home:
- Paint a sheer pink or nude base and let it dry fully.
- Dip a thin brush in gold polish and trace a light line along each tip.
- Clean any wobble with a small brush and remover, then add a top coat.
Cost & time: DIY costs 8–15 and takes 40–50 minutes. A salon charges about 35–70. Expect 1–3 weeks depending on the polish type.
Care tips: Metallic lines can scratch, so use a good top coat and avoid using your nails as tools.
8. Soft Glitter Fade at the Tips
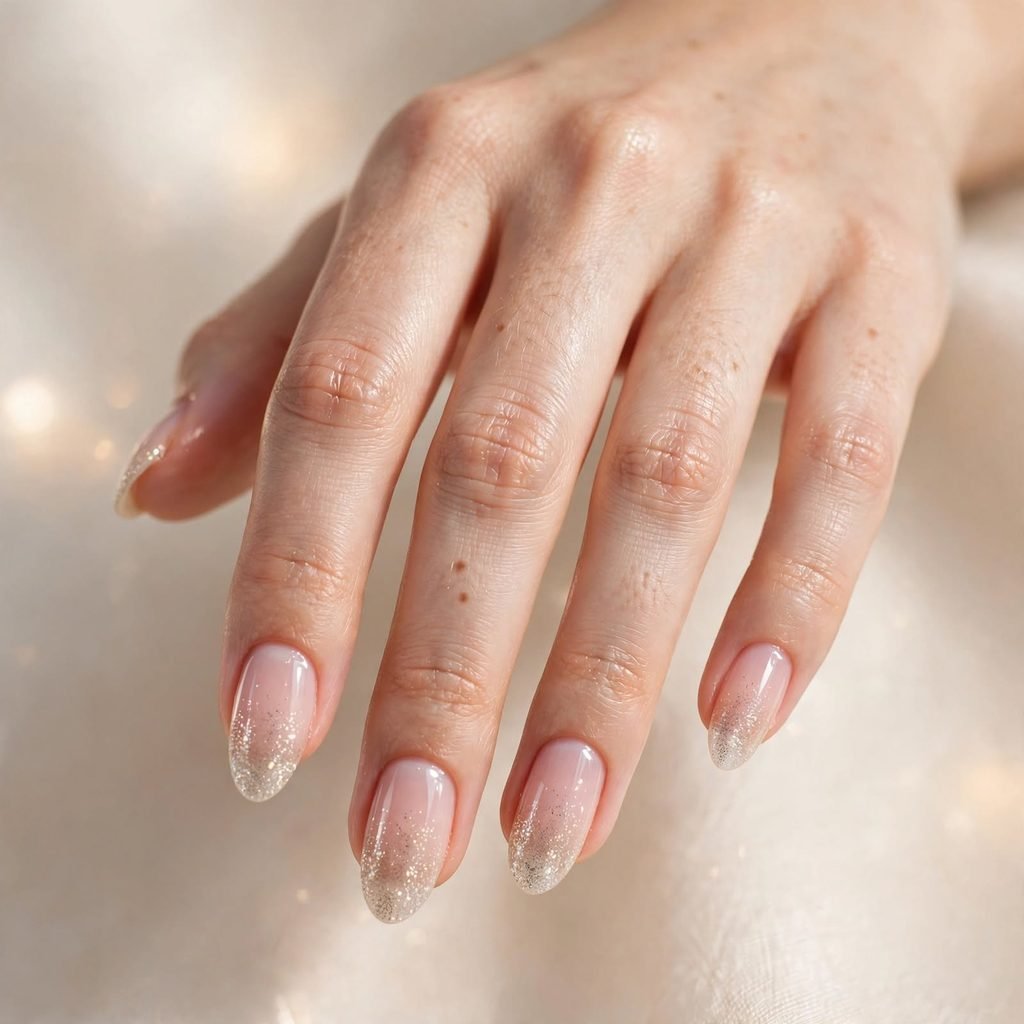
A soft glitter fade at the tips feels like sprinkled snow. The sparkle sits at the ends and fades toward the middle. It is easy to wear because the base stays clean and neutral. Regrowth looks natural since the base is soft and sheer. It is a gentle way to enjoy shine without going over the top.
Who it suits best: Sparkle lovers who still want a calm, everyday look.
Quick styling tip: Pick fine, champagne-colored glitter for a look that works with almost everything.
How to do this at home:
- Apply a sheer pink or nude base and let it dry.
- Dab a makeup sponge with glitter polish and press it gently on the tips.
- Blend upward, then add a smooth top coat to even out the texture.
Cost & time: DIY costs 7–15 and takes 35–45 minutes. A salon charges about 35–65. It lasts about a week or up to three with gel.
Care tips: Glitter can be hard to remove, so soak a cotton pad in remover and hold it on each nail for a minute before wiping.
9. Tiny Holly Berry Dots
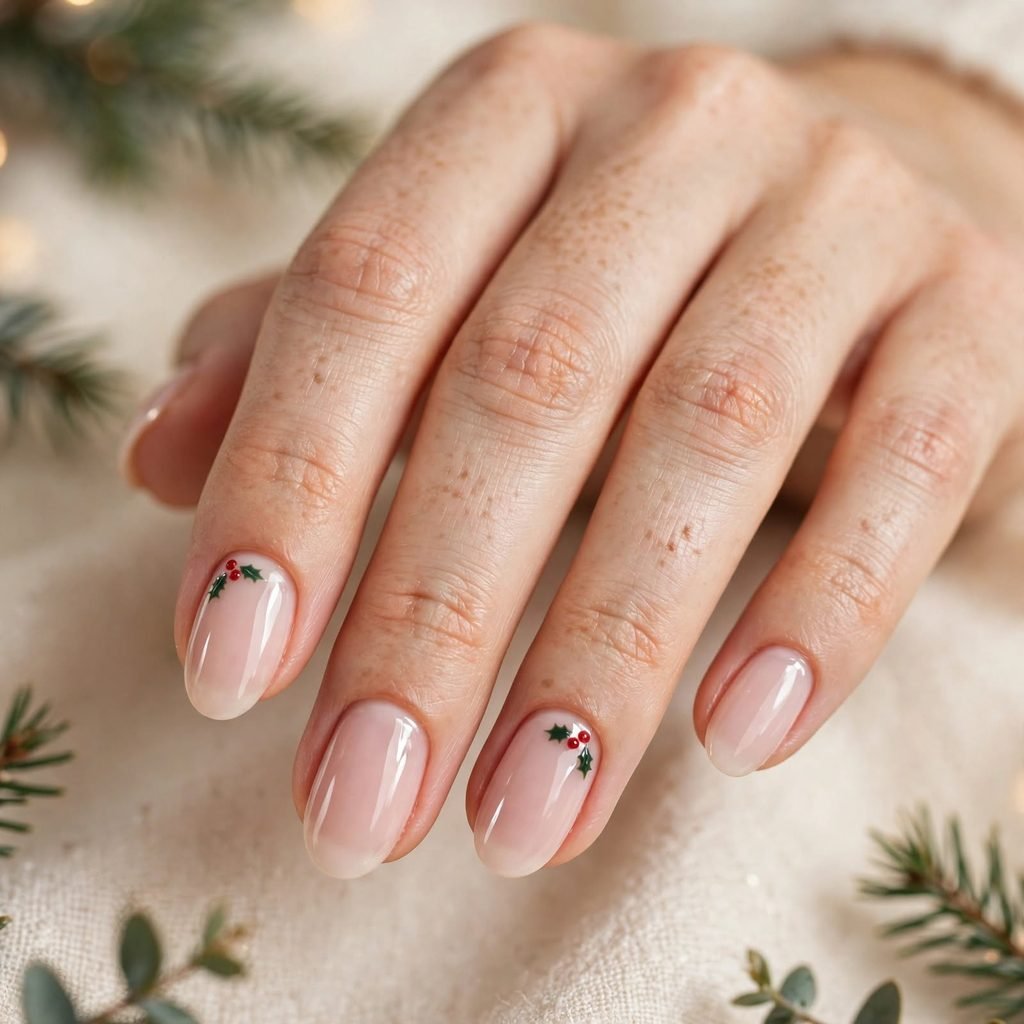
Tiny holly berries are one of the easiest bits of nail art you can try. Paint three small red dots next to two little green leaves on an accent nail. A dotting tool or even a toothpick does the job. The pattern reads as Christmas right away. On a nude base, it looks sweet and tidy.
Who it suits best: Beginners who want a cute design with almost no skill needed.
Quick styling tip: Place the berries near the cuticle or the tip for a modern, off-center look.
How to do this at home:
- Paint a nude or soft cream base and let it dry well.
- Dot three berries in red, then draw two small leaves in green with a thin brush.
- Let the art dry, then seal with a top coat.
Cost & time: DIY costs 8–15 and takes 35–45 minutes. A salon may charge 5–12 per accent nail. Expect about a week of wear.
Care tips: Wait a few minutes before the top coat so the dots do not smear, and refresh the top layer every few days.
10. Sheer Nude With a Red French Tip
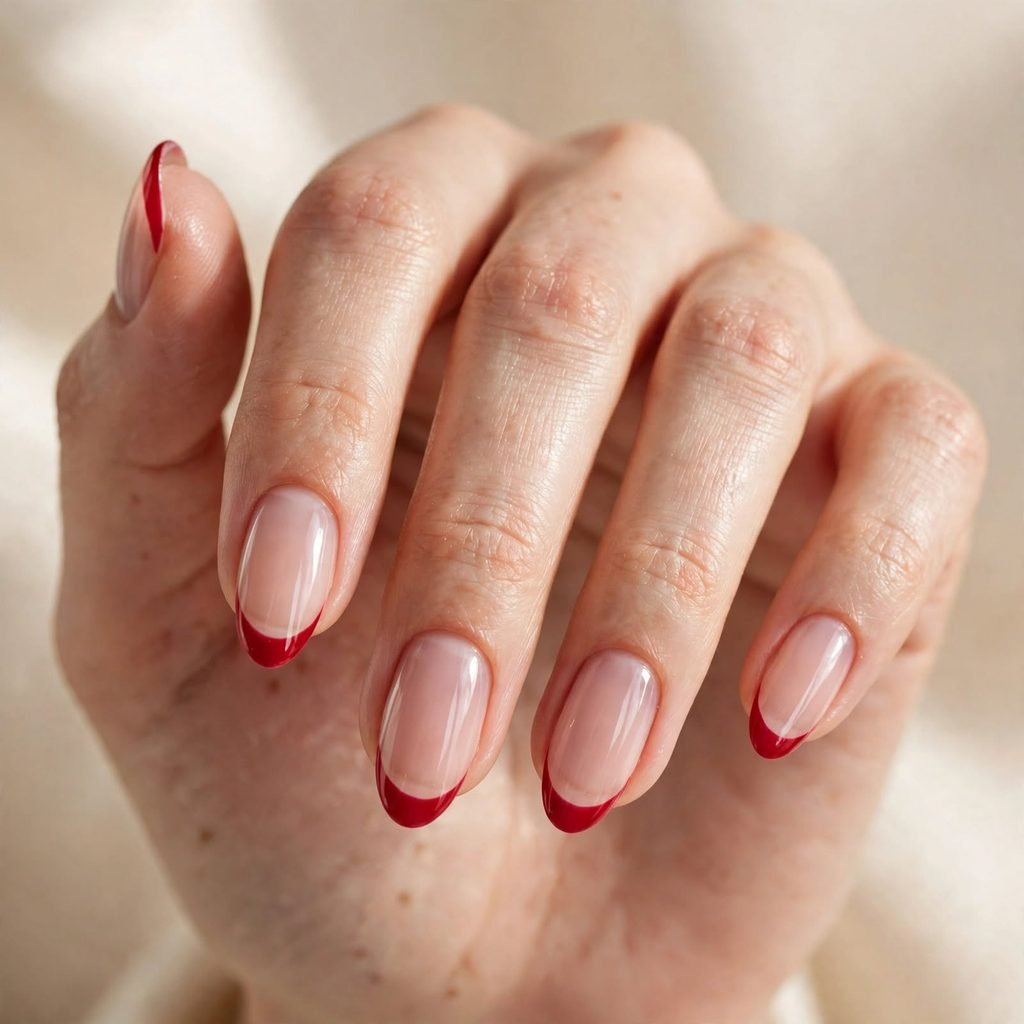
A red French tip on a nude base gives you a modern holiday twist. It looks like a classic manicure with a little Santa-hat charm. The tip can be thick, thin, or slightly slanted. Because the base is sheer, small chips are less obvious. It is dressy enough for parties yet calm enough for the office.
Who it suits best: People who want something polished and wearable from work to dinner.
Quick styling tip: Choose a red with a blue undertone for a crisp look, or a warm red for a softer feel.
How to do this at home:
- Apply a sheer nude base and let it dry.
- Paint a curved red line across each tip using a thin brush.
- Clean the edges and finish with a glossy top coat.
Cost & time: DIY runs 8–15 and takes 40–50 minutes. Salon prices are about 35–70. It lasts a week, or two to three with gel.
Care tips: Keep your hands moisturized, because dry skin around the nails makes the sharp tips look rough.
11. Matte Black With One Gold Star
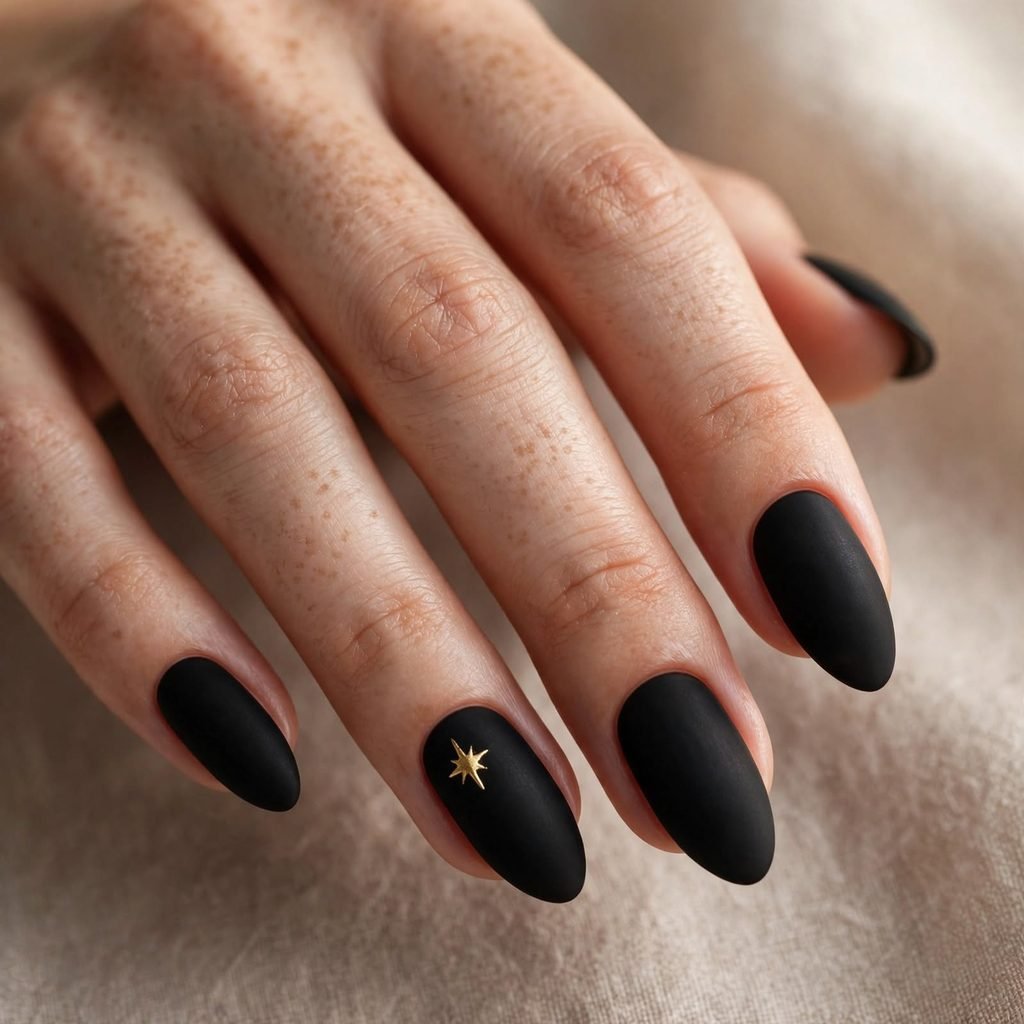
Matte black nails look bold and chic, and they surprise people at Christmas. Add one tiny gold star on your ring finger to bring in the holiday spirit. The contrast between flat black and shiny gold is stunning. This look works for anyone who dislikes the usual red and green. Short nails look especially sleek in this style.
Who it suits best: Bold dressers, night-out plans, and anyone who wants a non-traditional holiday look.
Quick styling tip: Wear it with simple silver or gold jewelry to let the star shine.
How to do this at home:
- Paint two thin coats of black polish and let them dry fully.
- Apply a matte top coat to the whole nail.
- Use a thin brush to draw a small star in gold on one nail, or dab on a star sticker.
Cost & time: DIY costs 8–18 and takes 40–50 minutes. A salon charges about 35–70. Expect 1–3 weeks depending on the type of polish.
Care tips: Matte finishes show oil and fingerprints, so wash your hands gently and avoid heavy hand creams right after painting.
12. Silver Chrome Dusting for an Ornament Shine
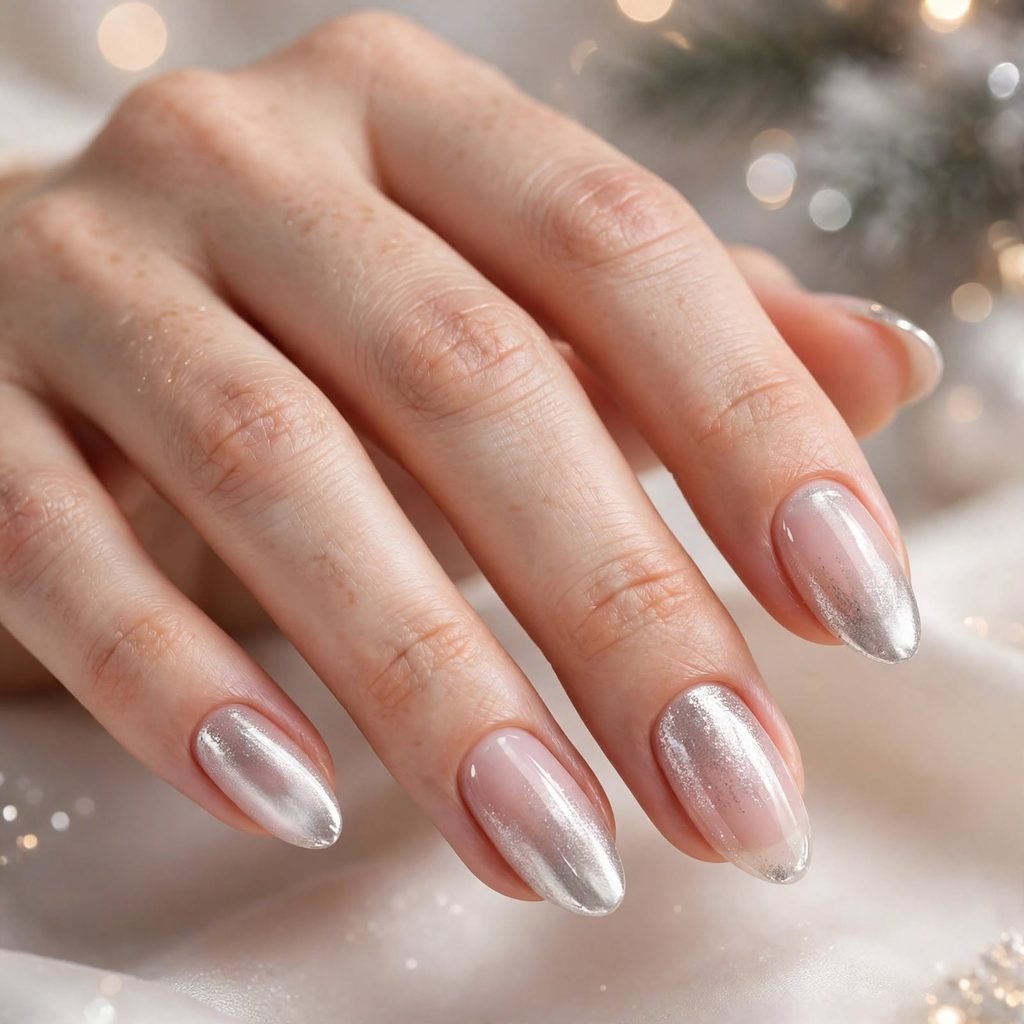
Silver chrome powder gives nails a mirror shine that looks like a frosted ornament. A thin, rubbed-on layer is all you need. It works best over a dark or gray base. The effect sparkles under party lights without any chunky glitter. It looks high-end while staying simple.
Who it suits best: Cool skin tones, party lovers, and anyone who likes a modern, icy style.
Quick styling tip: Try it on just two fingers if a full chrome set feels like too much.
How to do this at home:
- Apply a gel base in gray or black and cure it under a lamp.
- Add a no-wipe gel top coat, cure, and rub the chrome powder on with a soft applicator.
- Brush off extra powder, seal with another top coat, and cure again.
Cost & time: DIY needs a lamp and gel kit, usually 30–60 at the start. It takes about 45–60 minutes. A salon charges around 45–85, and it lasts 2–3 weeks.
Care tips: Do not peel gel polish off, because that can harm your nails. Soak it off with remover or visit a pro.
13. Mini Plaid Accent Nail
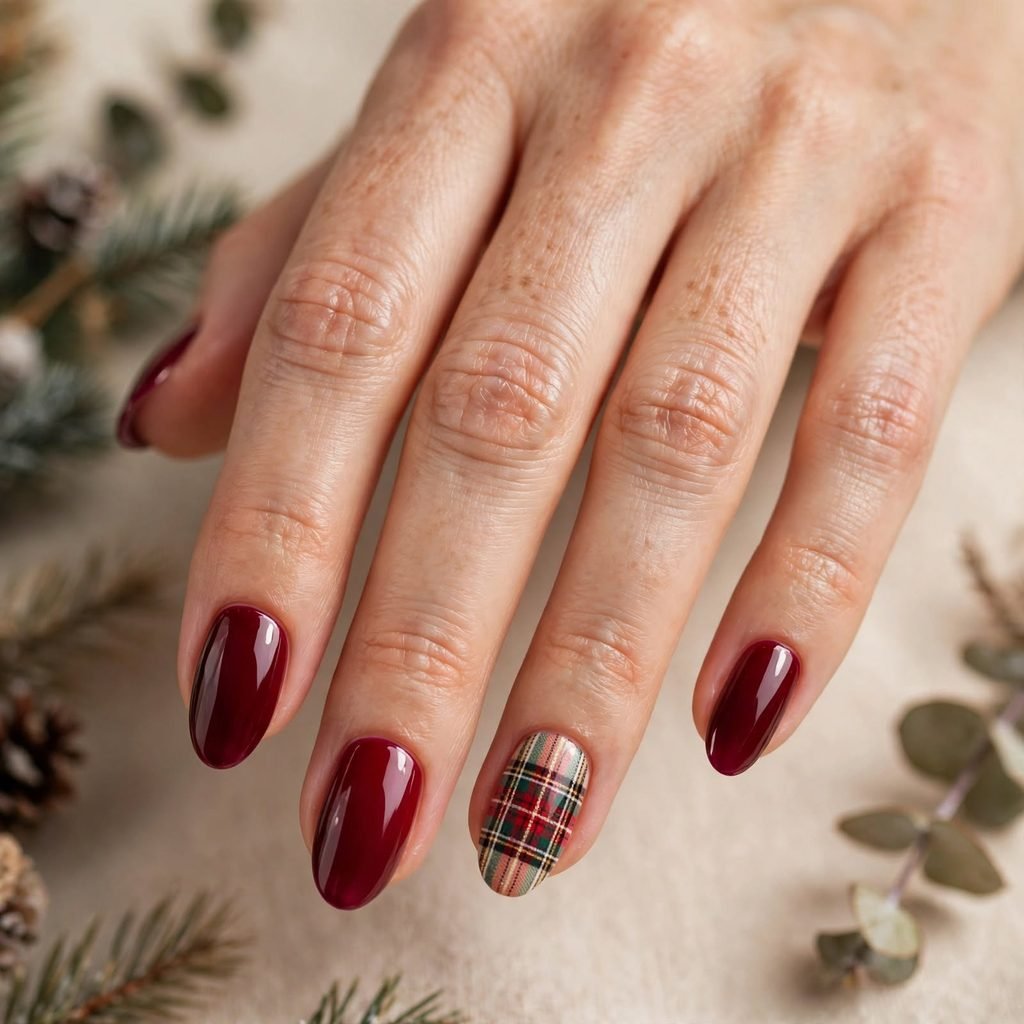
A mini plaid accent nail brings flannel pajamas to your fingertips. Pick red or green as your base, then draw thin crossing lines in white or black. You only do this on one finger, so it stays simple. The pattern adds cozy texture without making your whole hand look busy. It is cute with sweaters, scarves, and warm drinks.
Who it suits best: Cozy-style lovers and anyone who likes a little pattern.
Quick styling tip: Match the plaid colors to the polish on your other nails for a neat, matching set.
How to do this at home:
- Paint your base color on every nail and let it dry fully.
- On one nail, draw two thin vertical lines and two thin horizontal lines with a fine brush.
- Add a few even thinner lines in between, then seal with a top coat.
Cost & time: DIY costs 8–15 and takes 40–50 minutes. A salon may add 5–15 for the accent nail. Expect about a week with regular polish.
Care tips: Use a top coat that dries quickly so the thin lines stay crisp, and avoid rubbing that nail against rough surfaces.
Frequently Asked Questions
What colors work best for Christmas nails simple styles?
Classic red, forest green, creamy white, burgundy, and soft gold are the safest choices. These shades match most outfits and feel festive without trying too hard. If you want something different, try silver, deep navy, or matte black with a small gold detail. Sheer pinks and nudes also work well as a base for tiny designs. Pick the color you will enjoy wearing the most, since you will see it all day.
How long do simple Christmas nails last?
Regular polish usually lasts five to seven days when you add a fresh top coat. Gel polish can last two to three weeks if it is applied and removed with care. Your habits matter a lot, because water, cleaning products, and typing can all wear down the color. Thin coats dry better and tend to last longer than thick ones. Adding a top coat every few days is the easiest way to extend wear.
Can I do Christmas nail designs on short nails?
Yes, and many of these ideas look best on short nails. Solid colors, tiny dots, a single star, and sheer French tips all fit well on a small nail bed. Short nails also feel easier to manage when you are busy with holiday plans. Keep the designs small and the lines thin so nothing looks crowded. A neat shape and a glossy finish matter more than length.
When should I get my nails done before Christmas?
Aim for two to four days before the big day so your polish still looks fresh. If you have a gel manicure, you can book it a bit earlier because it holds up longer. Many salons fill up fast in December, so booking early saves stress. If you paint them yourself, you have more freedom to choose any day. Plan a quick touch-up with top coat right before the event.
Is gel or regular polish better for simple holiday nails?
It depends on your time, budget, and nail health. Regular polish is cheaper, easy to change, and gentle if you like to switch looks often. Gel lasts longer and stays shiny, which helps during a busy holiday month. Gel needs a lamp and careful removal, so it is not the best option for everyone. If your nails feel weak, take a break between gel sets and keep them moisturized.
How do I remove glitter or chrome without hurting my nails?
Start by gently filing the top layer if you are removing gel, and avoid cutting into your skin. Soak a cotton pad in remover, place it on your nail, and wrap it with foil for about ten minutes. Slide the pad off gently, and never scrape hard or peel the polish. Wash your hands, then add cuticle oil and a rich hand cream to bring moisture back. Give your nails a short rest before your next set.
Final Thoughts: Pick Your Christmas Nails Simple Vibe
If you love a simple look, go for classic red cream, milky white, forest green, or burgundy. These shades need only a few steps, look neat on any nail length, and fit every outfit. A single accent nail, like a snowflake or holly berries, adds charm without extra work. Short, tidy nails with a glossy top coat are always in style. You can finish in under an hour and still feel festive.
If you want a glam look, try gold line French tips, a soft glitter fade, or silver chrome dusting. These designs catch the light and look lovely in party photos. They take a bit more care, but the sparkle is worth it. Keep the base soft so the shine feels classy, not heavy. A little goes a long way.
If you want a bold look, matte black with a gold star, candy cane stripes, or a mini plaid accent will turn heads. These ideas let your personality come through without covering every nail in art. Wear one bold detail and let the rest stay calm. Whichever vibe you choose, remember that the best holiday nails are the ones that make you smile. Happy holidays, and enjoy ever