14 Stunning 3D Nail Art Ideas That Are Fun, Chic, and Easy to Wear
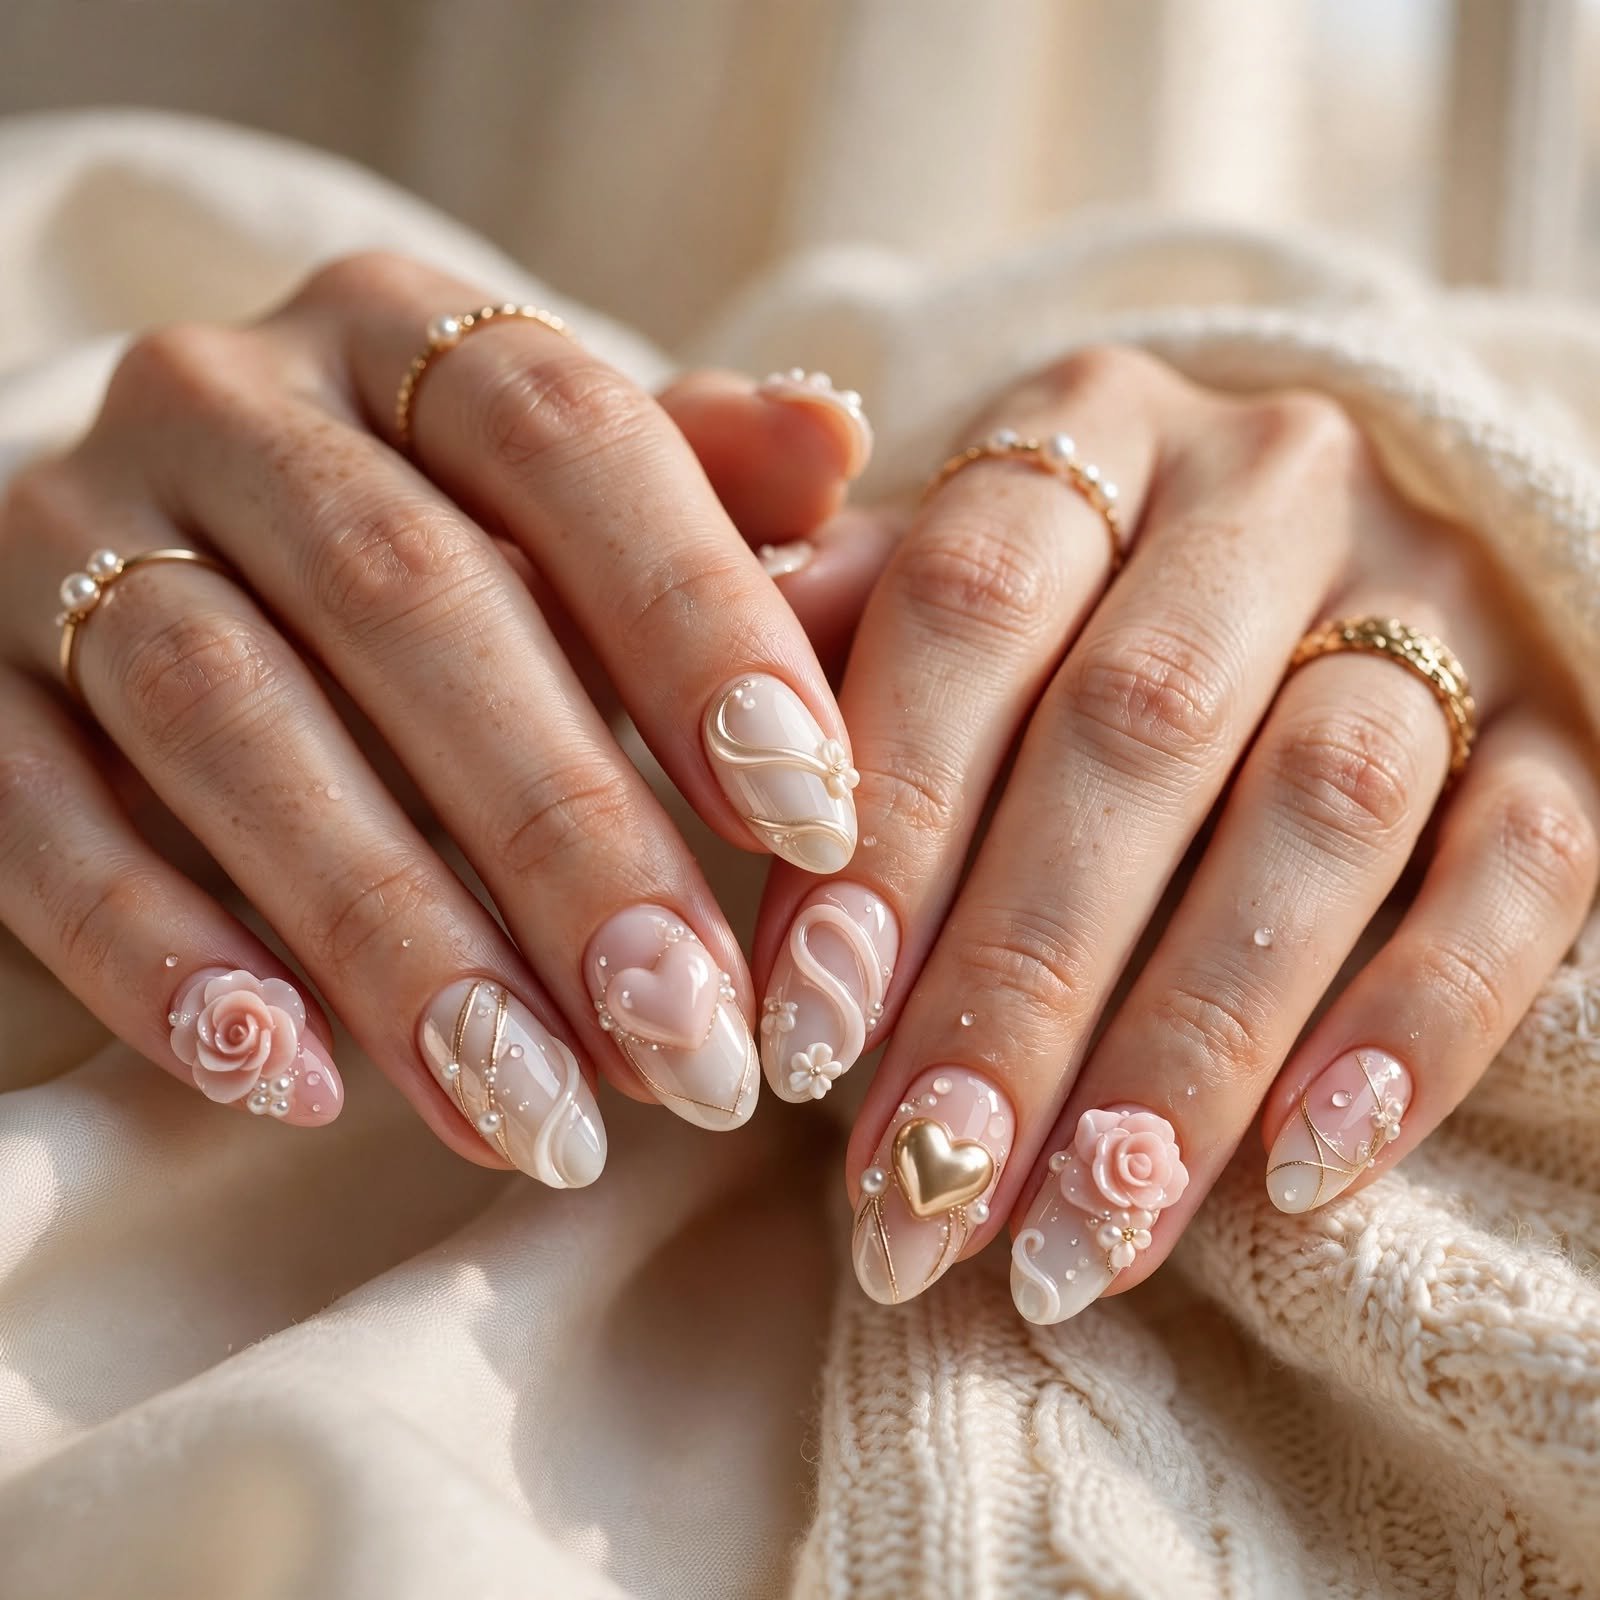
Have you ever looked at your nails and wished they had a little more oomph? Flat polish is pretty, but 3D nail art adds shape, shine, and real fun. Tiny flowers, soft bows, and glowing pearls can sit right on top of your nails. This guide shares 14 easy-to-love 3D nail art ideas, plus tips on how to pick, make, and care for them. Grab a cozy drink and let’s dive in!
Why 3D Nail Art Is Trending Right Now
3D nail art has moved from a niche salon trick to a big everyday trend. Social media made tiny sculpted details feel exciting and doable. People love nails that look like little pieces of jewelry. Short, rounded nails with one or two raised accents are especially popular right now. It is a fun way to show your style without going over the top.
The season matters too. It is late October, so deep reds, warm browns, and spooky-cute touches are everywhere. Holiday parties are also just around the corner, which makes sparkle and texture feel perfect. Nail artists have used raised designs for decades, from old acrylic sculpting to charm nails in the 1990s. Today’s tools are easier and gentler, so more people can try 3D nail art at home.
How to Pick the Right 3D Nail Art for You
Start with your nail length and shape. Short nails look great with small, flat-backed pieces like pearls and tiny gems. Long nails have more room for bigger designs like bows, butterflies, and sculpted flowers. Round and oval nails show off soft shapes, while square and almond nails make bold pieces stand out.
Next, think about your daily life. If you type, cook, or work with your hands, choose low, smooth designs that will not snag. If you want nails for a party or photo shoot, go taller and sparkly. Think about the occasion, too, because a soft pearl look fits a job interview and a big glitter charm fits a night out.
Finally, match the design to your skin tone and wardrobe. Warm tones glow with gold, bronze, and cream details. Cool tones shine with silver, icy blue, and berry shades. When in doubt, pick one favorite accent nail and keep the rest simple.
Table of Contents
- Soft Pearl Drops for a Quiet Glow
- Sculpted Mini Flowers in Full Bloom
- Glossy Water Droplet Nails
- Sweet Little Bow Charms
- Butterfly Wings That Pop Off the Nail
- Raised Gel Ribbon Swirls
- Rhinestone Clusters for Instant Sparkle
- Puffy Heart Charms
- Autumn Leaves and Mini Pumpkins
- Frosty Snowflake Accents for the Holidays
- Cozy Knit Sweater Texture
- Raised Gold Foil Lines
- Mermaid Shell and Scale Nails
- Tiny Stars and Moons for a Dreamy Night Sky
- How to Do 3D Nail Art at Home
- Cost and Time
- Care Tips
- FAQ
- Final Thoughts
1. Soft Pearl Drops for a Quiet Glow
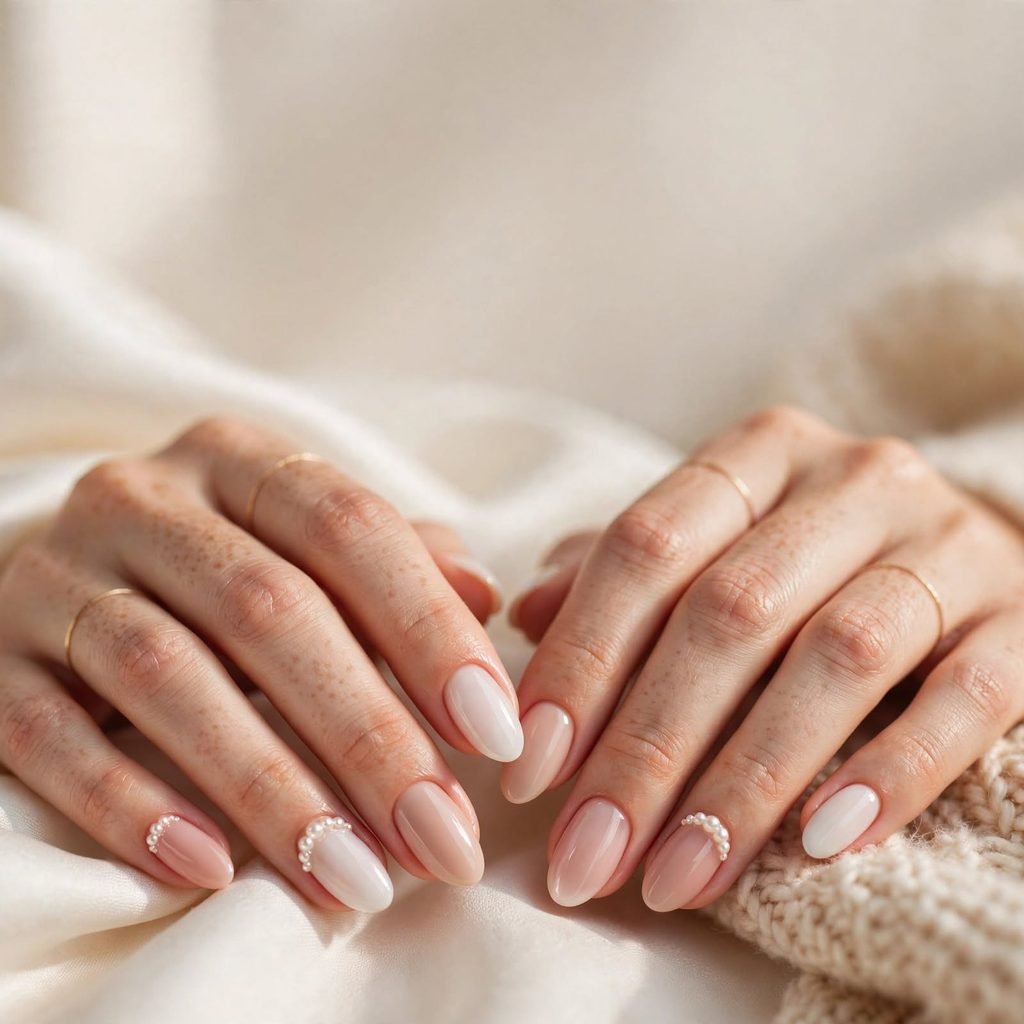
Tiny pearls are the easiest way to start with 3D nail art. They sit in a small cluster or a neat line near the cuticle. The soft glow looks classy and calm. Pearls pair well with sheer pink, milky white, or nude polish. They add depth without making your nails feel heavy.
Who it suits best: This idea suits short and medium nails. It works well for weddings, work, and school. Every skin tone looks lovely with creamy pearls. It is also a great pick if you type a lot.
Quick styling tip: Place pearls away from the free edge. That keeps them from catching on hair and sweaters. Seal around each one with a thin line of top coat. Try pearls on just two nails if you want a lighter look.
2. Sculpted Mini Flowers in Full Bloom
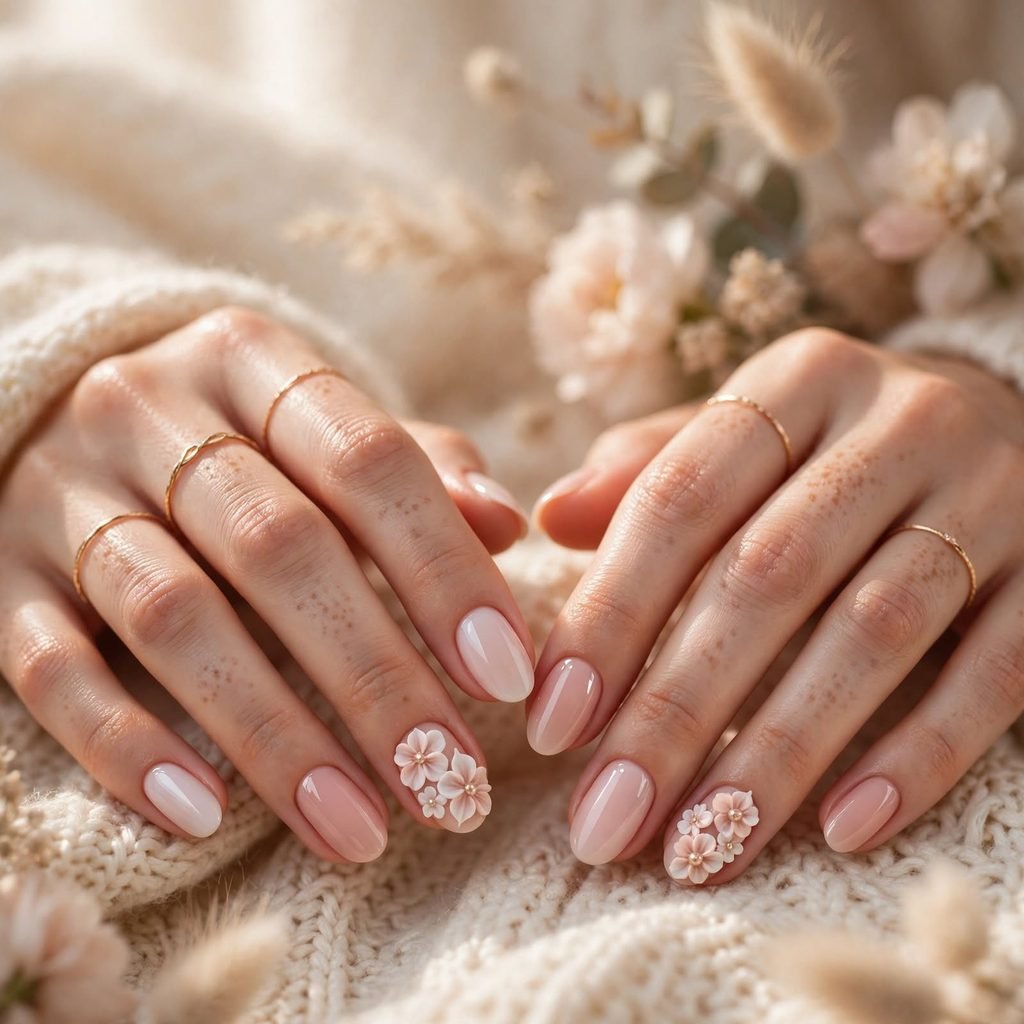
Tiny raised flowers look like they grew right on your nails. Nail artists build the petals one by one with gel or acrylic. You can keep them white and soft or make them bright and bold. A small gem or dot in the center finishes the look. It feels fresh in spring, but it also looks cozy with deep fall colors.
Who it suits best: This style suits medium to long nails with oval or almond shapes. It is lovely for birthdays, brunches, and photo days. Pastel flowers glow on fair skin, and rich jewel tones pop on deeper skin. It also works well if you love a romantic, garden feel.
Quick styling tip: Use one flower cluster on your ring finger. Keep the other nails in a soft sheer shade. This balance stops the set from looking too busy. Add a tiny leaf in green or brown for extra charm.
3. Glossy Water Droplet Nails

Water droplet nails look like fresh dew sitting on your polish. Clear gel is dotted on top, then cured into smooth, shiny domes. The effect is fun, light, and a little magical. It works over almost any color, which makes it very easy to wear. Droplets also catch the light in a way flat polish just can’t.
Who it suits best: This idea suits short and medium nails of any shape. It is great for school, casual days, and summer trips. Bright colors look juicy under the droplets, and neutral colors look soft and clean. It is perfect if you want a design that feels fresh but simple.
Quick styling tip: Use droplets in different sizes. Small and large drops together look more natural. Keep them off the tips if you use your nails a lot. A clear glossy finish makes the whole set shine.
4. Sweet Little Bow Charms

Bows are one of the cutest 3D nail art ideas around. They can be made of metal, gel, or tiny pieces of acrylic. A single bow on a pale pink nail looks sweet and neat. Red or black bows feel more bold and playful. Bows also look great for the holiday season.
Who it suits best: This style suits medium nails with round or square shapes. It works for holiday parties, date nights, and gift-wrapping season. Light pink looks pretty on fair skin, and rich red looks stunning on deep skin. It is a fun pick if you love a girly, polished look.
Quick styling tip: Put the bow near the base of the nail, not the tip. That keeps it from popping off when you grab things. Match the bow color to your base color for a soft look. Choose a contrast color for a loud one.
5. Butterfly Wings That Pop Off the Nail
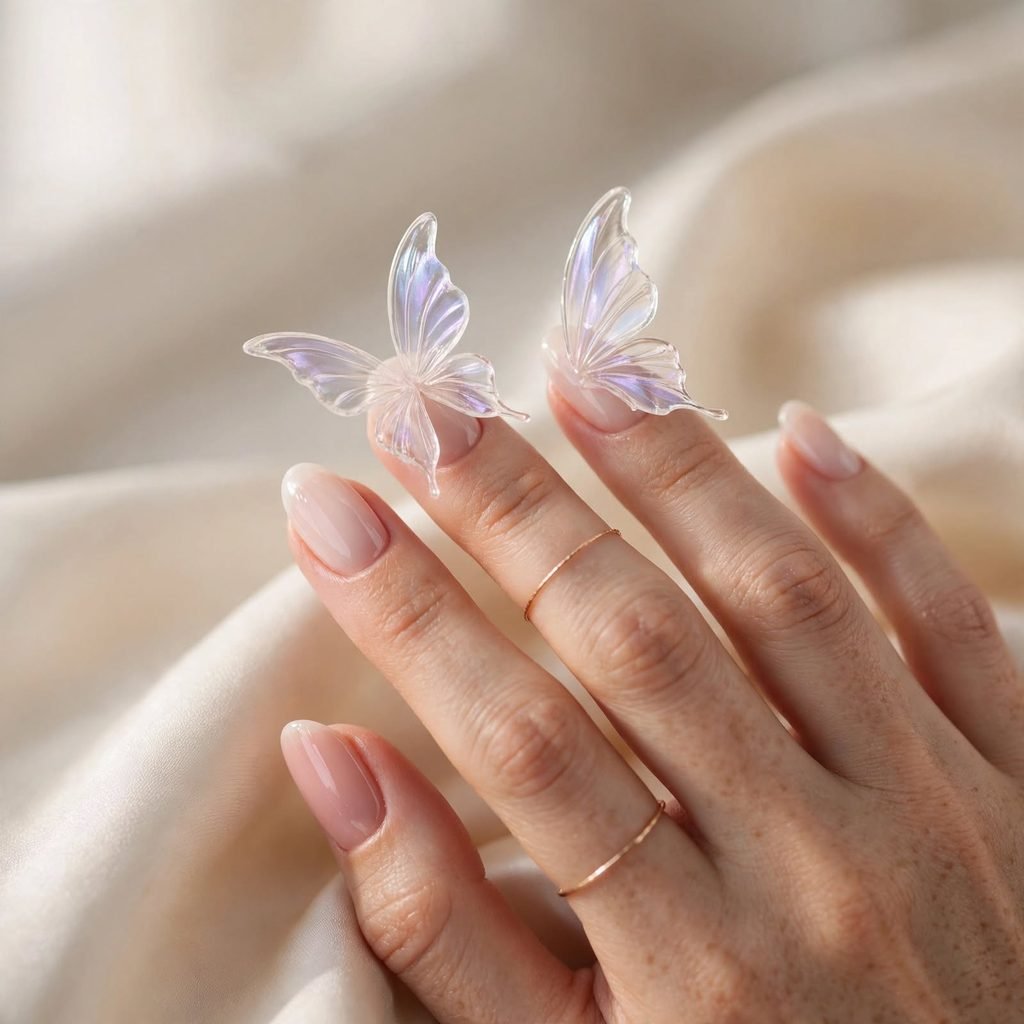
Butterfly nails use thin raised wings that seem to flutter on your fingertips. The wings can be clear, shimmery, or painted in bright colors. They look light and dreamy, even though they are 3D. Pair them with a glossy base for extra magic. They bring a sense of movement to your hands.
Who it suits best: This idea suits medium to long nails with almond or oval shapes. It is perfect for festivals, vacations, and big celebrations. Pastel wings glow on fair skin, and metallic wings shine on deeper tones. It is a great fit if you like soft, whimsical style.
Quick styling tip: Use one butterfly per hand. This keeps the look elegant, not crowded. Add a few tiny gems near the wings for sparkle. Make sure the wings are well sealed at the base so they last.
6. Raised Gel Ribbon Swirls
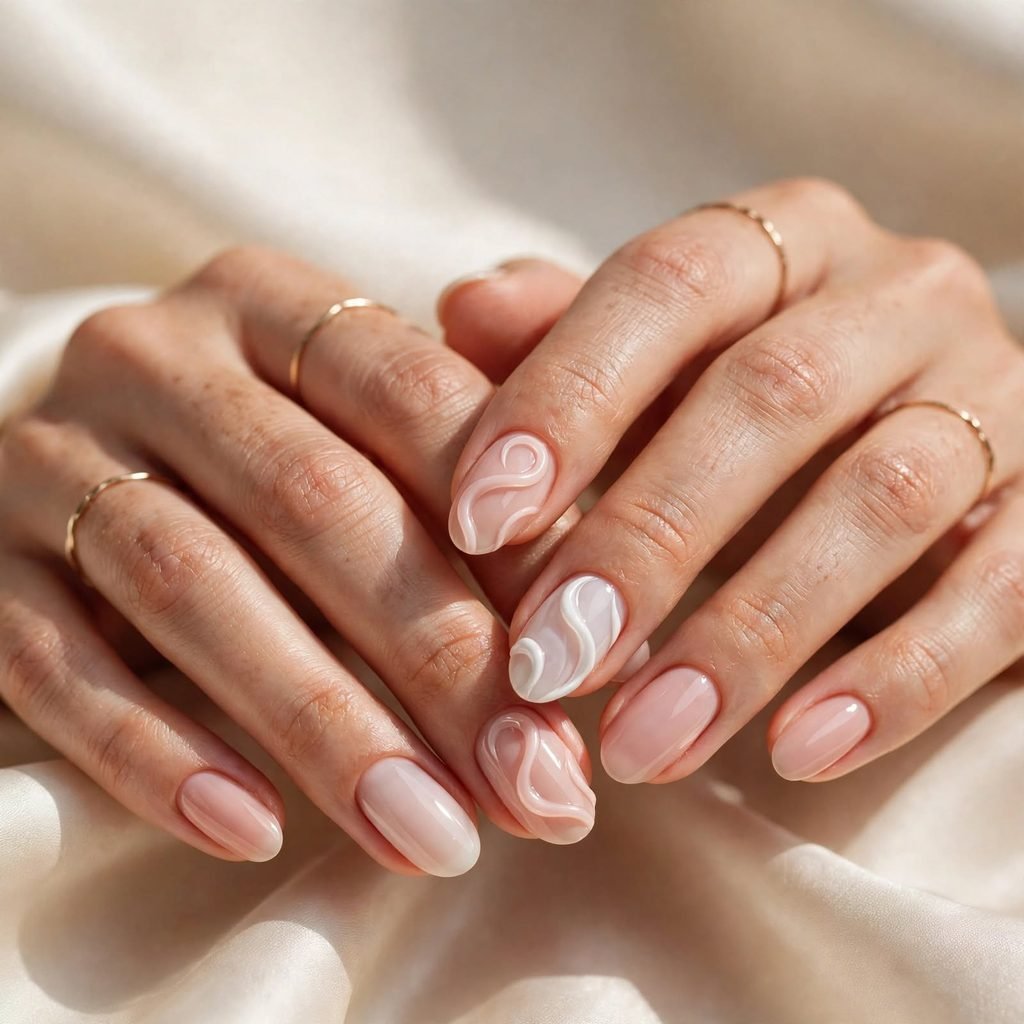
Gel ribbon swirls are curvy lines that sit above the nail like frosting. They look like soft waves or loops. You can do them in one color or mix two shades. The shape feels smooth and modern. It is a good choice if you want texture without charms.
Who it suits best: This style suits short to medium nails, especially square and squoval shapes. It is lovely for work, school, and everyday wear. Neutral swirls look soft on every skin tone, while bright swirls feel playful. It is a good idea if you want art that is low and snag-free.
Quick styling tip: Keep swirls simple and follow the curve of your nail. Two or three loops are enough on one nail. Use a clear top coat to make them extra shiny. A matching base color makes the swirl feel like a quiet detail.
7. Rhinestone Clusters for Instant Sparkle
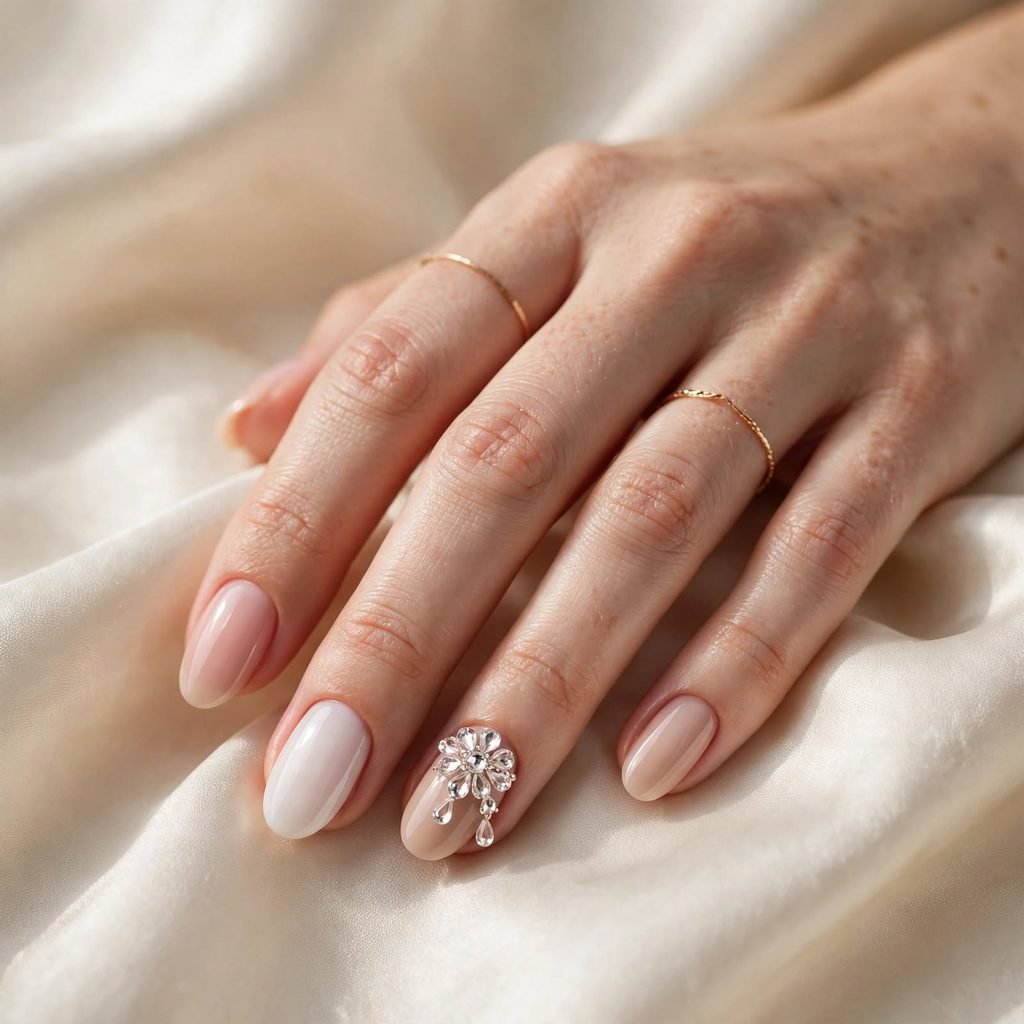
Rhinestone clusters are small groups of gems placed in a shape, like a flower or a teardrop. They bring instant glam to any base color. Clear stones look icy and fresh. Colored stones can match your outfit. Even a few stones can make a plain manicure feel special.
Who it suits best: This style suits medium to long nails of any shape. It is great for parties, concerts, and holiday nights. Silver stones glow on cool skin tones, and gold stones glow on warm ones. It is perfect if you love to sparkle.
Quick styling tip: Use different stone sizes in one cluster. This adds depth and looks more expensive. Place the largest stone first, then fill in gaps with tiny ones. Press each stone gently so it sits flat and secure.
8. Puffy Heart Charms
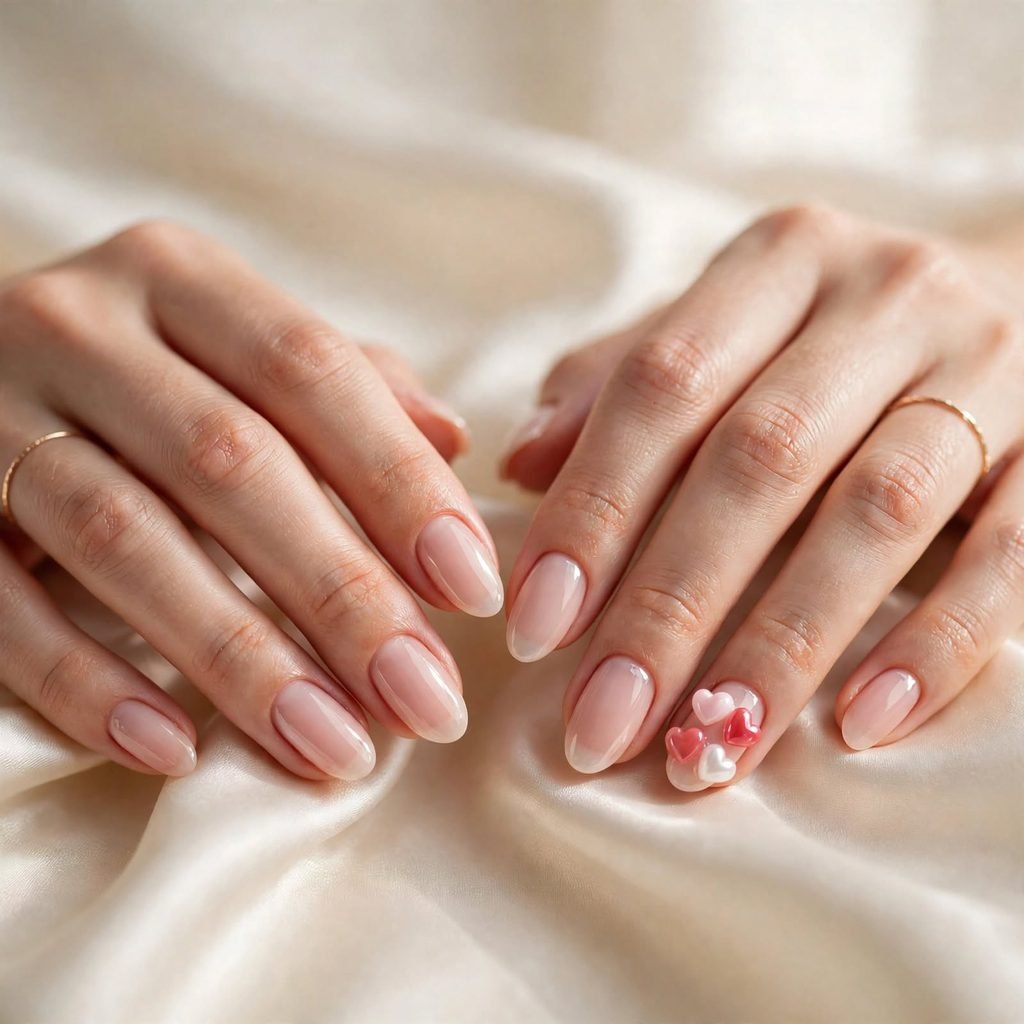
Puffy heart charms are round, soft, and super cute. They look like tiny candies sitting on your nails. You can pick red, pink, white, or even chrome shades. One heart on each hand feels playful. A row of hearts feels bold and fun.
Who it suits best: This idea suits short to medium nails with round or square shapes. It is great for date nights, friend gatherings, and fun photos. Pink hearts look soft on fair skin, and bright red hearts pop on deeper tones. It is perfect if you love sweet, cheerful style.
Quick styling tip: Keep the base color simple, like milky white or sheer pink. This lets the hearts stand out. Place them near the center of the nail for balance. Seal the edges well so they stay put.
9. Autumn Leaves and Mini Pumpkins

This idea brings the best of fall right to your fingertips. Tiny sculpted leaves in orange, gold, and brown sit on top of warm base shades. Mini pumpkins add a playful touch for the spooky season. Matte and glossy finishes look good together. It feels cozy, seasonal, and just a little bit cute.
Who it suits best: This style suits short to medium nails, especially round or oval ones. It is perfect for October, Halloween parties, and Thanksgiving dinners. Warm shades glow on every skin tone, especially rich browns and golds. It is great if you love seasonal nails with personality.
Quick styling tip: Use two or three leaves on one nail and keep the others plain. Mix matte and shiny finishes for extra depth. Choose pumpkins for just one accent nail. That keeps the set playful, not messy.
10. Frosty Snowflake Accents for the Holidays
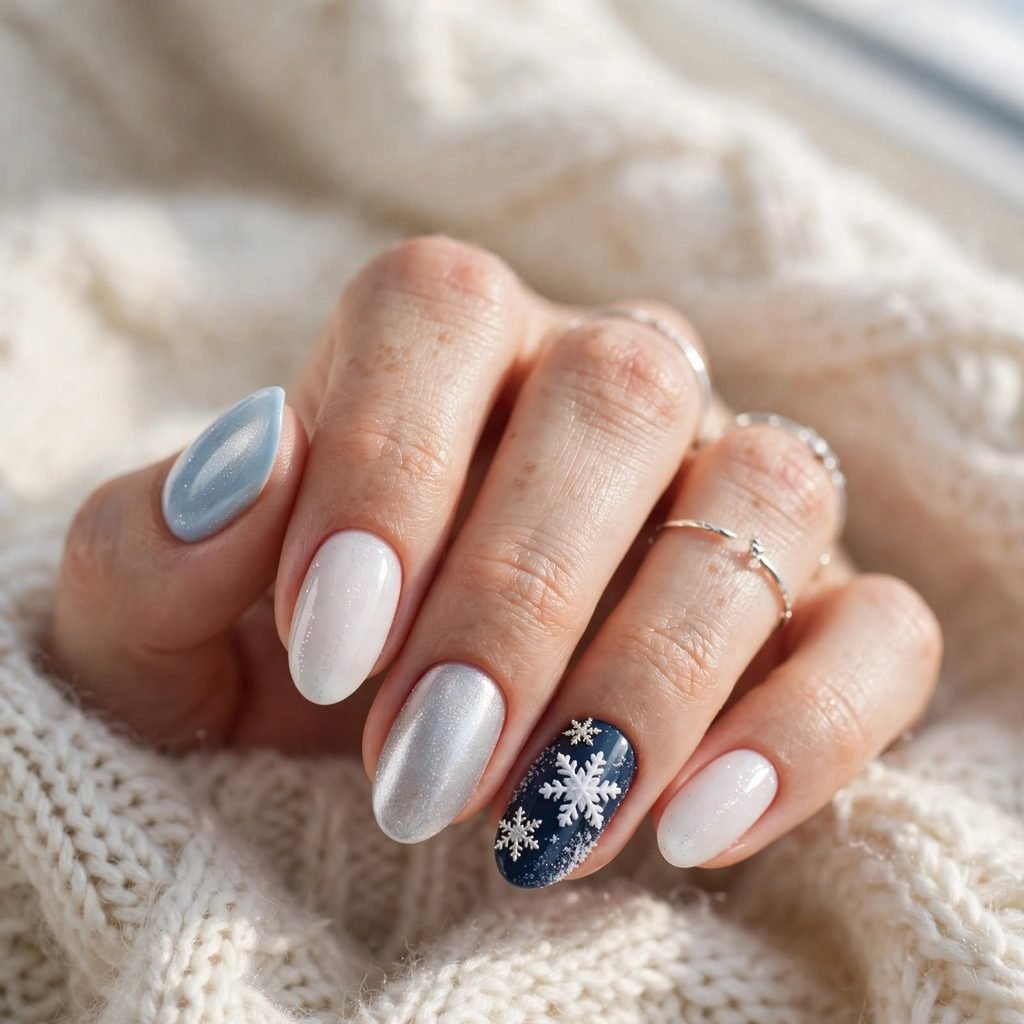
Snowflake nails bring a cool, sparkly winter feel. Tiny raised snowflakes sit on icy blue, silver, or deep navy bases. Some are made of gel, and some are small metal charms. A touch of glitter makes them look like fresh frost. They are a lovely way to celebrate the colder months.
Who it suits best: This idea suits medium nails with almond or square shapes. It works well for winter parties, ski trips, and holiday cards. Icy tones look pretty on cool skin, and deep navy looks rich on warm and deep skin. It is great if you like elegant seasonal style.
Quick styling tip: Use one large snowflake and a few tiny ones. This looks like real falling snow. Add a shimmery top coat to finish. Keep the design away from the very edge so it lasts.
11. Cozy Knit Sweater Texture
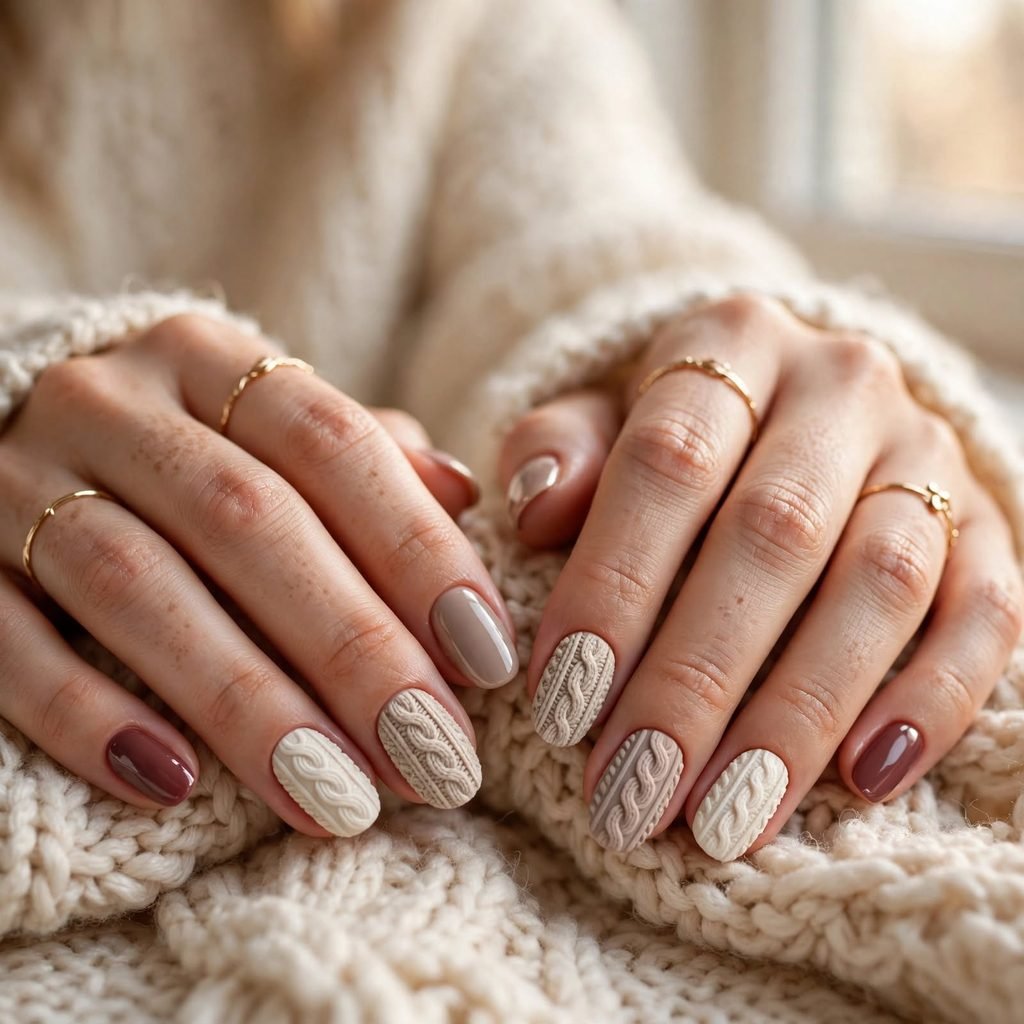
Knit sweater nails look like soft, woven fabric. Artists use thick gel to make tiny raised lines that mimic stitches. The look is warm, cozy, and a bit nostalgic. Think cream, oatmeal, forest green, or burgundy. It is the perfect nail design for chilly weather.
Who it suits best: This style suits short to medium nails with square or squoval shapes. It is great for fall days, coffee dates, and holiday gatherings. Cream and tan look soft on every skin tone, while deep green and red feel rich. It is a fun pick if you love comfy, cozy style.
Quick styling tip: Add the knit pattern on just one or two nails. Keep the rest in a matching solid color. Use a matte top coat for a soft, wool-like finish. A tiny charm, like a pearl button, adds a sweet touch.
12. Raised Gold Foil Lines
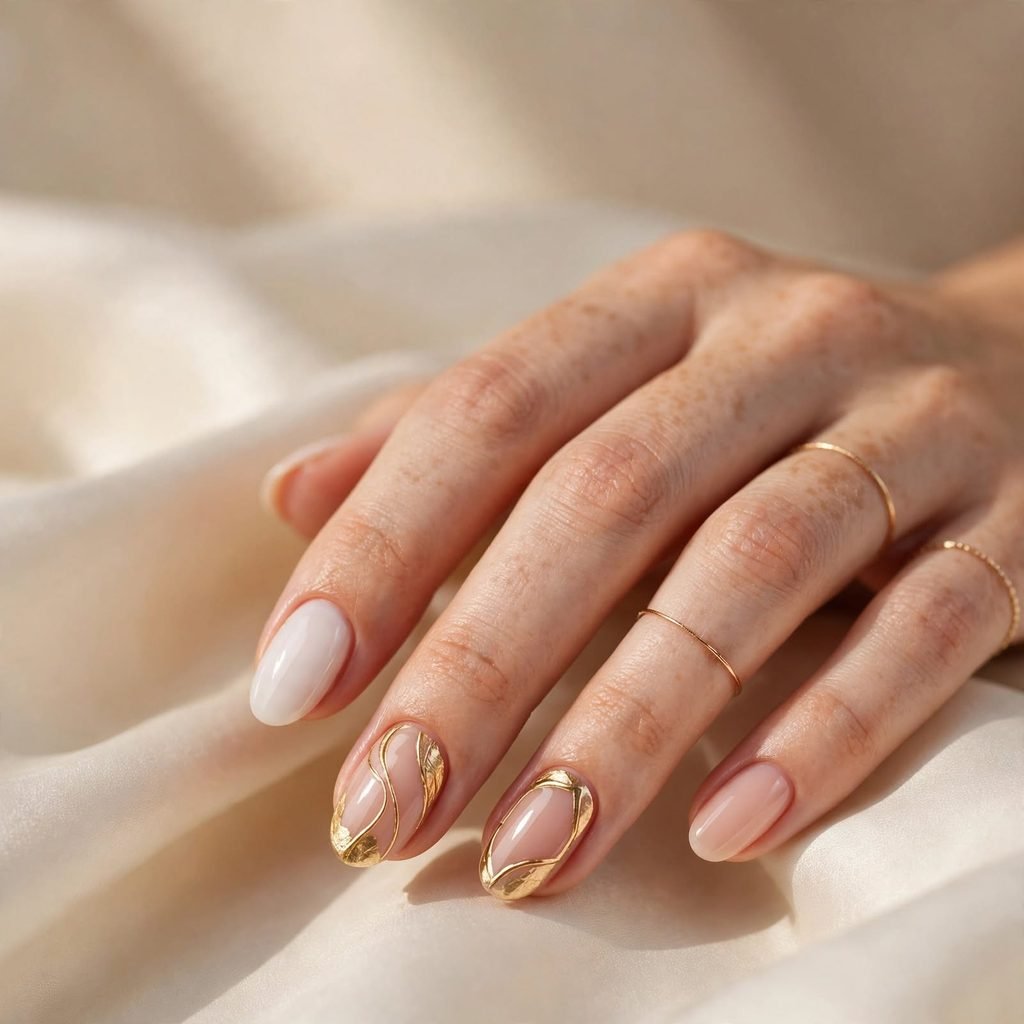
Raised gold lines add a slim, glamorous touch to any base. They are made by layering thin gel and foil in curved or straight patterns. The result looks like fine jewelry wrapped around your nails. It works well on black, nude, deep red, and white. It is chic, clean, and very easy to love.
Who it suits best: This style suits short to long nails of any shape. It is perfect for work, formal events, and special dinners. Gold looks warm on golden and deep skin, and silver lines look sharp on cooler tones. It is great if you want a modern, polished look.
Quick styling tip: Keep the lines thin and spaced out. Too many lines can feel heavy. Try a curved line that follows your cuticle. Finish with a smooth top coat to protect the foil.
13. Mermaid Shell and Scale Nails
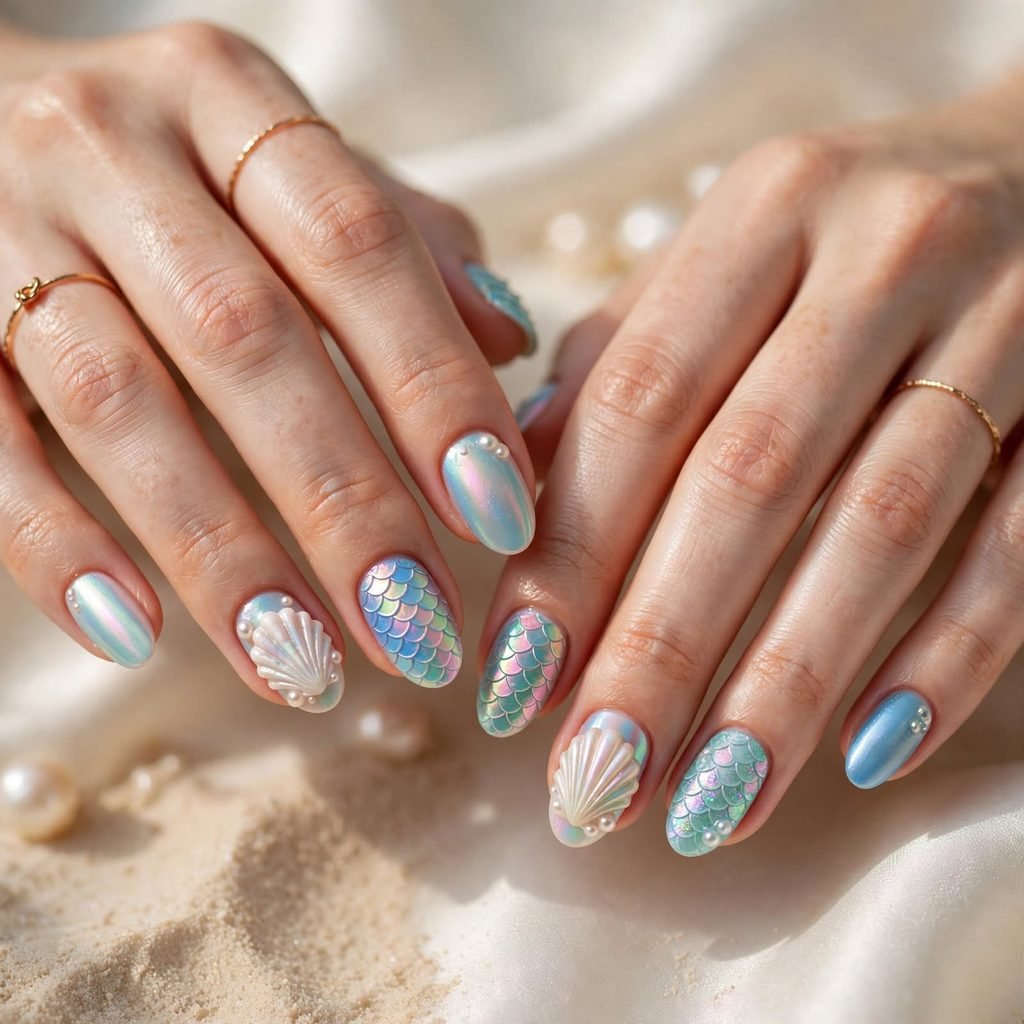
Mermaid nails bring the ocean to your hands. Tiny raised shells, scales, and pearls sit on shimmery blue, pink, or green bases. The mix of textures feels magical. A pearly top coat makes everything glow. It is a playful choice for beach days and festive nights.
Who it suits best: This idea suits medium to long nails, especially almond and coffin shapes. It is great for vacations, birthday parties, and photo shoots. Ocean tones look fresh on every skin tone, and iridescent shades shine in any light. It is perfect if you love dreamy, colorful style.
Quick styling tip: Use one shell charm on your ring finger. Add scale patterns on the other nails with a thin brush or stamp. Keep the colors in the same family so the set feels calm. A glossy finish brings out the shimmer.
14. Tiny Stars and Moons for a Dreamy Night Sky

Star and moon nails look like a tiny night sky. Small raised stars and crescent moons sit on deep blue, black, or purple bases. A bit of glitter works like faraway lights. The look feels magical and a little mysterious. It is a lovely design for evening events and cozy nights in.
Who it suits best: This style suits short to medium nails with round or almond shapes. It is great for night outings, parties, and fun weekends. Silver stars glow on cool skin, and gold stars glow on warm and deep tones. It is perfect if you love a soft, dreamy look.
Quick styling tip: Place the moon near the cuticle and scatter the stars toward the tip. This makes a natural sky effect. Use different sizes for more depth. Add a glossy top coat to make the dark base shine.
How to Do 3D Nail Art at Home
You do not need to be a pro to try 3D nail art at home. A few simple tools and a bit of patience are enough. Start with clean, dry nails and a calm, well-lit space. Take your time, because small details need a steady hand. Here is an easy step-by-step guide.
- Prep your nails. Push back your cuticles, gently buff the surface, and wipe away dust and oil.
- Apply a base coat. Paint a thin layer and let it dry or cure fully.
- Add your color. Apply two thin coats of your chosen shade, letting each one dry or cure.
- Plan your design. Lay your charms, pearls, or gems on a clean surface so you can see the layout before you start.
- Pick up each piece. Use a dotting tool or a small wax pencil to lift tiny gems and charms.
- Glue it down. Place a small dot of builder gel or nail glue on the nail, then press the piece into it gently.
- Cure or dry it. Hold the piece in place for a few seconds, then cure or let the glue set.
- Seal the edges. Brush a thin line of top coat around each piece so it stays in place.
- Finish with top coat. Cover the rest of the nail, avoiding the raised pieces if they are delicate, and cure or dry again.
- Clean up. Wipe away any sticky layer and tidy the skin around your nails.
Cost and Time
Doing 3D nail art at home is usually the lower-cost route. You can often start with a small kit of tools, gel, and a handful of charms for about $20 to $50. After that, each new set costs just a few dollars in supplies. A full DIY set can take one to two hours, especially when you are learning. With practice, you will get faster and neater.
A salon visit costs more but saves time and effort. Simple 3D accents, like a few pearls or gems, often run about $10 to $25 extra on top of a basic manicure. Fully sculpted designs, like flowers and bows on every nail, can reach $60 to $150 or more. Most salon sets take between one and three hours. With good care, gel and acrylic designs can last two to four weeks.
Care Tips
Taking care of 3D nails helps them last and keeps your natural nails healthy. Wear gloves when you wash dishes, clean, or garden. Water and strong soaps can loosen charms and dull your top coat. Try to avoid using your nails as tools to open cans or scrape stickers. These small habits can save your design from chipping.
Keep your cuticles soft with a little oil every day. Healthy cuticles make your nails look neat and help them grow strong. Be gentle when you pull on sweaters, hair ties, or tights, since raised pieces can catch. If a charm lifts, glue it back down right away so it does not pull at your nail. When it is time to remove your set, soak it off safely or visit a nail tech, and never rip it off.
Frequently Asked Questions
1. Is 3D nail art bad for my natural nails?
3D nail art is not harmful on its own. Problems usually come from rough removal or too much filing. Always take your set off gently with a soak or with help from a nail tech. Give your nails a short break and use cuticle oil between sets. This keeps them strong and healthy.
2. How long does 3D nail art last?
Most 3D nail art lasts about two to four weeks. The time depends on how you treat your hands and how well the pieces were sealed. Gel and acrylic last longer than regular polish. Small charms may come loose sooner if they get snagged. Good prep and a strong top coat make a big difference.
3. Can I do 3D nail art on short nails?
Yes, you can! Short nails look great with small designs like pearls, tiny flowers, and thin raised lines. Choose pieces that sit low and flat so they do not catch on things. Keep the design on one or two nails if you want a cleaner look. Short nails can be just as stylish as long ones.
4. Will 3D nails get in the way of daily tasks?
They can feel a little different at first. Tall charms and big bows may catch on clothes or hair. If you type or work with your hands a lot, choose low, smooth designs. Place the pieces toward the center of the nail instead of the tip. You will get used to it quickly.
5. What is the easiest 3D nail art for beginners?
Pearls, tiny gems, and water droplets are the easiest to start with. They need only a few tools and very little skill. You can place them in simple patterns, like a line or a small cluster. If you make a mistake, they are easy to fix. Once you feel confident, try small flowers or bows.
6. How do I stop charms from falling off?
Start with clean, oil-free nails so the glue can hold well. Use the right amount of gel or glue, not too much and not too little. Press each piece gently and hold it for a few seconds. Seal the edges with top coat for extra strength. Avoid heavy hand work and hot water for the first day.
7. Can I mix 3D nail art with regular polish?
Absolutely! A simple painted base looks great with just one or two 3D accents. This mix keeps your set balanced and easy to wear. Choose colors that match or contrast softly with your charms. Many people find this the most fun way to enjoy 3D nail art. It also saves time and money.
Final Thoughts
If you love a soft, clean look, go for the simple vibe. Pearls, water droplets, and gel ribbon swirls add texture without much fuss. They are easy to wear every day and easy to love. These styles fit work, school, and casual outings. You can start here if 3D nail art is new to you.
If you want to feel a little fancy, try the glam vibe. Rhinestone clusters, raised gold lines, bows, and snowflakes bring sparkle and shine. They are perfect for parties, holidays, and dinners out. A few well-placed details can make your hands feel dressed up. Pick one or two nails and let them shine.
If you love to stand out, choose the bold vibe. Butterfly wings, mermaid shells, big sculpted flowers, and starry skies make a loud, happy statement. They show off your personality and make every photo more fun. Mix colors, play with shapes, and try something new. Your nails are your tiny canvas, so enjoy it!
Thanks for reading, and I hope this list of 3D nail art ideas sparks some fun for your next manicure. Pick your favorite, try it out, and make it your own. Be kind to your nails and take breaks when they need it. Have fun, and happy nail art!