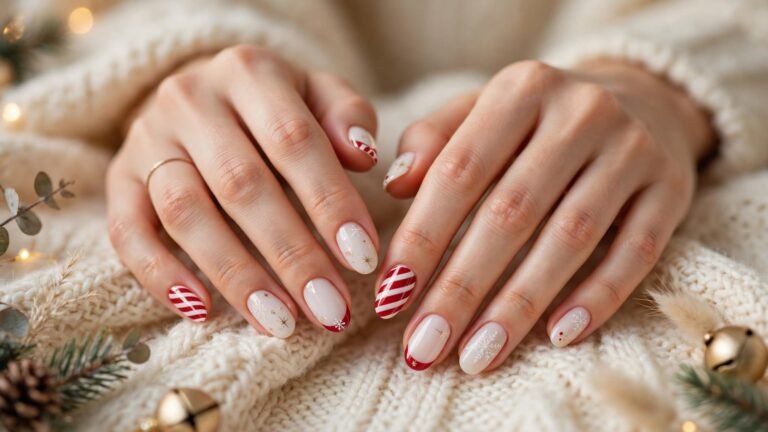
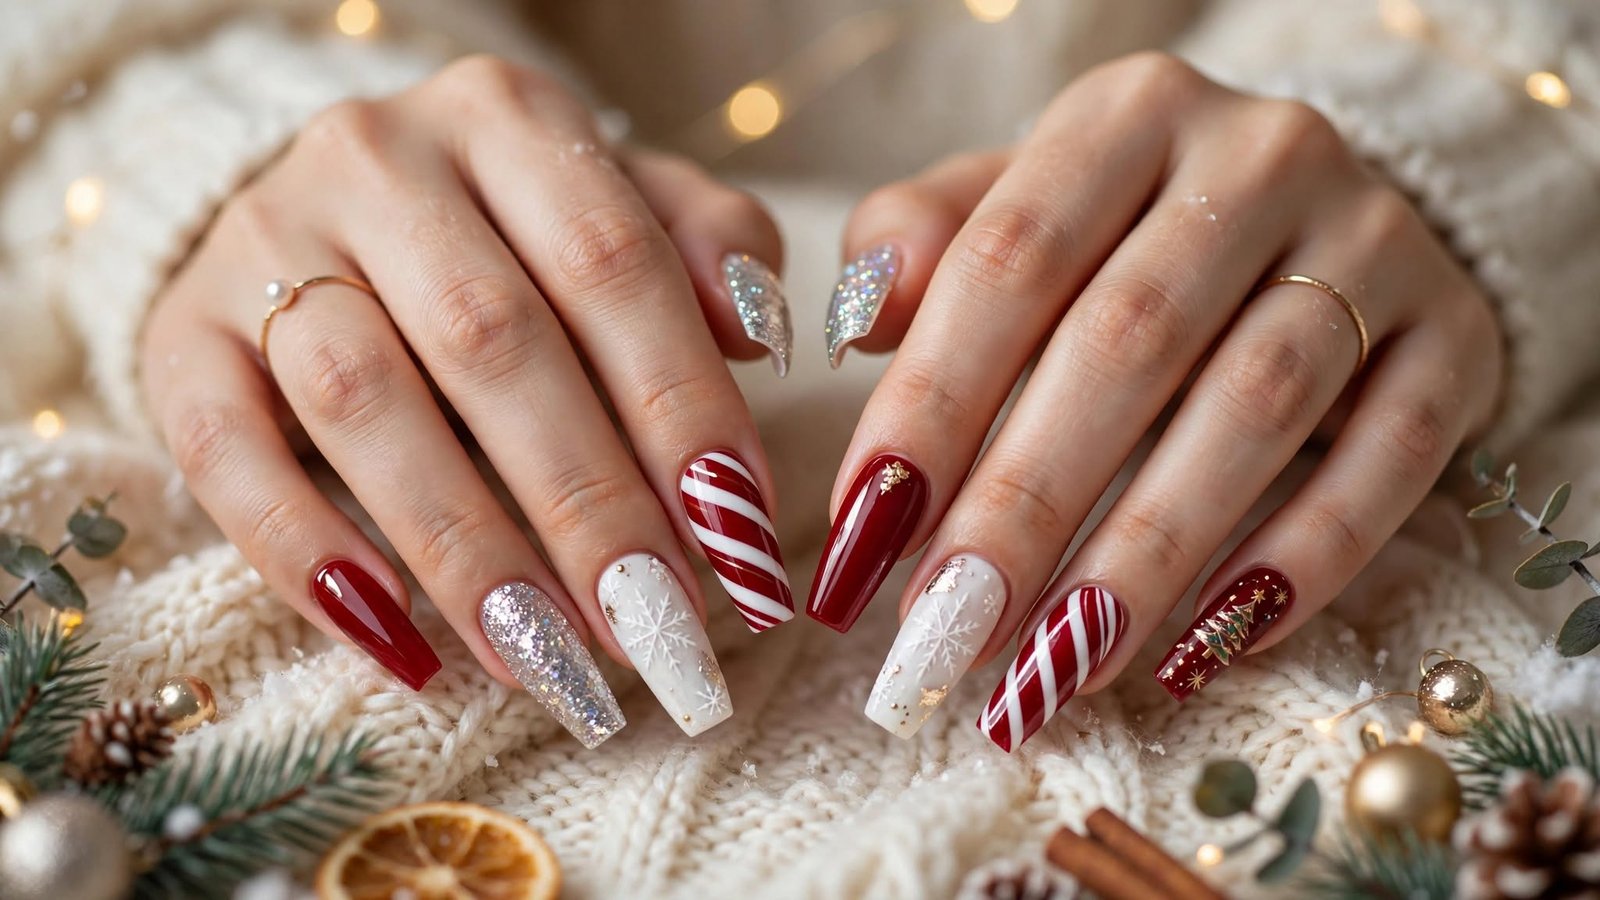
14 Christmas Nails Acrylic Ideas for a Festive, Long-Lasting Manicure
Want Christmas nails acrylic styles that stay pretty through every party, gift swap, and family dinner? You are in the right place. Acrylic nails are strong, shapely, and perfect for holiday designs, since they can handle glitter, charms, and bold colors. In this guide, you will find 14 festive ideas for every length and mood. We also cover trends, how to choose your set, and simple steps to try at home.
Why Christmas Nails Acrylic Sets Are So Popular Right Now
Acrylics are a top pick for the holidays because they last. December is busy, and a set that holds up for three or four weeks takes one thing off your list. Acrylic also lets you build a clean shape, whether you like short squares or long almonds. That strong base makes it easier to add 3D art, chrome, and glitter without chips. No wonder so many people book a Christmas nails acrylic set before the season starts.
Trends this year lean in two directions. Some people want soft, sheer, “quiet luxury” looks, like milky whites and deep burgundy. Others want fun, festive art, like bows, sweater texture, and candy cane swirls. Short and medium lengths are rising because they feel easier for daily life. Acrylic itself has been around since the 1950s, and today it is more polished and more creative than ever.
How to Pick the Right One for You
Start with your lifestyle and nail length. If you type, cook, or lift a lot, pick short or medium acrylics in a round, square, or soft almond shape. Long coffin and stiletto shapes look dramatic, but they take more care and can snap if you are rough with them. Think about the art too, because 3D charms and heavy glitter can catch on sweaters. Choose the amount of detail that fits your week.
Skin tone and occasion also help you decide. Warm tones glow in golds, rich reds, and olive greens, while cool tones shine in silver, icy blue, and blue-based reds. Neutral tones can wear nearly anything. For an office party, soft shades and small accents look polished. For a night out, go bigger with chrome, glitter, or bold art.
One more tip before you book or buy supplies. Acrylic is not a beginner craft, and it takes practice to get smooth results. If your natural nails are thin, painful, or damaged, wait until they feel healthy first. A good salon tech can also tell you whether acrylic is right for your nails. Learning at home is possible, but be patient and start with a simple set.
Table of Contents
- Short Round Red Acrylics for Everyday Holiday Wear
- Almond Candy Cane Swirl Acrylics
- Long Coffin Snow White With Silver Snowflakes
- Square Forest Green With Gold Foil Flecks
- Burgundy Velvet Shimmer Acrylics
- Classic Red French Tip Acrylics
- Gold Glitter Ombre Acrylics
- Mini Plaid Accent Acrylics
- 3D Red Bow Accent on a Nude Base
- Cozy Sweater Texture Acrylics
- Icy Blue Ombre Stiletto Acrylics
- Matte Black Coffin With Gold Stars
- Santa Hat Tip Acrylics
- Gingerbread Brown With White Icing Lines
14 Christmas Nails Acrylic Ideas
A quick safety note for all the at-home steps below: work in a room with fresh air, keep products off your skin, and never use acrylic on nails that are sore, infected, or damaged.
1. Short Round Red Acrylics for Everyday Holiday Wear
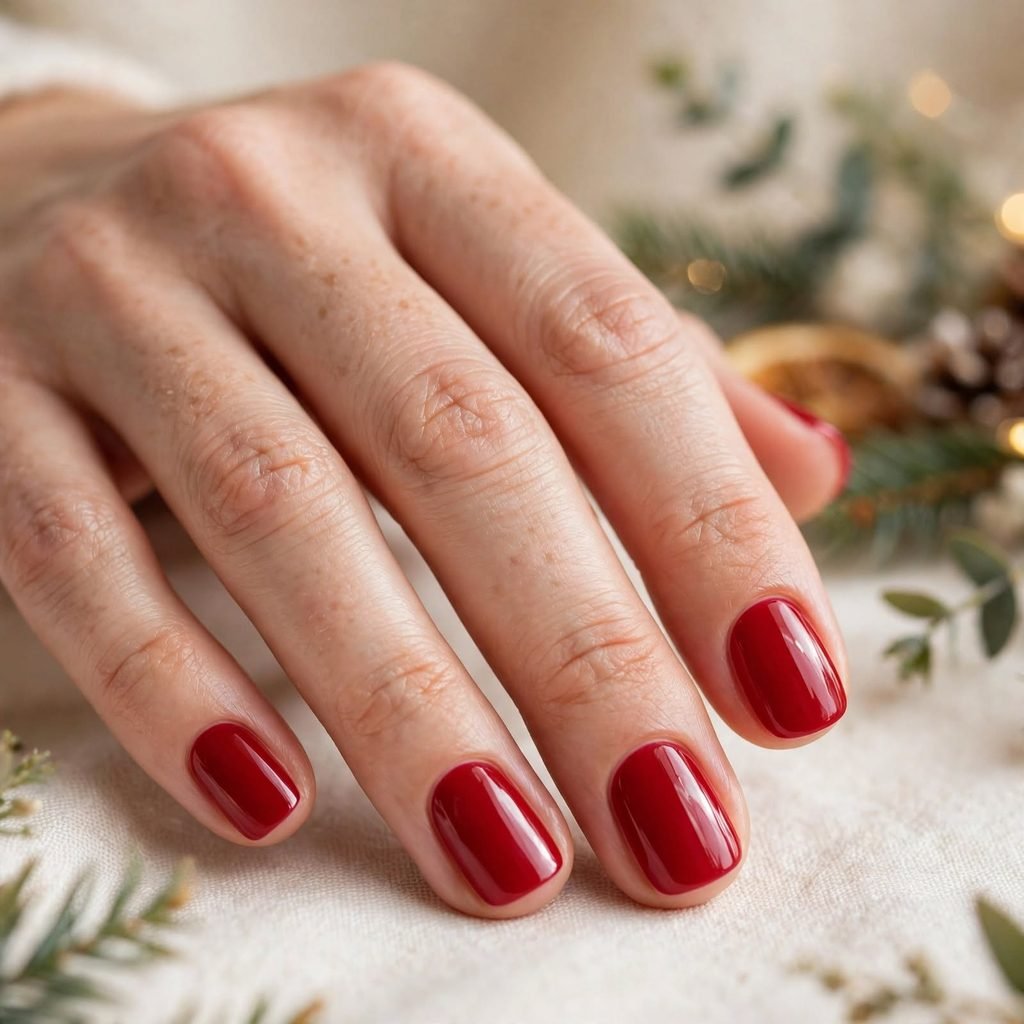
A short round red set is the easiest way to enjoy Christmas nails acrylic without any fuss. The rounded shape is strong, soft, and hard to snag. Red is bright and festive, and it matches nearly every outfit. These nails are great for people who type or work with their hands. You get holiday color with almost no worry.
Who it suits best: Beginners, busy people, and anyone who wants a classic look.
Quick styling tip: Pick a cherry red for a friendly feel or a deep true red for a dressy look.
How to do this at home:
- Prep your nails by pushing back cuticles, buffing the shine off, and wiping clean.
- Apply a small bead of acrylic at the nail tip, then blend it toward the cuticle.
- Shape it round with a file once it has hardened.
- Paint two coats of red polish and add a glossy top coat.
Cost & time: DIY has a starter cost of about 30–60 and takes 1.5–2 hours. A salon set costs about 40–80. It lasts 2–4 weeks.
Care tips: Use cuticle oil daily, and avoid opening cans or packages with your nails.
2. Almond Candy Cane Swirl Acrylics
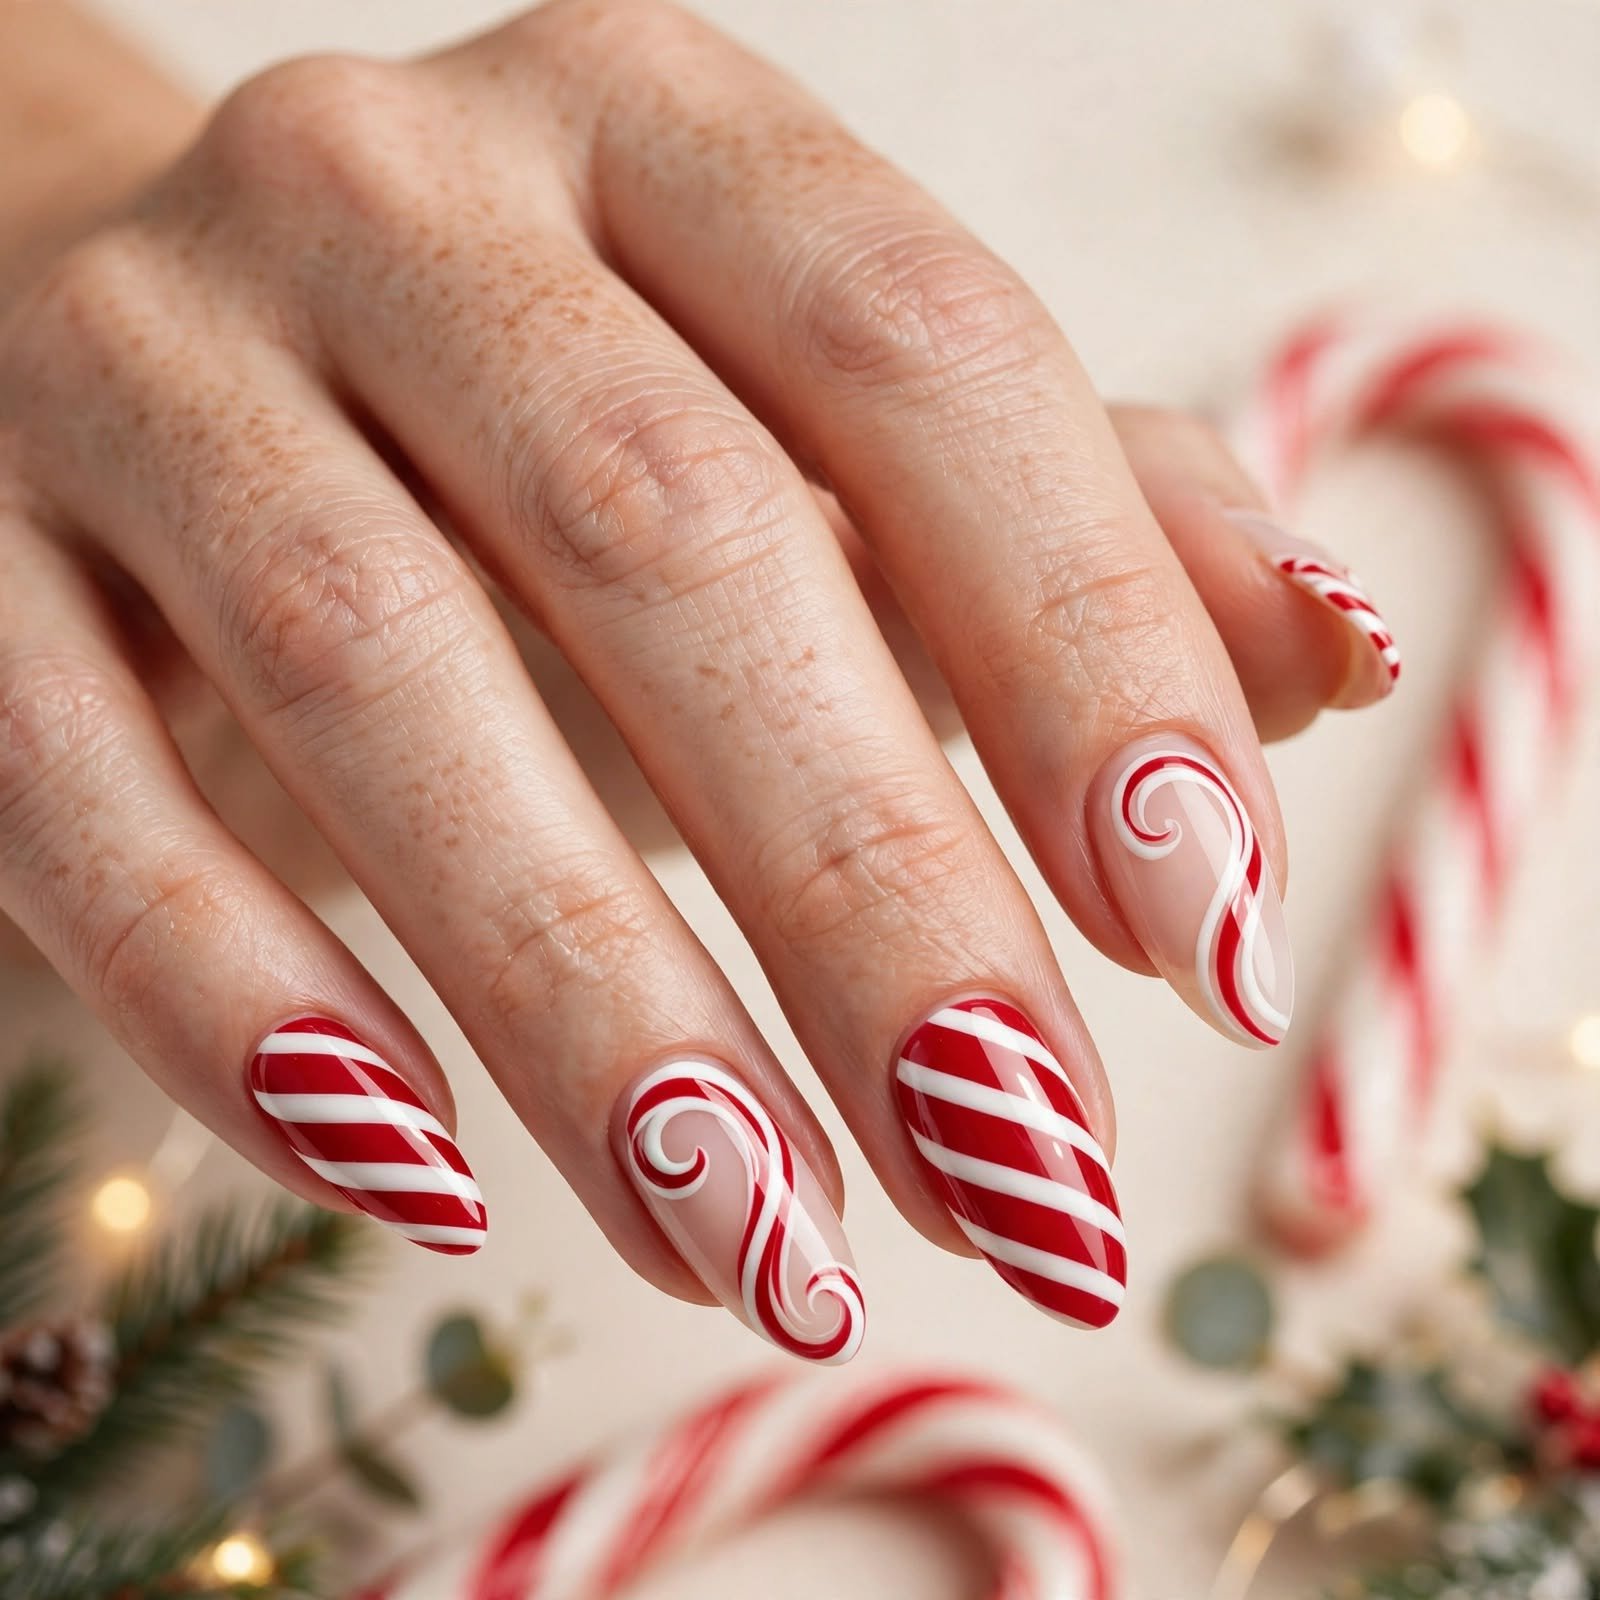
Almond acrylics have a soft point that looks graceful and a little dreamy. Add red and white swirls and you get a candy cane that is easy to wear. The swirls can be thin and neat or wide and playful. This design feels sweet without being childish. It looks lovely in photos next to tree lights.
Who it suits best: Medium length lovers and anyone who likes playful art.
Quick styling tip: Use swirls on two or three nails and keep the rest solid white or pale pink.
How to do this at home:
- Build and shape your almond nails, then smooth the surface.
- Paint a white base and let it dry.
- Draw curved red lines with a thin brush to make the swirl.
- Add a glossy top coat and clean the edges.
Cost & time: DIY runs about 30–60 to start and takes 2–2.5 hours. A salon charges 50–95 with art. It lasts 2–4 weeks.
Care tips: Keep the nails dry for the first few hours, and file any rough tips lightly instead of picking at them.
3. Long Coffin Snow White With Silver Snowflakes
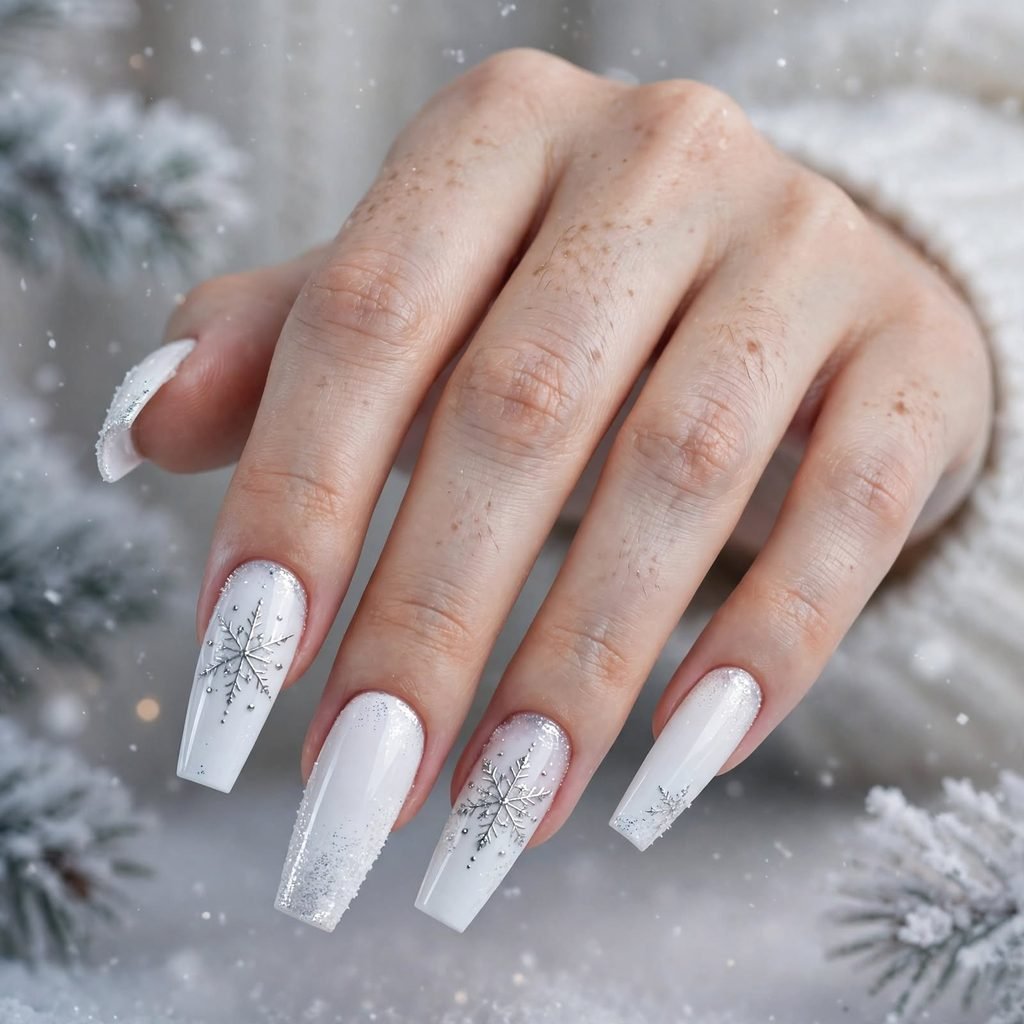
Long coffin nails in snow white look like a winter wonderland. Silver snowflakes add a bit of sparkle and a hint of frost. The flat tip of the coffin shape gives you plenty of room for art. This style feels glamorous and dramatic. It is a favorite for holiday parties and photos.
Who it suits best: Long nail fans and people who want a bold statement.
Quick styling tip: Keep the snowflakes small and spread out so the white stays clean.
How to do this at home:
- Sculpt long coffin nails and file the tip flat and even.
- Paint two coats of white polish.
- Use a fine brush to draw snowflakes in silver, or place tiny flat gems.
- Seal everything with a thick top coat.
Cost & time: DIY costs 35–65 to start and takes 2.5–3 hours. A salon set costs 60–110. It lasts 3–4 weeks.
Care tips: Long nails break more easily, so wear gloves while cleaning and use the pads of your fingers for tasks.
Internal link of christmas nails simple
4. Square Forest Green With Gold Foil Flecks
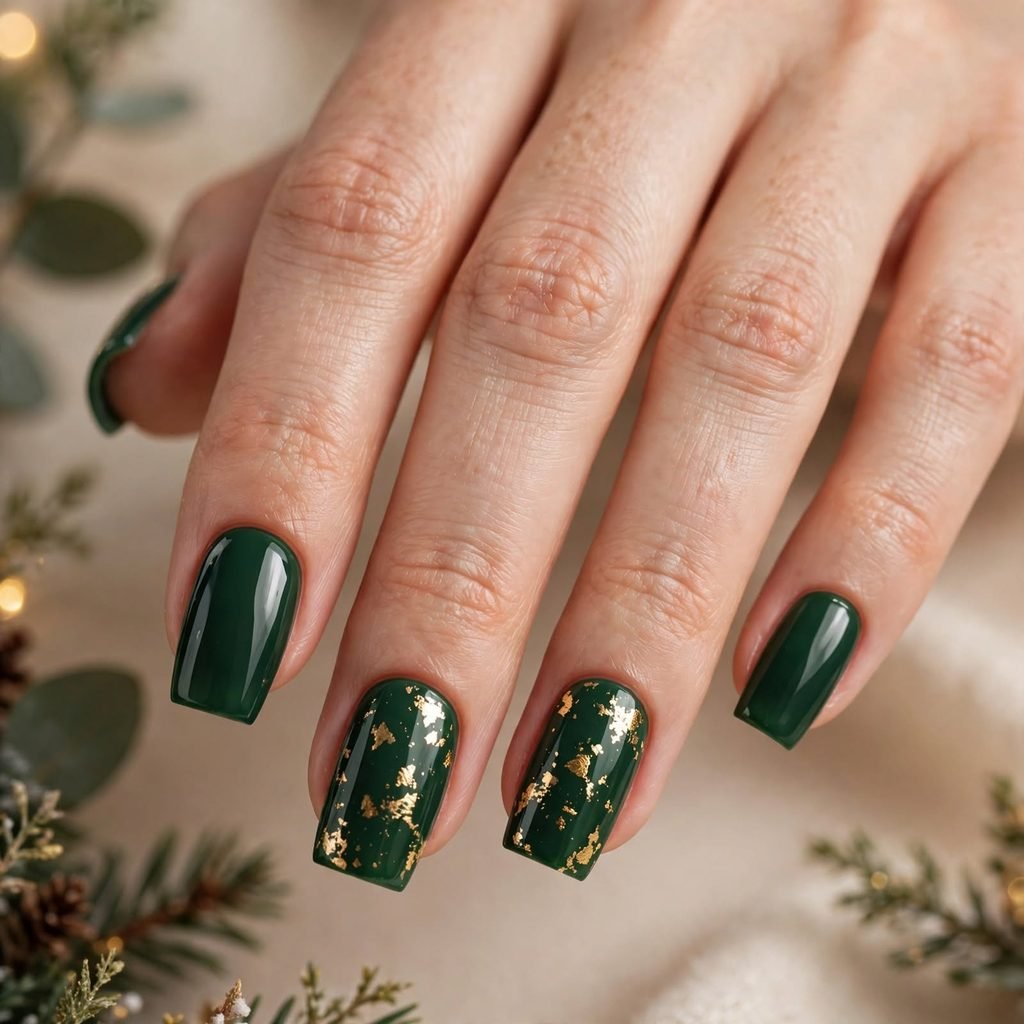
Forest green feels rich, warm, and very Christmas tree. Gold foil flecks look like tiny ornaments caught in the light. A square shape keeps the look clean and modern. The foil is easy to press on and does not need drawing skills. It is a lovely pick if you want color and sparkle together.
Who it suits best: Warm and neutral skin tones, plus anyone who loves earthy shades.
Quick styling tip: Place the foil near the cuticle or only on two nails for a calm look.
How to do this at home:
- Shape your nails into squares and smooth them.
- Paint two coats of deep green and let them dry.
- Dab small pieces of gold foil on the nails with a stick.
- Cover with a smooth top coat to hold the foil flat.
Cost & time: DIY costs about 35–60 to start and takes 2–2.5 hours. A salon charges 50–90. It lasts 2–4 weeks.
Care tips: Foil can lift if the top coat is thin, so add a second top coat layer if edges feel rough.
5. Burgundy Velvet Shimmer Acrylics
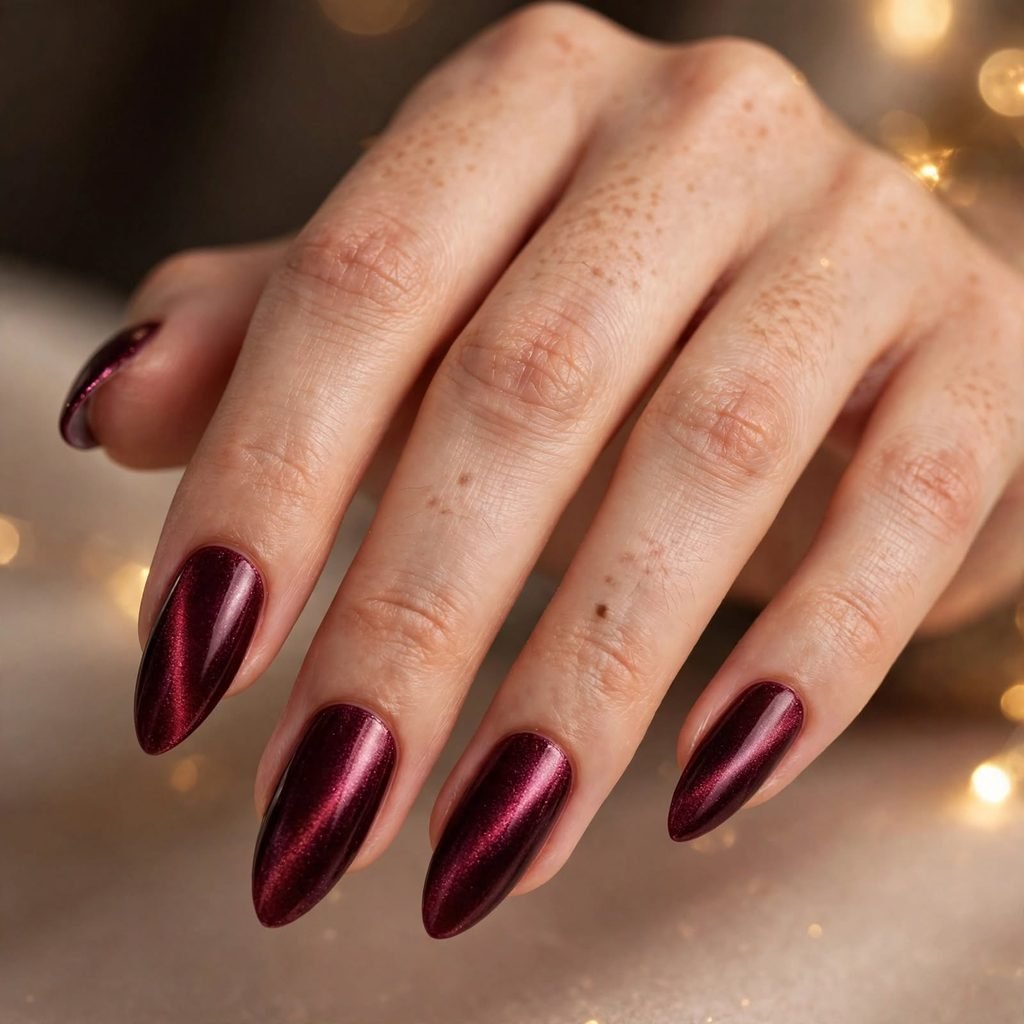
Burgundy has a moody, grown-up feel, and a velvet shimmer makes it glow. The shine moves when you turn your hand, almost like soft fabric. Medium almond or oval acrylics suit this look beautifully. It feels expensive without being loud. It also works from early December through New Year’s Eve.
Who it suits best: Cool and neutral skin tones and anyone dressing up for evening events.
Quick styling tip: Match it with dark lipstick or a black dress for a polished look.
How to do this at home:
- Build and shape medium almond nails.
- Paint two even coats of burgundy polish and let them dry.
- Brush on a shimmer top coat to add the velvet glow.
- Clean the skin around your nails with a small brush and remover.
Cost & time: DIY costs 35–65 to start and takes about 2–2.5 hours. A salon charges 55–100. It lasts 3–4 weeks.
Care tips: Dark shades can stain natural nails, so use a base coat and let nails rest after removal.
6. Classic Red French Tip Acrylics

A red French tip is a simple twist on a classic that fits the season perfectly. The nude or pink base keeps things soft, while the red tip adds the Christmas spark. Acrylic gives you a crisp, even smile line that lasts. The tips can be thin and modern or thick and bold. It is a great choice if you want something both festive and neat.
Who it suits best: Anyone who likes a polished look that can go from work to a party.
Quick styling tip: Try a slightly slanted tip for a trendy shape.
How to do this at home:
- Apply a sheer pink acrylic base and shape it.
- Use red polish or red acrylic to paint a curved line on each tip.
- Clean up the line with a thin brush and remover.
- Finish with a glossy top coat.
Cost & time: DIY costs 35–60 to start and takes about 2–2.5 hours. A salon charges 50–95. It lasts 2–4 weeks.
Care tips: The red tip can fade if you scrub it with harsh cleaners, so use gloves for chores.
7. Gold Glitter Ombre Acrylics
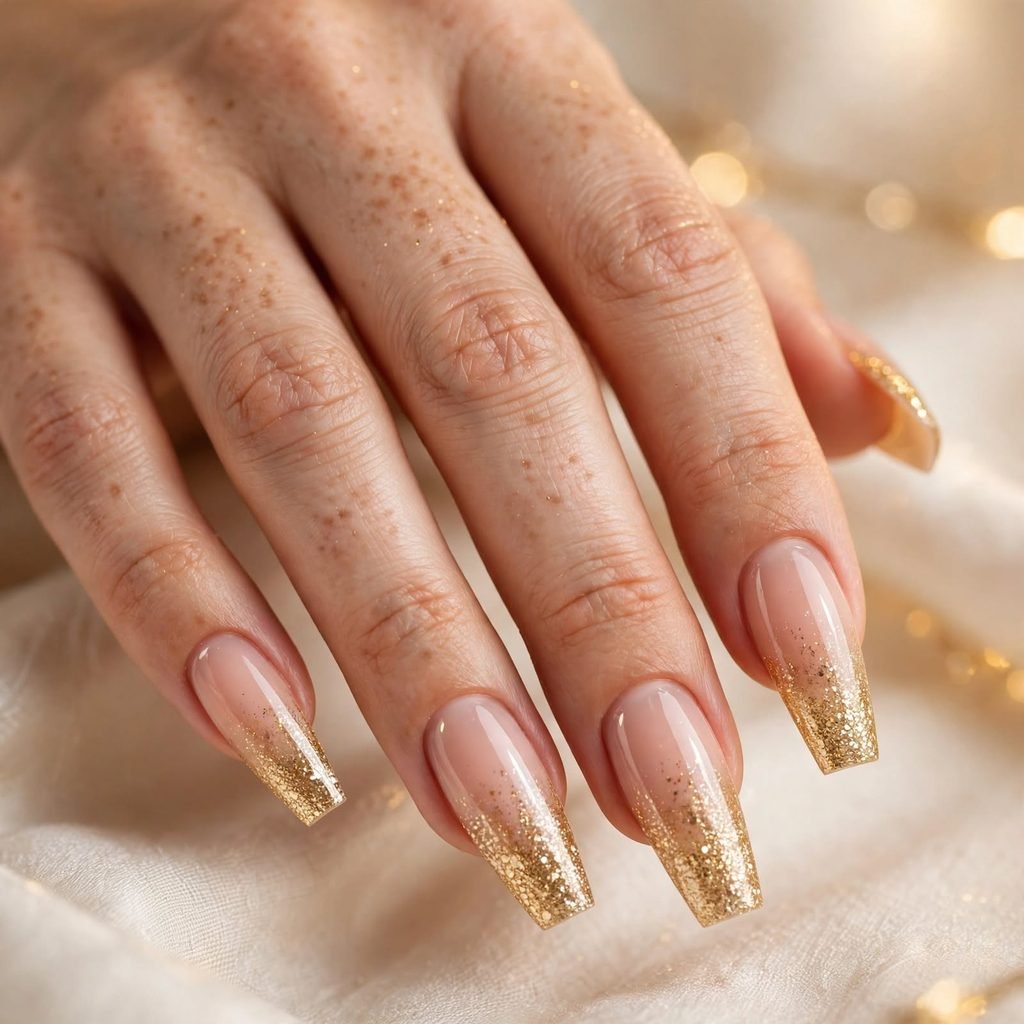
A gold glitter ombre fades from clear or nude at the cuticle to bright sparkle at the tip. It looks like candlelight on your hands. The soft fade makes regrowth less obvious as the weeks go by. It is a good pick if you love shine but want it to look smooth. Medium to long nails show off this style best.
Who it suits best: Glitter fans and anyone planning a party or holiday photoshoot.
Quick styling tip: Choose a fine champagne glitter for a classy glow.
How to do this at home:
- Build and shape your nails, then smooth the surface.
- Brush glitter at the tips, working a little toward the middle.
- Press a sponge over the glitter to blend the fade.
- Add a thick top coat to cover the rough texture.
Cost & time: DIY costs 35–65 to start and takes about 2.5 hours. A salon charges 55–100. It lasts 3–4 weeks.
Care tips: Glitter can be tough to remove, so soak your nails in remover and never scrape them hard.
8. Mini Plaid Accent Acrylics

Plaid reminds us of flannel pajamas and cozy holiday mornings. On acrylics, it turns into a neat accent that looks tiny but very detailed. Pick red, green, or black as your main colors. You only need plaid on one or two nails to get the effect. The rest can stay solid so the whole set looks calm.
Who it suits best: Cozy-style lovers and people who enjoy a little pattern.
Quick styling tip: Match the plaid colors to the solid polish on your other nails.
How to do this at home:
- Paint all nails in your base color and let them dry.
- On the accent nails, draw two thin lines up and two across with a fine brush.
- Add a few thinner lines in between.
- Seal with a top coat and fix any wobbly lines.
Cost & time: DIY costs 35–60 to start and takes about 2.5 hours. A salon may charge 55–100. It lasts 2–4 weeks.
Care tips: Thin lines can wear off at the tips, so keep a small top coat handy to refresh them.
9. 3D Red Bow Accent on a Nude Base
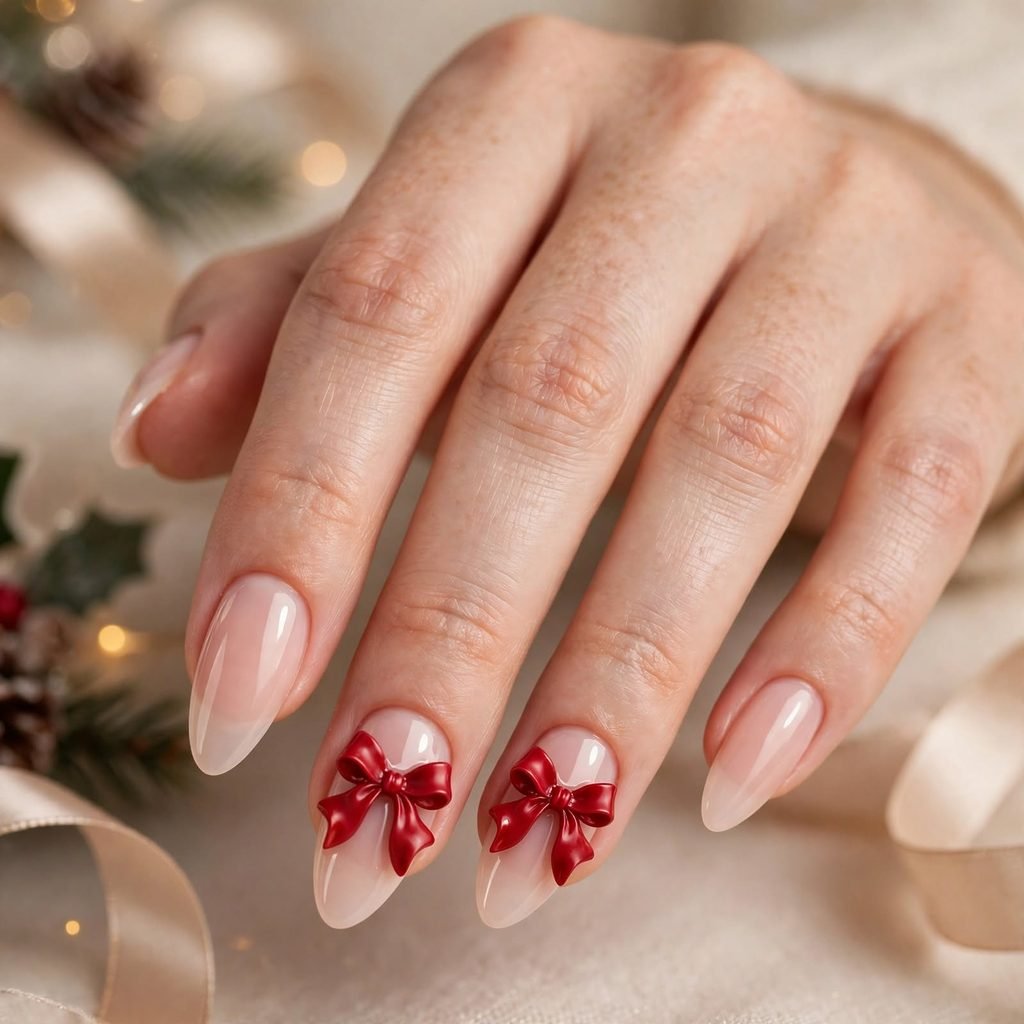
A 3D bow looks like a tiny gift sitting on your nail. On a nude base, the red bow stands out in a pretty and delicate way. You can shape the bow from acrylic or use a small charm. It is one of the cutest ways to wear Christmas nails acrylic styles. Keep the other nails simple so the bow gets all the attention.
Who it suits best: Anyone who loves sweet and feminine details.
Quick styling tip: Put the bow on your ring finger or thumb so it does not catch on things.
How to do this at home:
- Prep and shape short or medium nails in a soft nude.
- Shape two small loops and two tails from red acrylic, or use a ready-made bow.
- Attach the bow to one nail with a small bead of acrylic.
- Seal the edges with a top coat, and keep it away from the skin.
Cost & time: DIY costs 35–65 to start and takes about 2.5 hours. A salon charges 55–100. It lasts 2–4 weeks.
Care tips: Be gentle with the bow, since 3D art can pop off if you snag it on clothes.
10. Cozy Sweater Texture Acrylics

Sweater nails have a raised, knit-like texture that feels as warm as it looks. You build the texture right into the acrylic so it stays in place. Cream, red, or deep green are the best colors for this style. The look is playful, soft, and very Christmas. It pairs well with chunky scarves and hot cocoa plans.
Who it suits best: People who love texture, and cozy dressers.
Quick styling tip: Use texture on one or two accent nails for a balanced look.
How to do this at home:
- Build your nails and apply a base color.
- Press small beads of acrylic in a zigzag or braid pattern.
- Let the pattern harden, then shape it gently with a file.
- Paint over the texture and seal with a top coat.
Cost & time: DIY costs 35–65 to start and takes about 3 hours. A salon charges 60–110. It lasts 2–4 weeks.
Care tips: Brush the texture with a soft toothbrush to remove lint, and avoid rubbing it on rough fabric.
11. Icy Blue Ombre Stiletto Acrylics
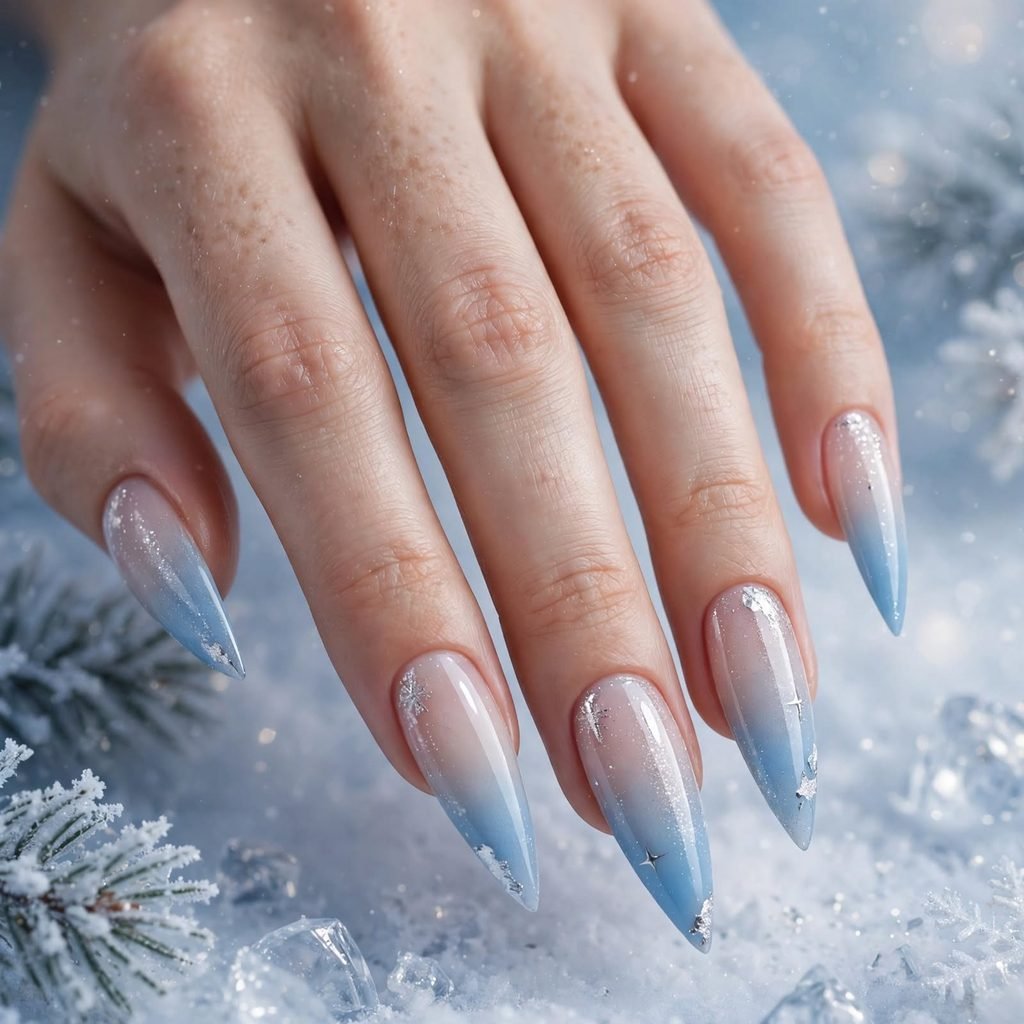
Icy blue ombre nails look like frost on a window. A stiletto shape adds sharp, high-fashion drama. The color fades from clear at the base to pale blue at the tip. Silver glitter or tiny crystals can add a winter sparkle. It is a unique pick if you like cool tones more than red and green.
Who it suits best: Bold dressers with cool undertones and people who love a modern look.
Quick styling tip: Add a few tiny crystals near the cuticle for a frosted effect.
How to do this at home:
- Build a long stiletto shape and file it carefully.
- Brush pale blue at the tips and blend toward the middle with a sponge.
- Add a little silver glitter or small crystals.
- Seal with a clear, thick top coat.
Cost & time: DIY costs 40–70 to start and takes about 3 hours. A salon charges 65–115. It lasts 3–4 weeks.
Care tips: Stiletto tips can break easily, so avoid using your nails as tools and keep your set filed smooth.
12. Matte Black Coffin With Gold Stars
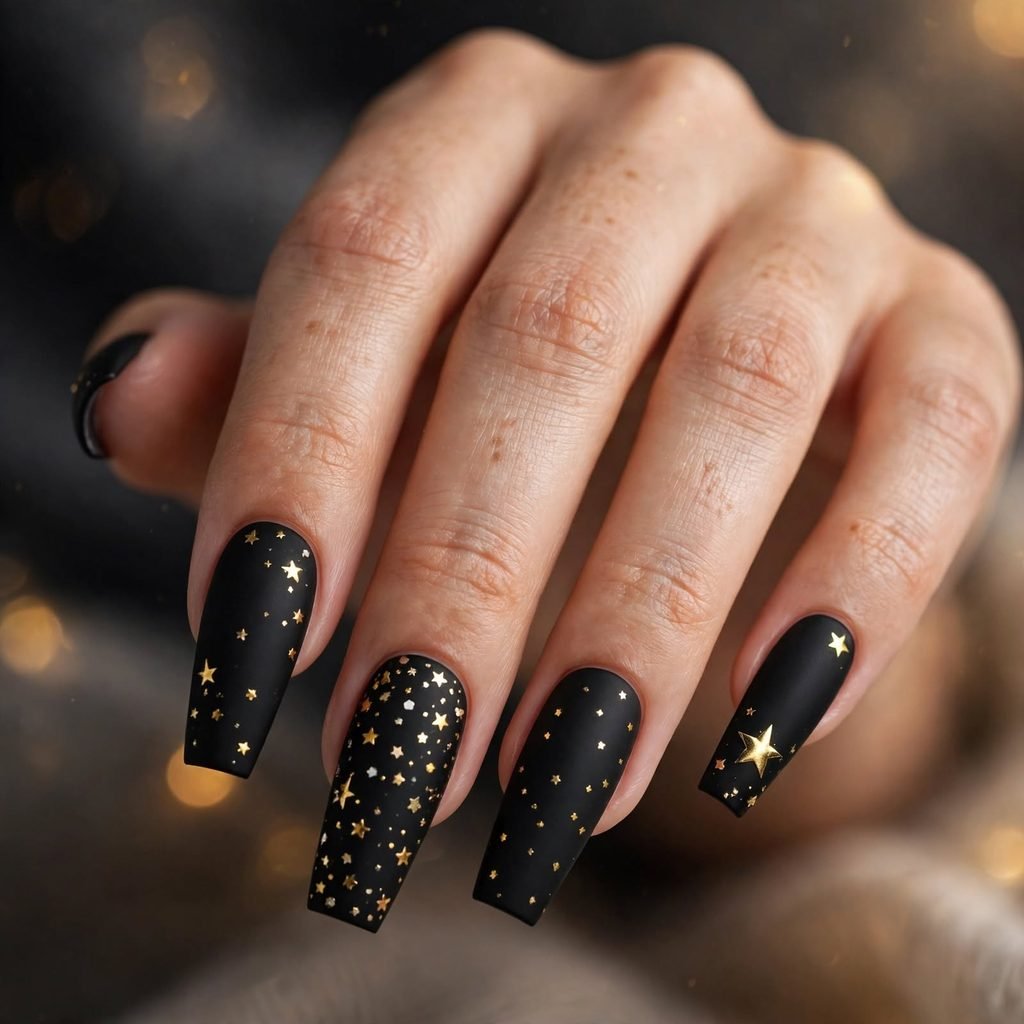
Matte black nails look bold and sleek, and they stand out at Christmas. A few tiny gold stars make the look feel festive. The coffin shape gives a clean, modern outline. The contrast between flat black and shiny gold is stunning. This is perfect if you like the holidays but not the usual colors.
Who it suits best: Edgy dressers and anyone planning a night out.
Quick styling tip: Stick to two or three stars on one nail and keep the rest plain.
How to do this at home:
- Build coffin-shaped nails and smooth the surface.
- Paint two coats of black and let them dry fully.
- Add a matte top coat to the whole nail.
- Use a thin brush or tiny stickers to place gold stars.
Cost & time: DIY costs 40–65 to start and takes about 2.5 hours. A salon charges 55–100. It lasts 2–4 weeks.
Care tips: Matte finishes show oil, so wash your hands gently and avoid heavy hand creams on the nails.
13. Santa Hat Tip Acrylics

Santa hat tips use a red nail with a white fluffy tip, like the brim of a hat. A small white dot at the end can look like the pom-pom. This style is playful, cute, and easy to understand at a glance. It works well on short and medium shapes. It is a fun choice for family parties and kids’ events.
Who it suits best: People who love cute, funny designs and who want a clear Christmas theme.
Quick styling tip: Add a tiny bit of white glitter to the tip to look like soft fur.
How to do this at home:
- Prep and shape your nails, then paint them red.
- Dab white polish along the tip to make the brim.
- Add a small white dot on the corner for the pom-pom.
- Cover with a glossy top coat.
Cost & time: DIY costs 35–60 to start and takes about 2–2.5 hours. A salon charges 50–95. It lasts 2–4 weeks.
Care tips: The white tip can pick up stains from dark food, so wear gloves while cooking.
14. Gingerbread Brown With White Icing Lines
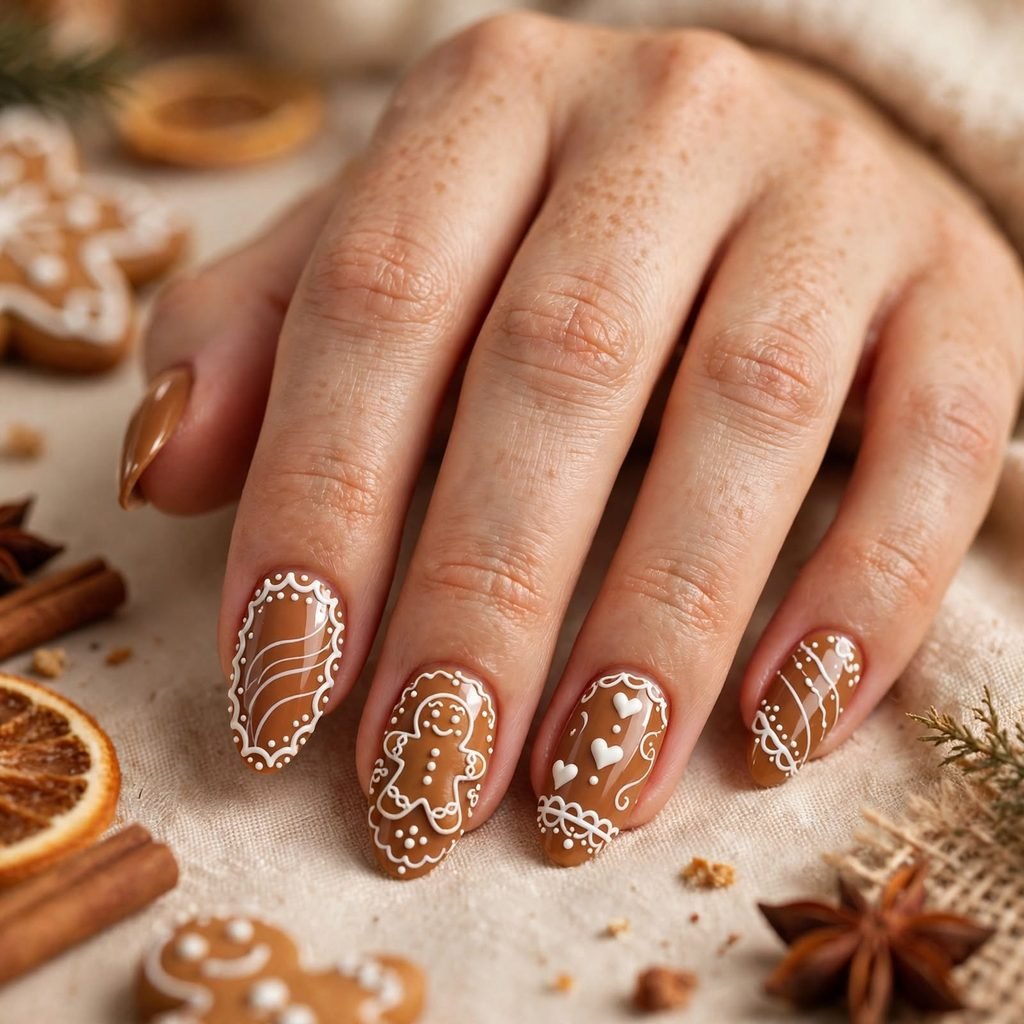
A warm gingerbread brown looks like freshly baked cookies. White icing lines on top add a sweet, playful touch. This look is calm, cozy, and a little different from red and green. Short squoval nails are a great shape for it. It is perfect for anyone who loves baking season.
Who it suits best: Warm skin tones and people who enjoy cozy, food-inspired art.
Quick styling tip: Use wavy white lines on just one nail so it feels like frosting.
How to do this at home:
- Shape short squoval nails and apply a base coat.
- Paint two coats of warm brown.
- Draw wavy white lines on a few nails with a fine brush.
- Add a tiny dot or two, then seal with a top coat.
Cost & time: DIY costs 35–60 to start and takes about 2–2.5 hours. A salon charges 50–90. It lasts 2–4 weeks.
Care tips: Keep your hands moisturized, and file down any small chips before they grow.
Frequently Asked Questions
How long do Christmas nails acrylic sets last?
Most acrylic sets last two to four weeks. That depends on your nail growth, your habits, and how well the set was done. After two or three weeks, you will likely see a gap at the cuticle. A fill appointment brings it back to a fresh look. Gentle use and regular cuticle oil help the set stay strong.
Are acrylic nails bad for your natural nails?
Acrylics are not harmful when they are applied and removed with care. Problems usually come from picking, peeling, or rough filing. If you remove them the wrong way, you can thin or damage your natural nails. Take a short break between sets if your nails feel weak. Keep your cuticles and nails moisturized to help them recover.
What is the best acrylic nail shape for Christmas designs?
It depends on your lifestyle and the look you want. Square and coffin shapes give you a flat canvas for art, glitter, and foil. Almond and stiletto shapes look elegant and elongate your fingers. Short round and oval shapes are the strongest and easiest for daily life. Pick the shape that matches how you use your hands.
Can I do acrylic nails at home?
You can, but it takes practice and patience. You need the right tools, a well-ventilated room, and a steady hand. Start with a simple design like a solid color or French tip before trying 3D art. Never use acrylic on damaged nails or sore skin. If you feel unsure, a trained nail tech can save you time and stress.
How much do Christmas nails acrylic sets cost at a salon?
A basic full set usually costs about 40–80. Fancy art, charms, chrome, or very long lengths can raise the price to $100 or more. Fill appointments cost less, often 30–55. Prices change with your city and the tech’s skill. Ask about the price before you book so there are no surprises.
How do I remove acrylic nails safely?
The safest way is to visit a salon and let a pro do it. At home, trim the length, file the top layer, and soak your nails in acetone with cotton and foil. Wait until the acrylic softens, then gently push it off. Never pry or peel it, because that can hurt your natural nail. Finish with cuticle oil and a rich hand cream.
Final Thoughts: Pick Your Christmas Nails Acrylic Vibe
If you love a simple look, try short round red acrylics, a classic red French tip, or Santa hat tips. These sets are easy to wear, easy to keep, and festive without being loud. Choose a strong shape, a glossy finish, and one small accent. You will enjoy them from the first cookie bake to the last holiday dinner.
If you want a glam look, go for gold glitter ombre, burgundy velvet shimmer, or long coffin snow white with silver snowflakes. These sets catch the light and look stunning at parties. Icy blue stilettos add a modern, frosty twist. A little sparkle goes a long way, so choose one star feature.
If you want a bold look, pick matte black with gold stars, a 3D red bow, cozy sweater texture, or gingerbread icing lines. These styles show off your personality and make people ask, “Where did you get those?” Keep one detail loud and the rest calm so the set feels balanced. Whatever you choose, wear it with confidence. Happy holidays, and enjoy every sparkle!