13 Cute Nails Christmas Ideas for a Merry and Bright Holiday Look
Christmas is coming, and your hands are about to be in every photo. From wrapping gifts to holding a hot cocoa, your nails get a lot of attention this season. The right nails christmas look makes you feel festive without wearing a reindeer sweater. This guide shares 13 easy ideas, from soft and simple to shiny and bold. You will also find trends, tips for choosing a style, home steps, costs, care advice, and answers to common questions.
Why Christmas Nails Are Having a Moment
Holiday nails have changed a lot over the years. For a long time, red and green were the only choices. Today, people mix in creamy whites, soft browns, icy chrome, and deep jewel tones. Nail art has become a small way to show your personality at every party. It is no surprise that nails christmas searches climb as soon as the weather turns cool.
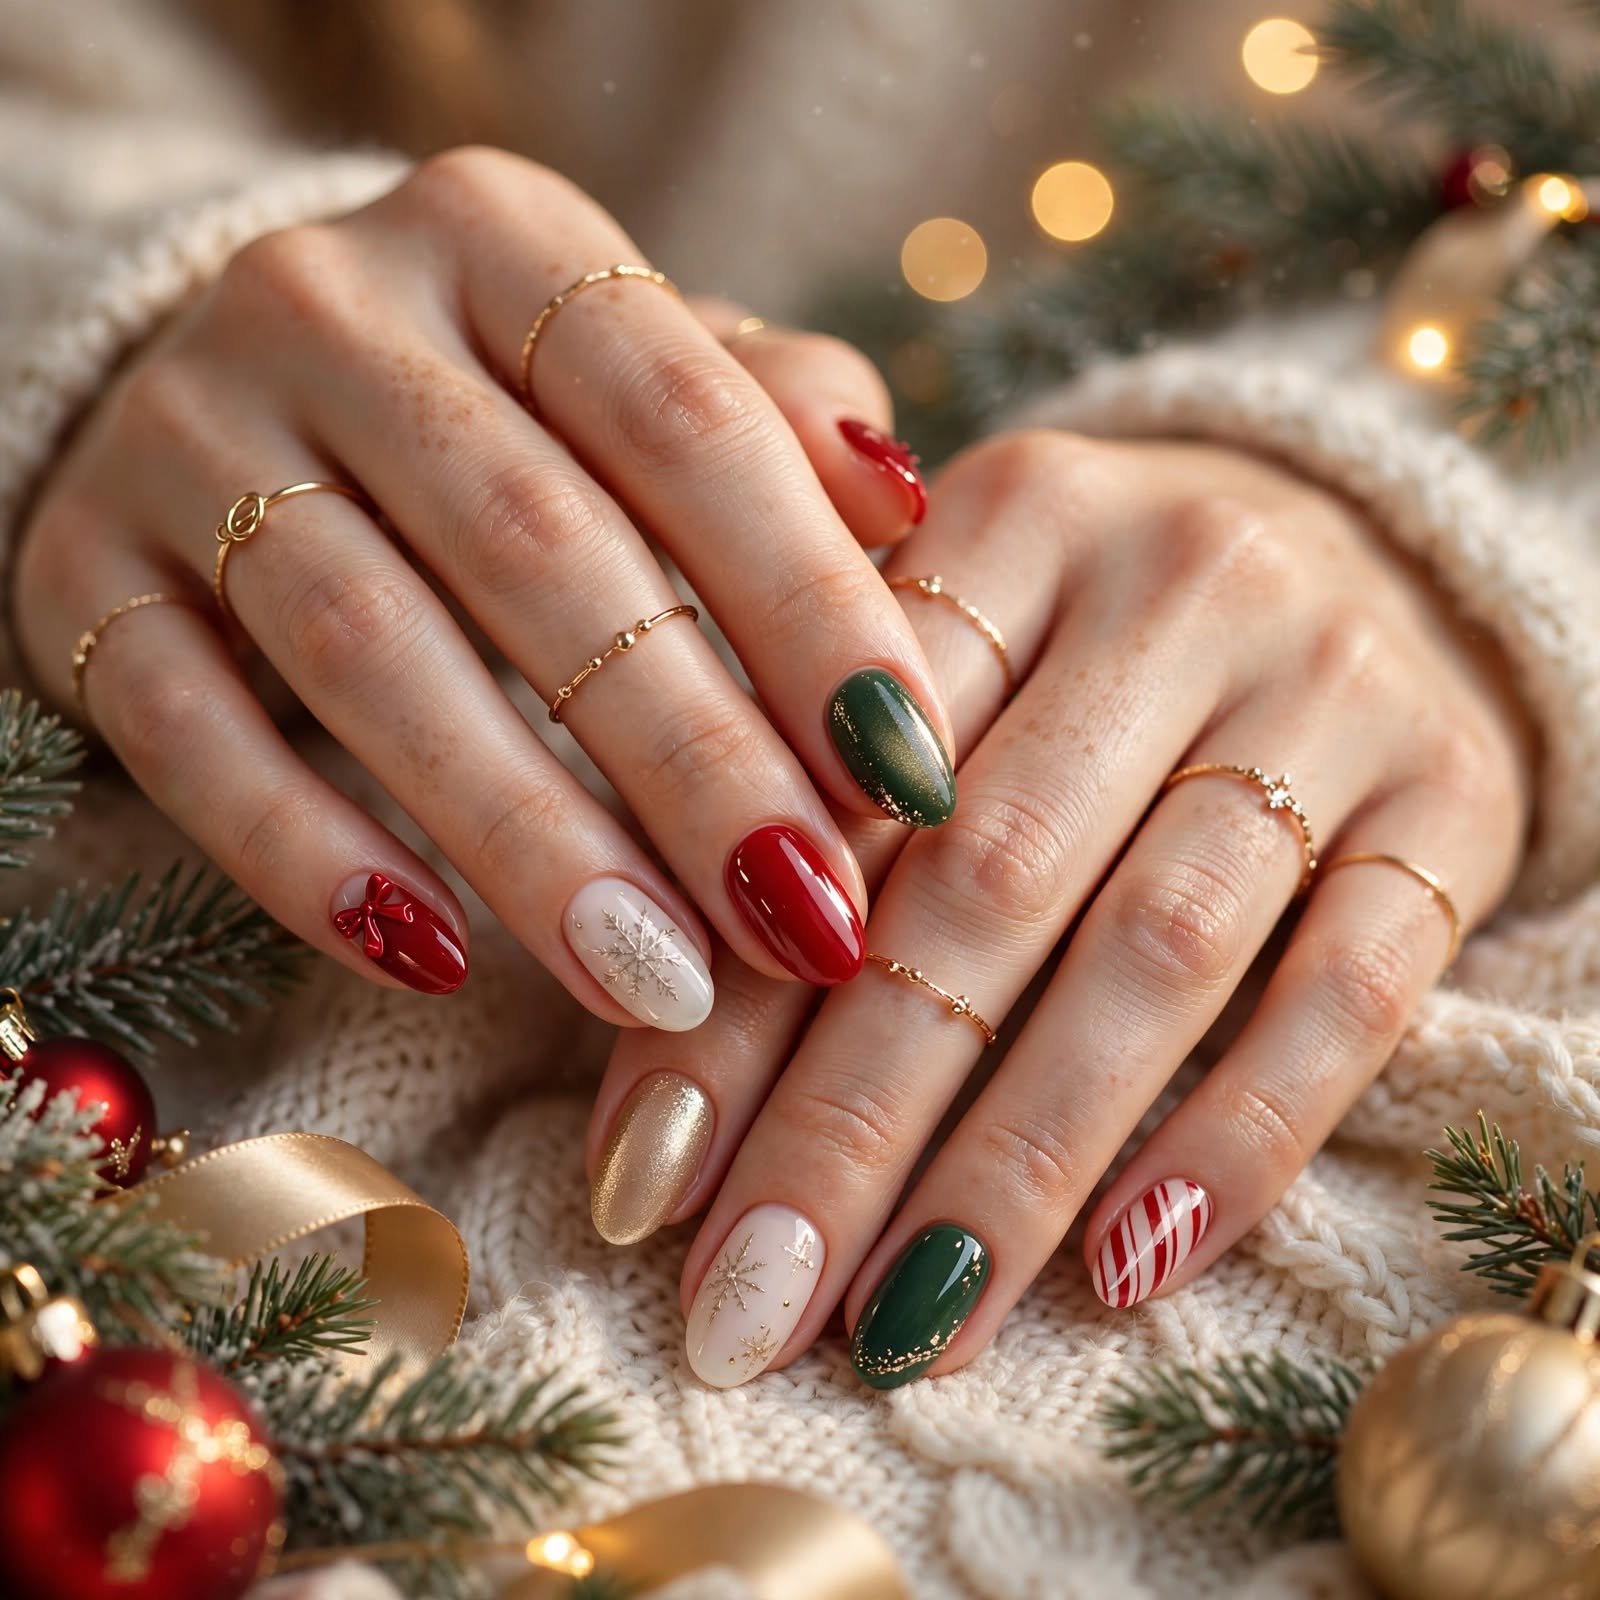
Right now, the big trend is “quiet festive.” That means gentle colors, glossy finishes, and one or two tiny details instead of a busy scene. Soft bows, thin stripes, and a little sparkle are everywhere. Many people also love short, rounded nails because they are practical for daily life. It is a pretty, cozy approach that fits real schedules.
Timing matters too. It is mid-October, so you have plenty of weeks to plan, practice, and book a salon spot if you want one. Holiday appointments fill up fast, especially the last two weeks before Christmas. Trying a design at home now lets you fix mistakes before the big day. Starting early also keeps the stress low and the fun high.
How to Pick the Right One for You
Start with your nail shape and length. Short nails look great with solid colors, small accents, and tiny French tips. Long nails give you room for stripes, plaid, and bigger designs. Almond and oval shapes make fingers look longer, while square shapes feel bold and sturdy. Choose a design that matches the nails you already have, not the ones you wish you had.
Think about your skin tone next. Warm skin often glows in brick red, gold, olive green, and chocolate brown. Cool skin tends to love blue-red, silver, icy white, and deep plum. Neutral skin can wear almost anything, so you get to play. If you are unsure, hold a color near your hand in natural light and see how it feels.
Consider the occasion and your daily life. A work party calls for polished, simple colors, while a New Year’s Eve dinner can handle glitter and chrome. If you type all day, pick a shorter length and a strong top coat. Busy hands also do well with designs that grow out gracefully. Match the look to your week, and you will enjoy it much more.
Finally, think about how much effort you want to spend. Some designs take ten minutes, and others need patience and a steady hand. There is no prize for the hardest set. Pick what makes you smile when you look down. The best nails christmas style is the one you actually love wearing.
1. Classic Cherry Red Gloss for a Timeless Holiday Look
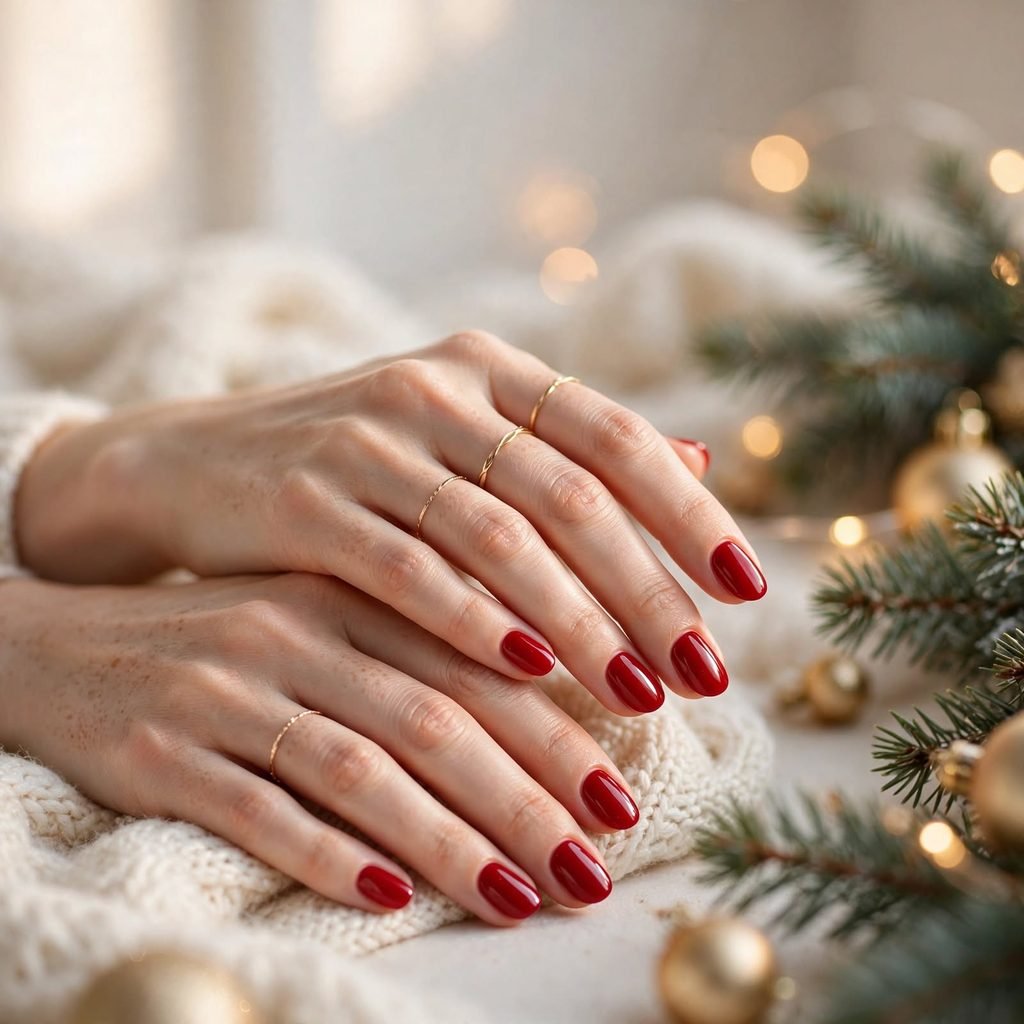
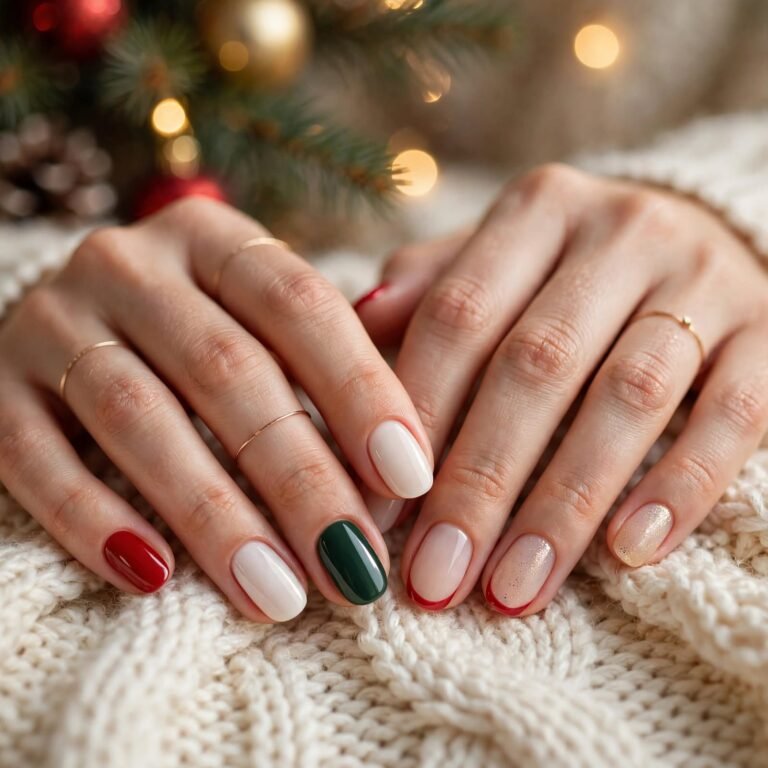
Cherry red is the queen of Christmas color. It looks rich, bright, and just a little retro. A glossy finish makes it feel fresh instead of plain. This shade works on short and long nails alike. It also pairs with nearly every outfit you will wear in December.
Who it suits best: This look suits anyone who loves a clean, classic style. It is perfect for office parties and family dinners. Both warm and cool skin tones glow in a true cherry shade. It is also kind to beginners because one color is easy to apply.
Quick styling tip: Add a thin layer of clear top coat for extra shine. Wear a gold ring to echo the festive mood. Keep your cuticles tidy, since red shows every little flaw. Try a tiny gold dot near the base of one nail for a subtle twist.
2. Cozy Burgundy Velvet Cat-Eye Nails for a Rich Winter Glow
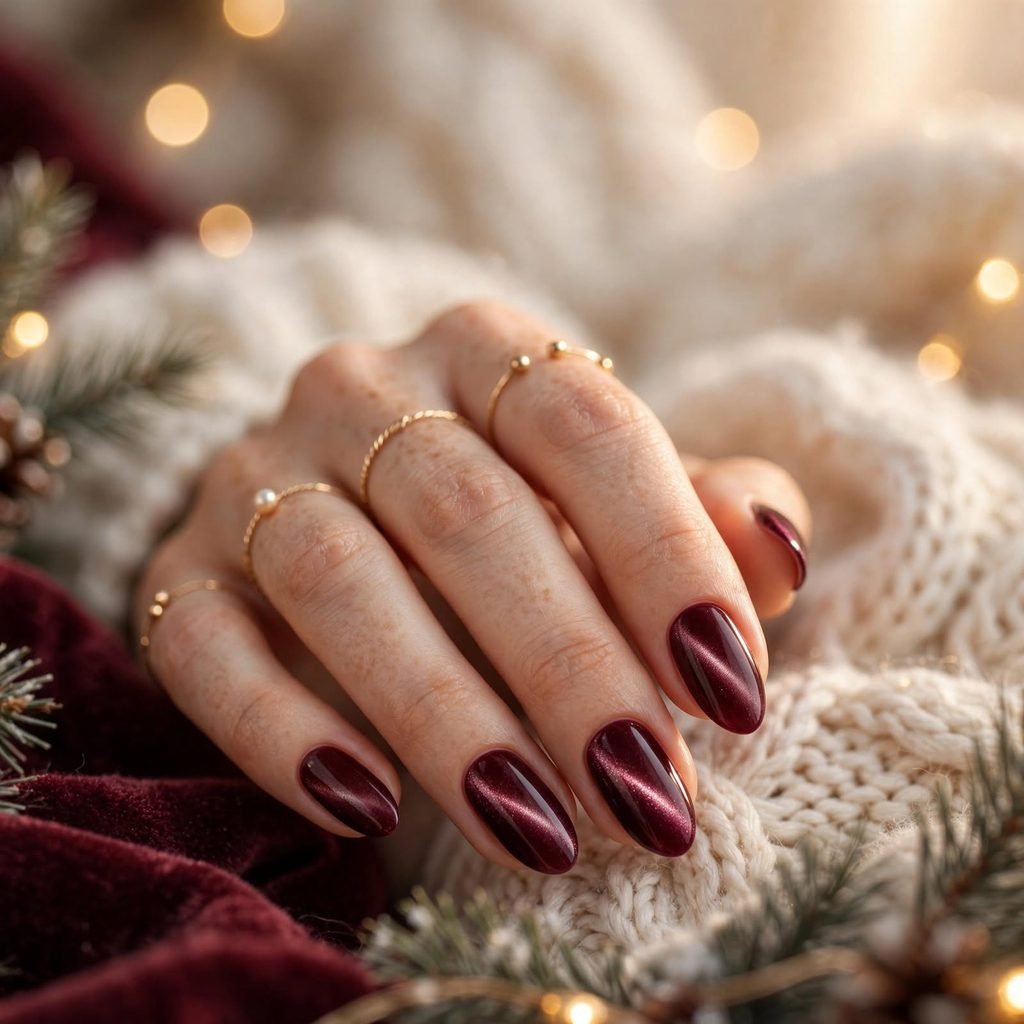
Burgundy is the color of mulled wine and warm blankets. A velvet cat-eye effect adds a soft, shimmery line that seems to move as you turn your hand. The result looks deep, luxe, and a bit mysterious. It feels more grown-up than bright red. It also hides small chips better than lighter shades.
Who it suits best: This style is a dream for anyone who likes moody, rich colors. It looks especially lovely on medium skin tones and deeper complexions. Almond and short square shapes show off the shimmer well. It is a great pick for evening events and cozy date nights.
Quick styling tip: Hold a small magnet near the wet polish to shape the shimmer line. Keep the line near the center or the tip for the best glow. Pair the look with a black or cream sweater. Soft candlelight makes this design look extra magical.
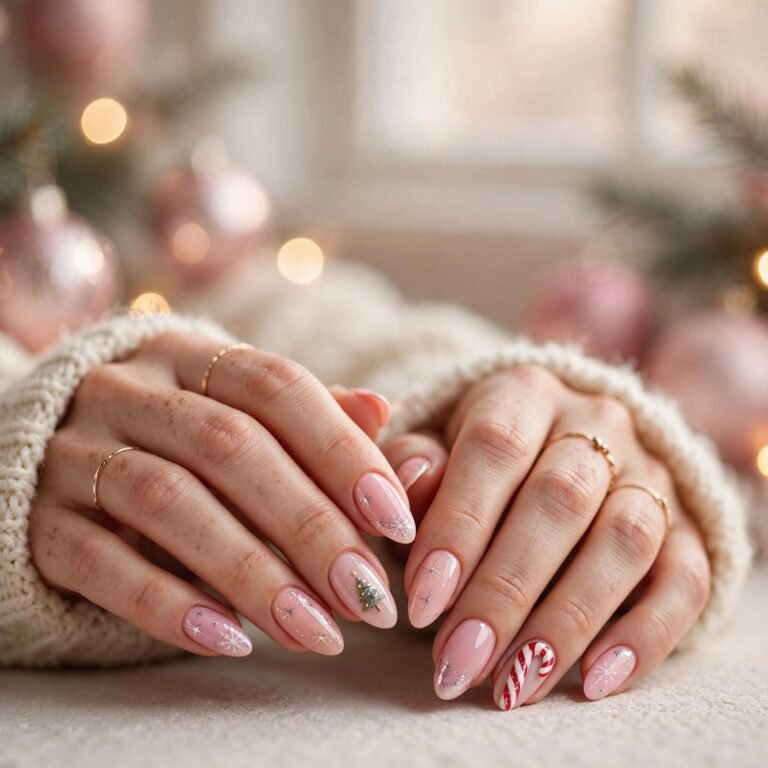
3. Milky White Snowflake Accents for a Soft Snowy Day Vibe
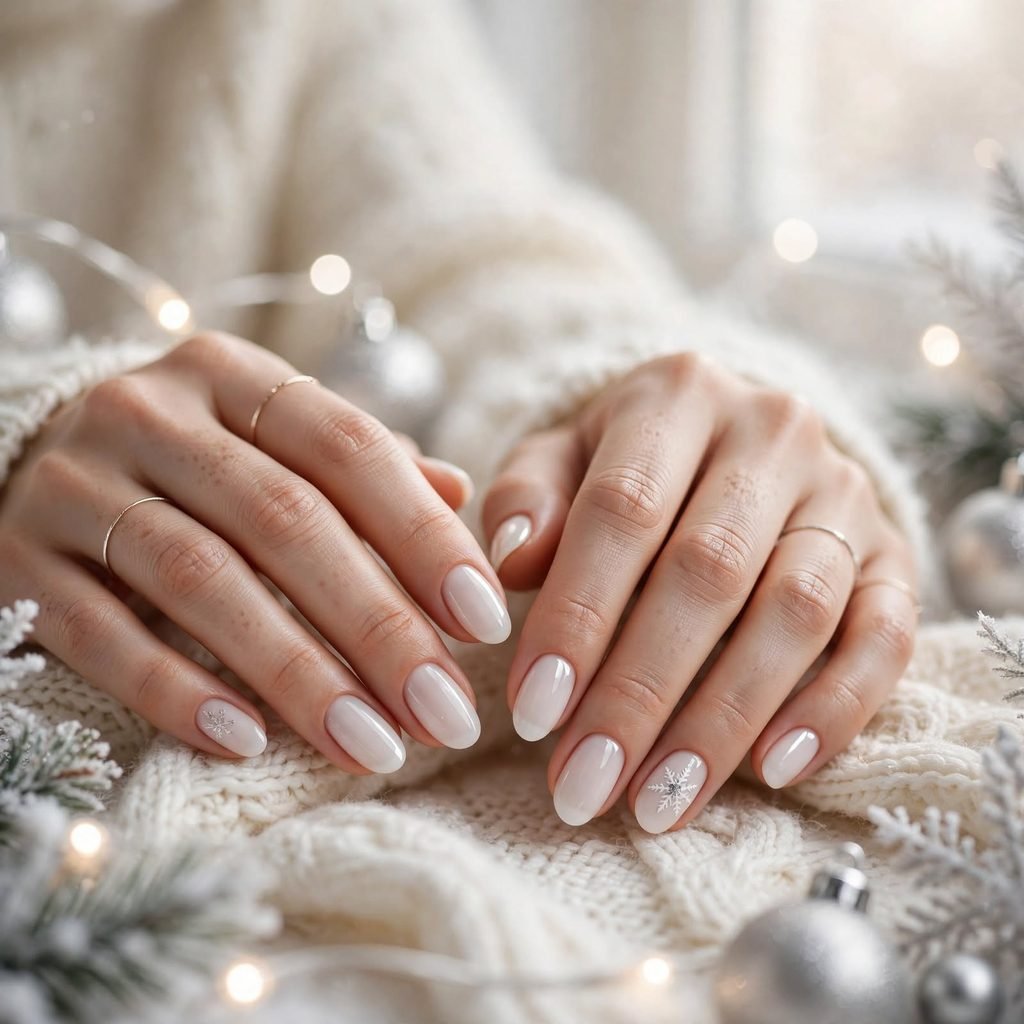
Milky white is gentle, clean, and calming. Add a few tiny snowflakes in white or silver, and you have a winter scene on your fingertips. The look is soft instead of loud. It feels like the first snowfall of the year. It is also easy to wear well past Christmas into January.
Who it suits best: This style is perfect for people who love simple, elegant nails. It works for school, work, and holiday brunches. It looks lovely on fair, olive, and deep skin tones alike. Short nails handle small snowflakes beautifully.
Quick styling tip: Place snowflakes on just one or two nails. Leave the others plain so the design feels airy. Use a thin brush or a dotting tool for the tiny lines. Finish with a glossy top coat so the white looks creamy.
4. Forest Green Shine with Gold Foil for Elegant Evenings
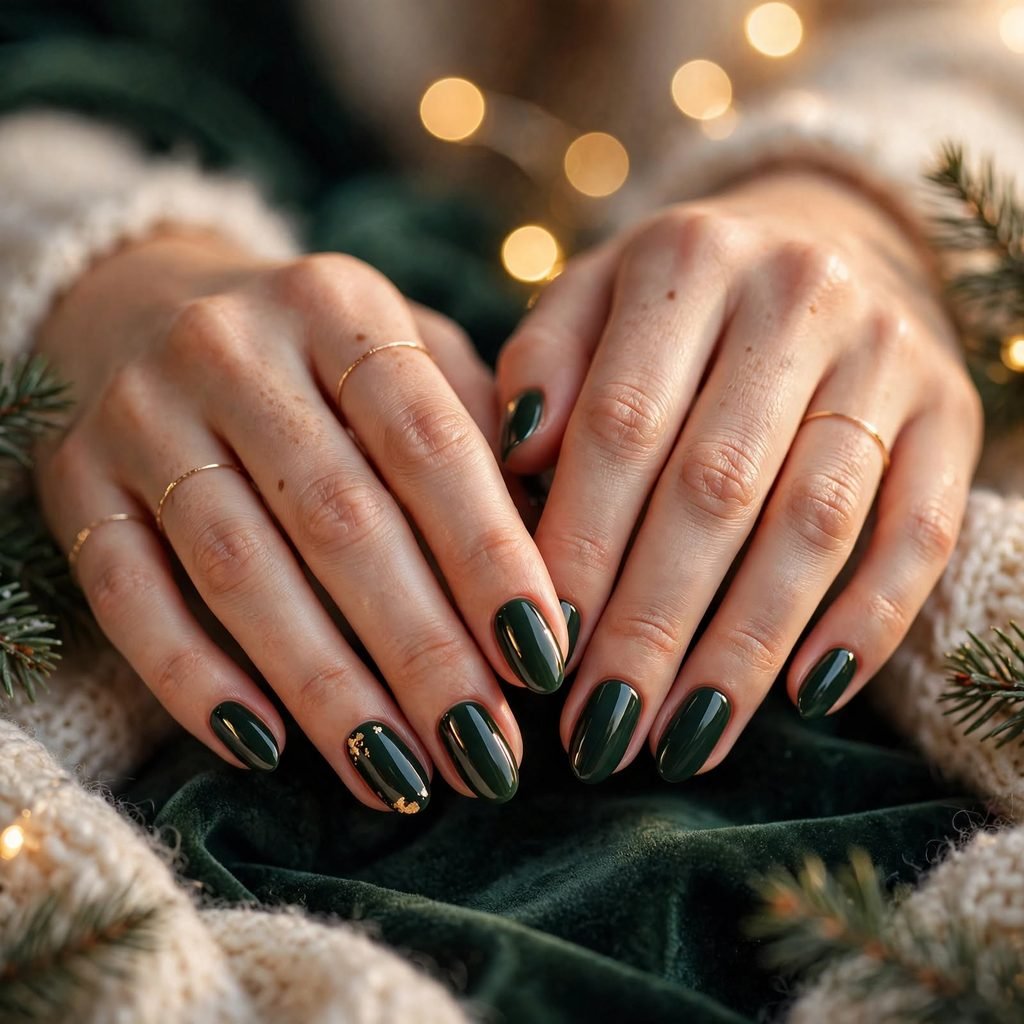
Deep forest green feels like a fresh Christmas tree. Add a few flakes of gold foil, and it begins to look like jewelry. The mix of dark green and warm gold feels rich and festive. It is a color pair that never goes out of style. It looks polished without trying too hard.
Who it suits best: This look flatters warm skin tones and golden undertones especially well. It also looks striking on very fair and very deep skin. It suits holiday dinners, church services, and fancy dress-up nights. Medium length nails with a soft squared tip show it off nicely.
Quick styling tip: Press the gold foil onto slightly tacky polish with a small tool. Do not cover the whole nail, because a few flakes look prettier. Seal everything with two thin layers of top coat. A smooth finish keeps the foil from catching on your sweater.
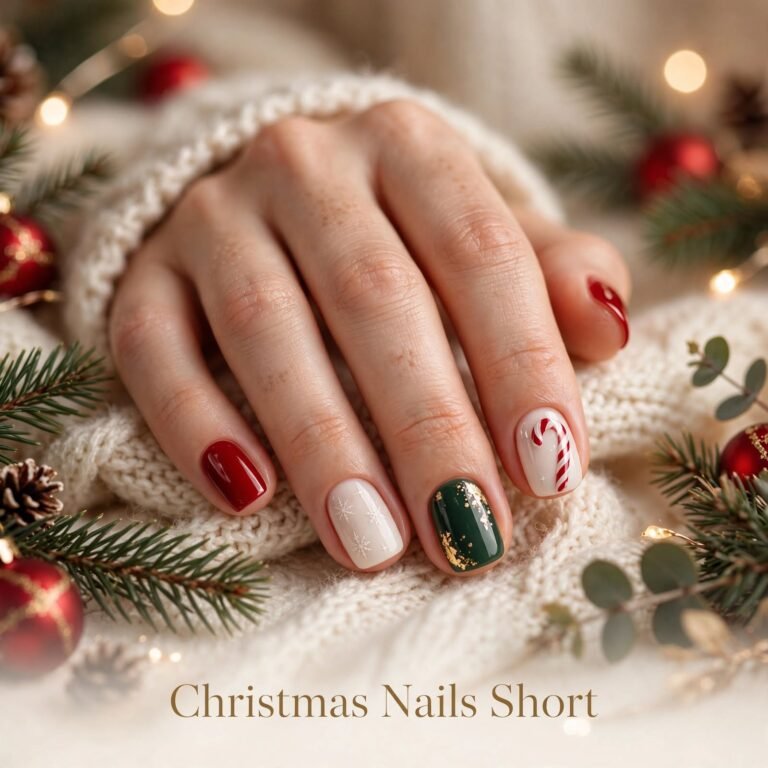
5. Candy Cane Stripes for a Sweet and Playful Twist
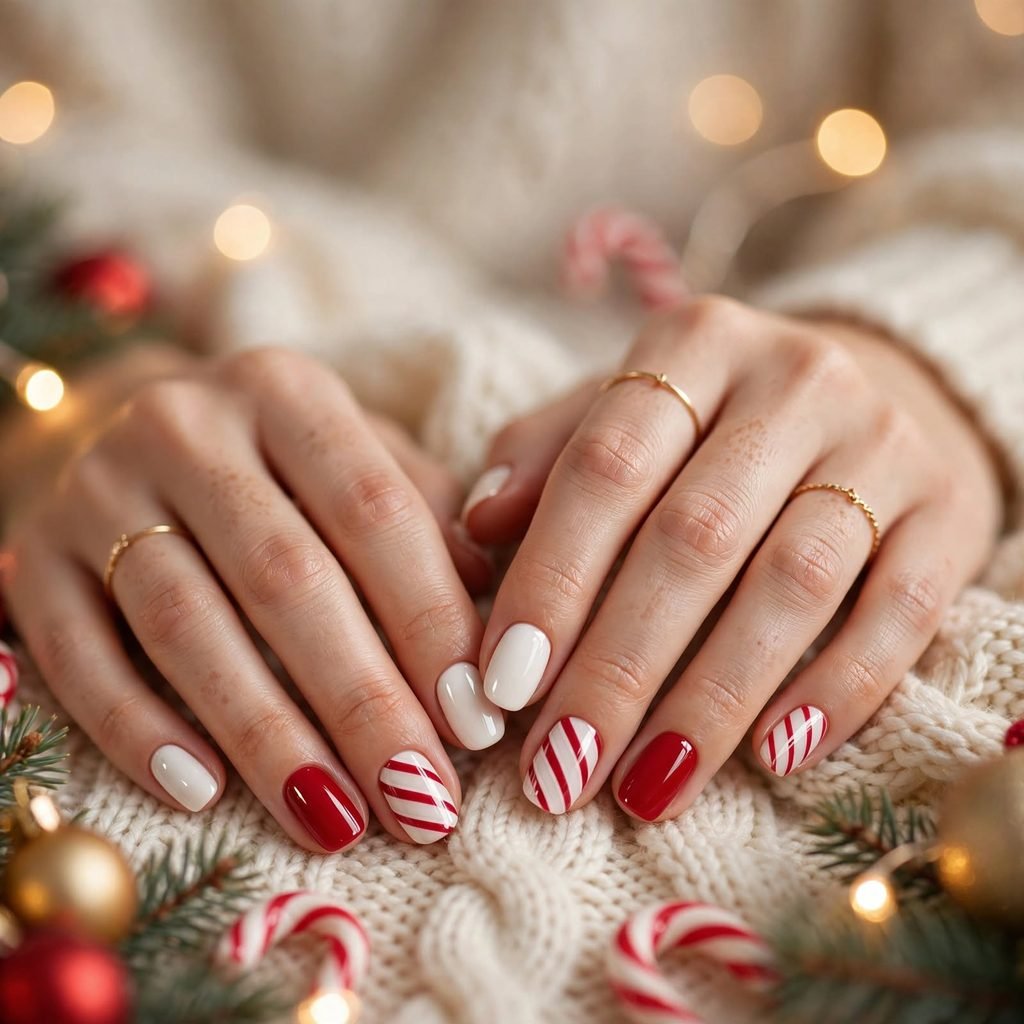
Candy cane stripes bring instant holiday cheer. You can paint thin red lines over white, or try a diagonal stripe on a single nail. The pattern is bright, clean, and a little nostalgic. It reminds people of peppermint and winter sweets. It is fun without being too busy.
Who it suits best: This design is great for people who love playful, cheerful looks. It is a hit with kids, teens, and grown-ups who love a bit of whimsy. Longer nails give you more space for neat stripes. Short nails can still look cute with a single stripe accent.
Quick styling tip: Use striping tape or a thin brush for clean lines. Let the white base dry fully before you add red. Take your time, since small wobbles are part of the charm. Wear a red or white scarf to match your hands.
6. Tiny Red Bow Accents on Sheer Nude Nails
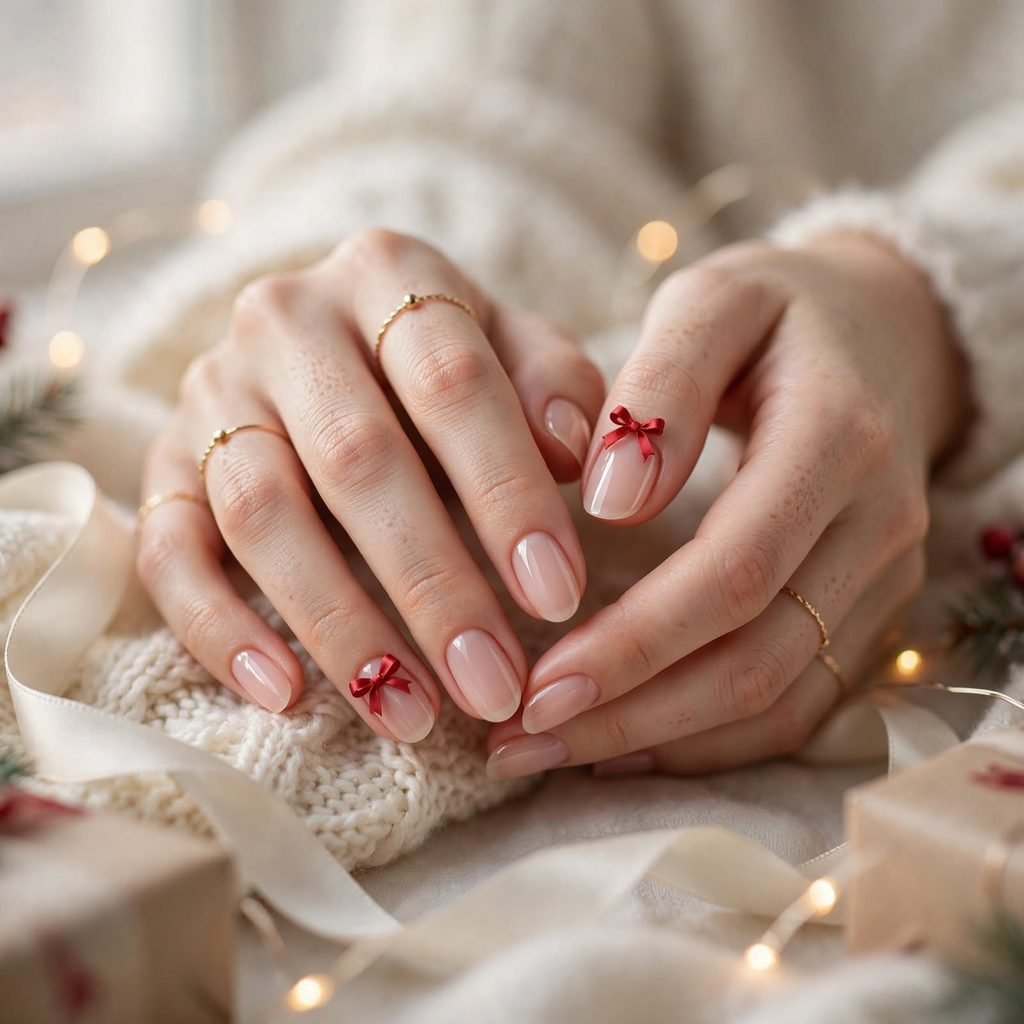
Little bows are one of the sweetest holiday trends. Picture a sheer, soft pink or nude base with one tiny red ribbon on each hand. It looks like a wrapped gift for your fingers. The style is gentle, feminine, and easy to love. It feels modern while still being festive.
Who it suits best: This look suits people who like a natural, “your nails but better” style. It is wonderful for teachers, office workers, and anyone who wants a subtle holiday touch. Almost every skin tone can find a sheer shade that matches. Short and medium nails both carry a small bow well.
Quick styling tip: Paint the bow in two small loops and a tiny center knot. Practice on paper first until your loops feel smooth. Place the bow on your ring finger so it stands out. A little shine on top makes the red look like real ribbon.
7. Silver Chrome Frost for an Icy Winter Wonderland
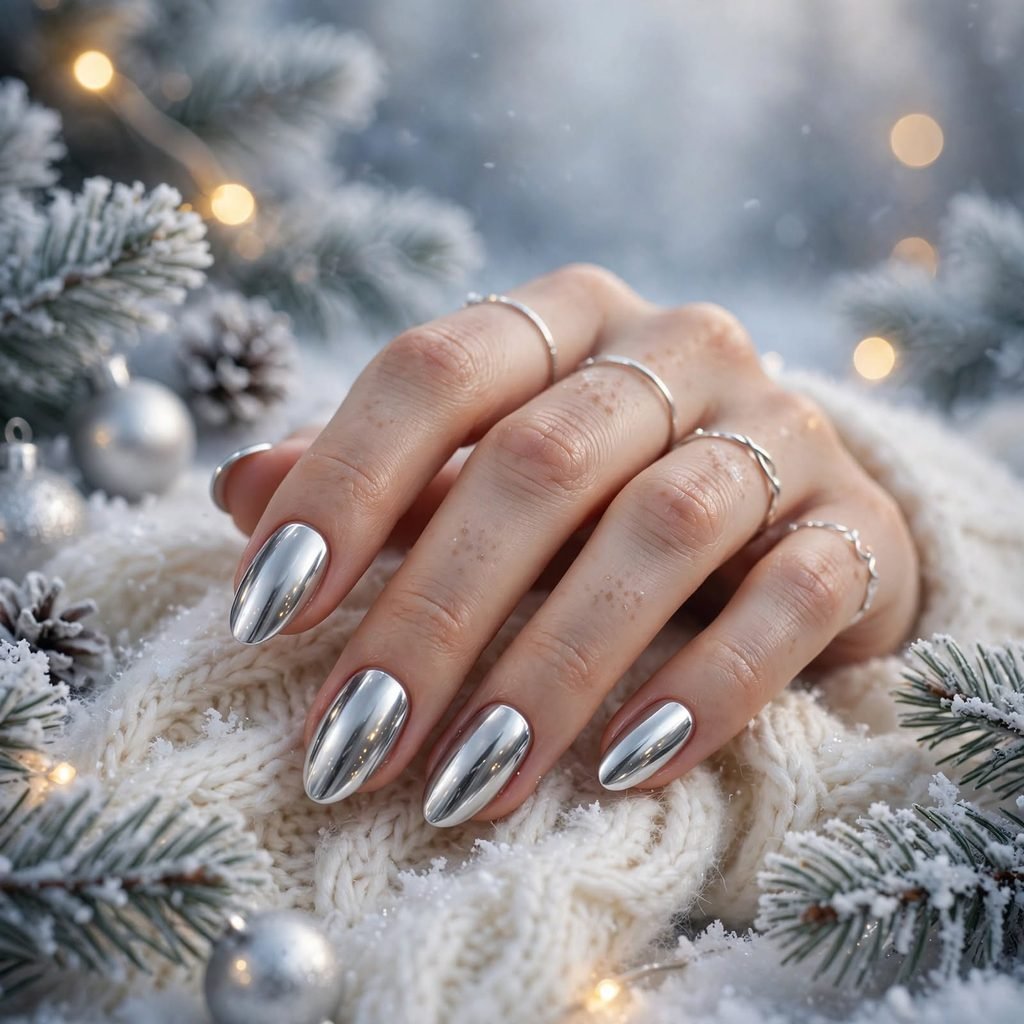
Silver chrome gives nails a mirror-like glow that looks like fresh ice. It catches every light in the room, from string lights to candles. The look is modern, sleek, and very eye-catching. It feels cool and bright at the same time. It is perfect when you want a little magic without any pattern.
Who it suits best: This style is made for people who love shine and futuristic vibes. It works well on cool skin tones, but it looks great on warm skin too. Short, oval, and almond nails look especially sleek in chrome. It is a strong choice for party nights and New Year’s celebrations.
Quick styling tip: Pair chrome with silver or pearl jewelry for a matching glow. Use a sheer white or pale blue base for a frosty finish. Keep the rest of your outfit simple so your hands shine. A smooth top coat keeps the chrome from looking dull.
8. Gingerbread Brown and Cream for Warm Bakery Vibes
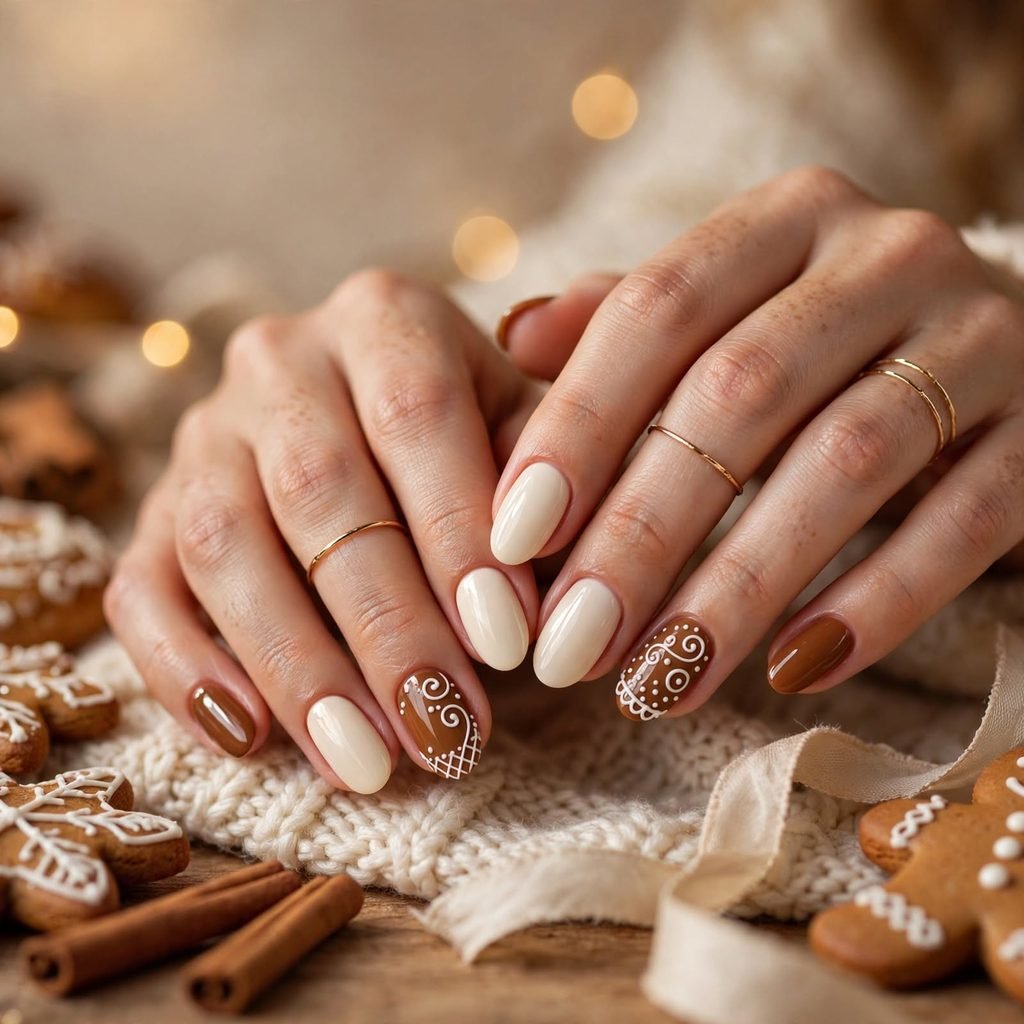
Brown nails can look truly delicious in December. Think of warm gingerbread paired with creamy white “icing” lines. The colors feel cozy, grounded, and a little sweet. This style is a lovely break from the usual red and green. It also looks great with winter coats and knit hats.
Who it suits best: This is perfect for people who love neutral, earthy colors. It looks beautiful on medium and deep skin tones, and it also flatters fair skin. Short and medium nails are ideal for this soft look. It suits casual parties, baking days, and cozy movie nights.
Quick styling tip: Paint thin cream squiggles on one or two nails for the icing look. Add a tiny dot in red or green for a “gumdrop.” Keep the lines small and a little uneven, since real icing is not perfect. A matte top coat can make the brown look like warm cookie dough.
9. Champagne Glitter Gradient for Party-Ready Sparkle
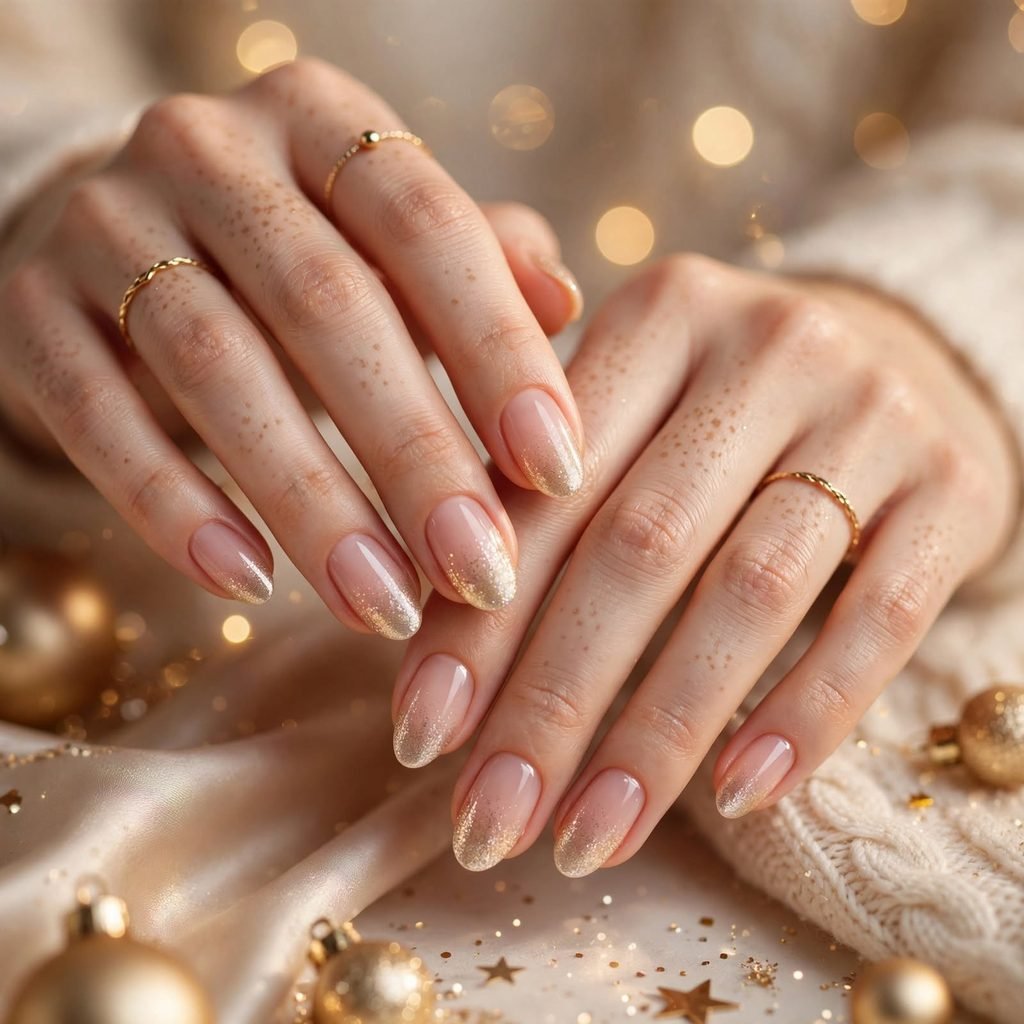
A champagne glitter gradient fades from a sheer base into soft gold sparkle at the tips. It glows without looking heavy. The look feels celebratory, like a toast at midnight. It also hides growth, so it stays pretty for a long time. It is a great bridge between Christmas and New Year’s Eve.
Who it suits best: This style is perfect for people who love glam but not too much color. It works on every skin tone because champagne is so flexible. Medium and long nails give the fade more room. It suits holiday parties, weddings, and fancy dinners.
Quick styling tip: Dab glitter with a small sponge, heavier at the tips and lighter toward the middle. Use a gentle tapping motion for a smooth fade. Add a thin layer of top coat to smooth the texture. Wear a simple dress or sweater so the sparkle can be the star.
10. Cozy Plaid Sweater Nails for Cabin Weekend Charm
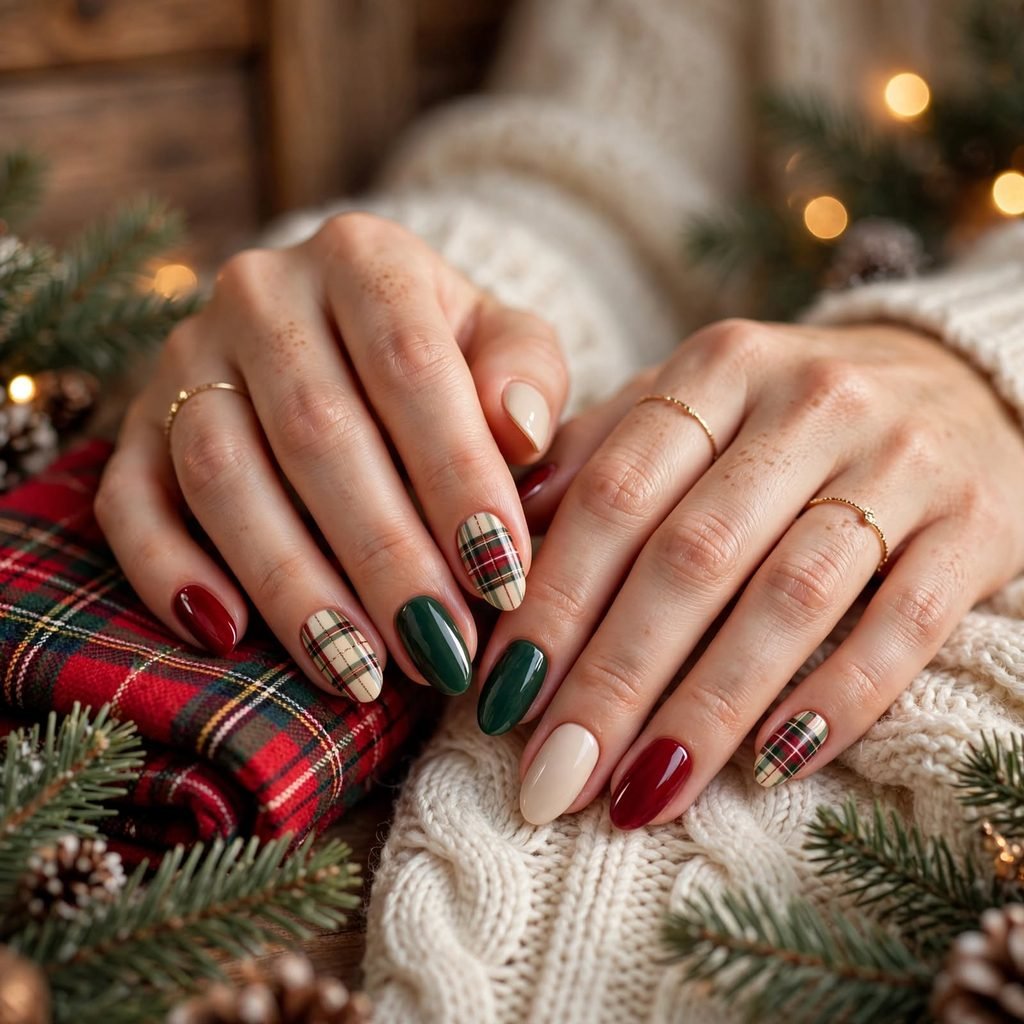
Plaid is the pattern of holiday pajamas and warm flannel. On nails, it looks like a tiny blanket on each finger. Red, green, and cream make a classic tartan, but you can use any colors you love. The look is playful and full of personality. It makes people stop and say, “Wait, is that plaid?”
Who it suits best: This design is great for people who enjoy detail and a little challenge. It suits relaxed gatherings, cabin trips, and family game nights. Medium and long nails give you more space for the grid lines. Anyone who loves cozy, sweater-weather style will adore it.
Quick styling tip: Start with a solid base color and let it dry fully. Draw thin crossing lines with a fine brush, then add a few narrow lines in a second color. Keep plaid on one or two nails and make the others plain. This keeps the whole set clean and balanced.
11. Hand-Painted Holly and Berry Accents for a Natural Festive Feel
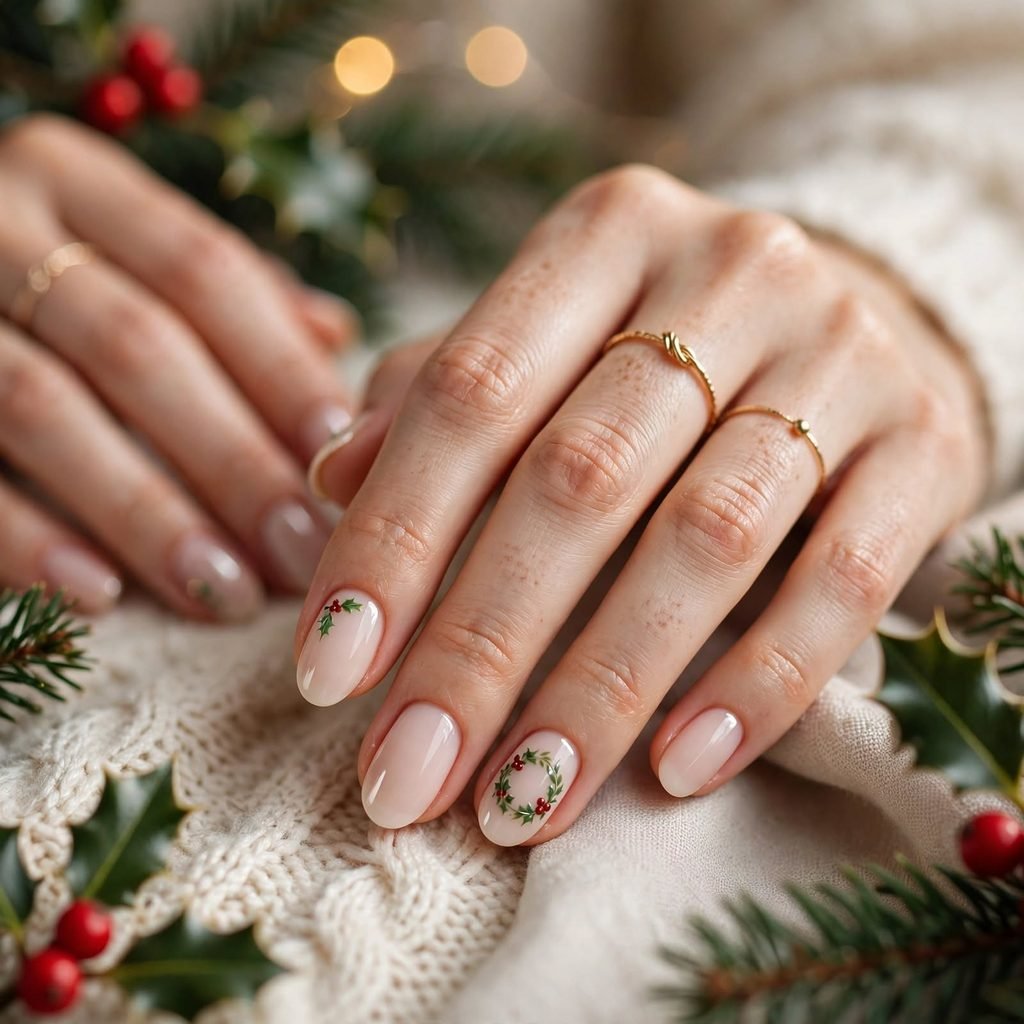
Holly leaves and red berries are a classic Christmas picture. On nails, they look delicate and charming. You can paint them on a cream, white, or sheer base for a soft, natural look. The design feels like a tiny wreath on your fingertip. It is simple, but it still looks thoughtful.
Who it suits best: This look is perfect for people who like a gentle, storybook style. It suits holiday brunches, gift exchanges, and Christmas morning. It looks lovely on short nails, since the small design fits well. Anyone who enjoys art or painting will have fun with it.
Quick styling tip: Paint each leaf as a small teardrop shape with a thin brush. Add three little red dots for the berries. Keep the design near the cuticle or the tip for a modern look. If your hand shakes, use a dotting tool for the berries and press lightly.
12. Starry Midnight Blue for a Magical Christmas Eve Sky
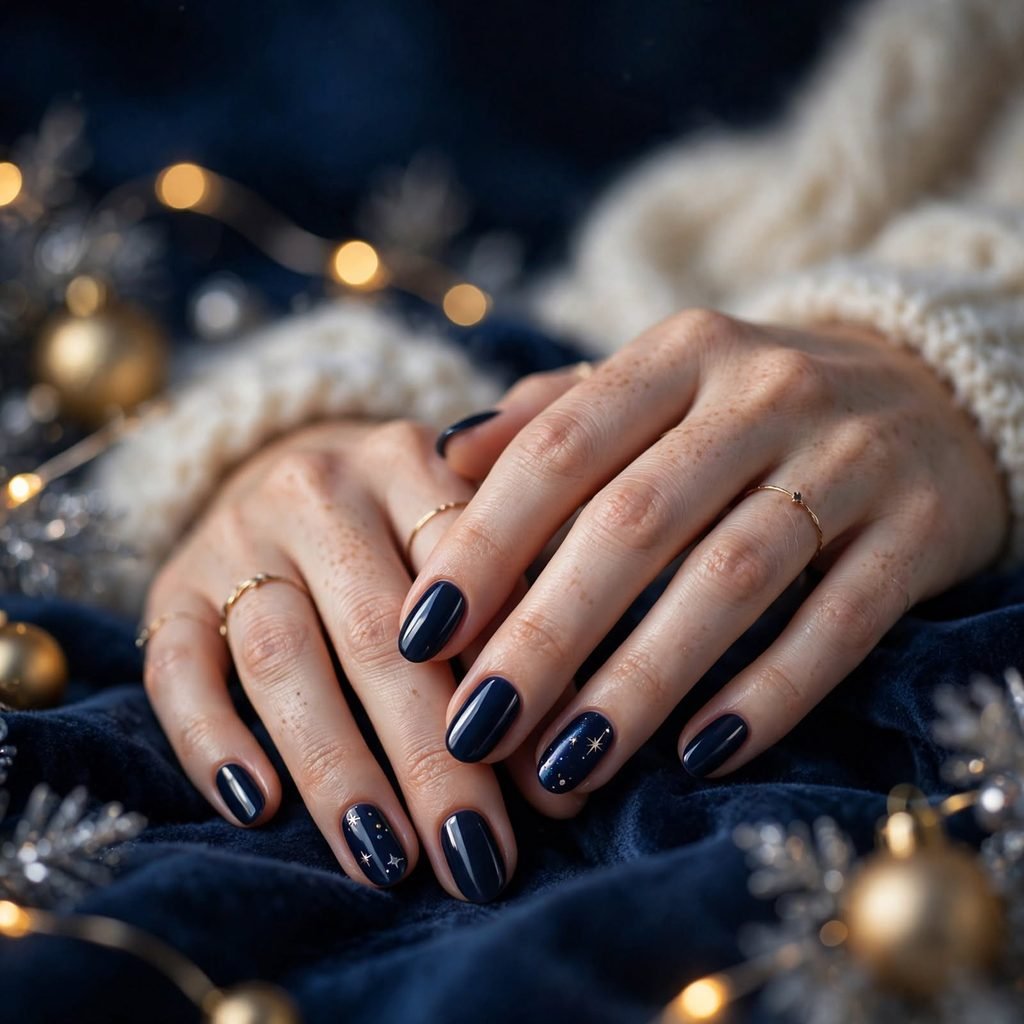
Midnight blue feels like the quiet, starry sky on Christmas Eve. Add tiny gold or silver stars, and you have a night scene on your nails. The deep color looks rich and calm. It is a lovely surprise among all the reds and greens. It also feels special, like a bedtime story.
Who it suits best: This style suits people who love dreamy, magical looks. It is beautiful on cool and neutral skin tones, and it pops on fair skin. Medium nails give you room for tiny star details. It is great for evening events, Christmas Eve, and winter dates.
Quick styling tip: Use a dotting tool to place tiny star dots in a loose scatter. Vary the size a little so it feels like a real sky. Add one larger star on your ring finger as the “wish” star. A glossy top coat makes the deep blue look like deep water.
13. Playful Santa Hat and Reindeer Accent Nails for Pure Fun
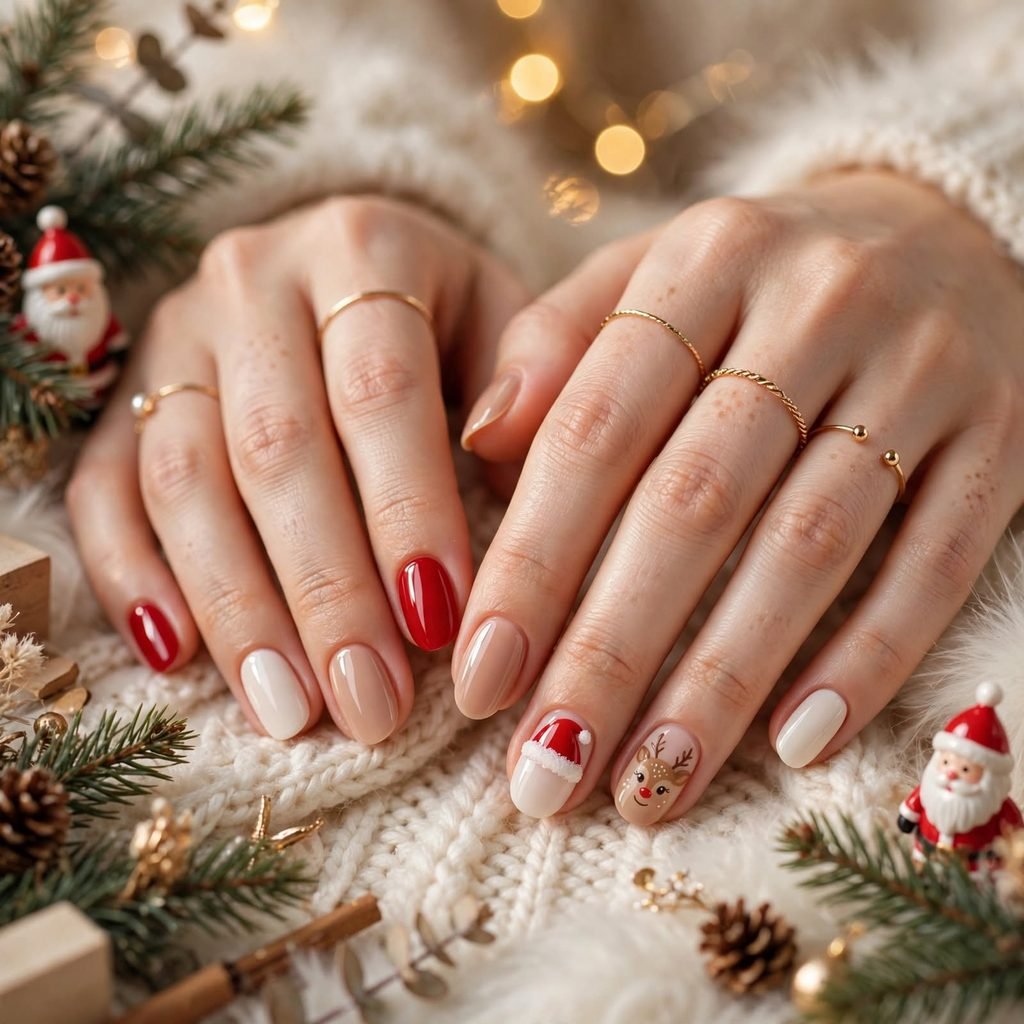
Sometimes you just want to be silly, and your nails can be too. A tiny Santa hat on one nail or a simple reindeer face on another brings instant joy. These designs are cute, bright, and made for smiles. They are not meant to be serious, and that is the charm. They also spark fun conversations at every holiday party.
Who it suits best: This look is perfect for kids, teens, and grown-ups with a playful heart. It works best for casual events, school parties, and family photos. Medium to long nails make the small characters easier to paint. Anyone who loves fun and cheer will enjoy wearing it.
Quick styling tip: Keep the characters simple, with just a few shapes and dots. Do one fun accent nail and keep the rest in a solid red or white. This stops the whole set from feeling too busy. Let each layer dry before you add small details so nothing smudges.
How to Do This at Home
You do not need fancy tools to try nails christmas looks at home. A few basics and some patience will take you far. Here are simple steps that work for almost every design above.
- Prep your nails. Wash your hands, remove old polish, and gently push back your cuticles. Shape your nails with a file, filing in one direction.
- Buff lightly. Use a soft buffer to smooth ridges so the polish goes on evenly. Wipe away dust with a clean cloth.
- Apply a base coat. Paint one thin layer to protect your nails and help the color stick. Let it dry for a minute or two.
- Add your color. Use two thin coats instead of one thick coat. Wait a few minutes between coats so the polish does not bubble.
- Create your design. Use a thin brush, a dotting tool, or striping tape for details. Work on one nail at a time and keep your tools clean.
- Add shimmer or foil if you like. Press it on while the polish is slightly tacky. Tap off any extra pieces gently.
- Seal with top coat. Cover the whole nail, including the tip, with a smooth layer. This locks in the design and adds shine.
- Clean up the edges. Dip a small brush in remover and wipe any polish off your skin. Add a drop of cuticle oil once everything is dry.
Cost and Time
Doing your nails at home is the budget-friendly choice. Basic supplies like polish, a base coat, and a top coat usually cost about $15 to $40 in total. Once you own the tools, each new set costs only a few dollars. A simple solid color takes about 30 to 45 minutes, while detailed art can take up to two hours. Polish usually lasts five to seven days before small chips appear.
A salon visit costs more but saves effort. A regular manicure often runs from $25 to $50, depending on your area. Gel color and nail art can push the price to $50 to $100 or more. A full set usually takes 60 to 90 minutes in the chair. Gel or similar long-wear styles can last two to three weeks with good care.
Care Tips
A good routine keeps your holiday nails looking fresh. Apply cuticle oil every day, because healthy cuticles make polish look neater. Wear gloves when you wash dishes or use cleaning products. Avoid using your nails as tools to open cans or peel stickers. Reapply a thin layer of top coat every two or three days to keep the shine alive.
Be gentle when it is time to remove your design. Soak a cotton pad in remover, rest it on each nail for a minute, and wipe softly. Do not peel or pick off polish, since that pulls away layers of your natural nail. After removing, give your nails a few days of rest with a nourishing oil or cream. Healthy nails make every future set look better.
Frequently Asked Questions
How early should I start my Christmas nails?
Most people start about one to two weeks before their first big event. If you want to keep your look all season, begin in early December. Salons get very busy close to Christmas, so book early if you want a pro. At home, you can refresh your color every week without trouble. It is a good idea to practice your chosen design once before the real day.
What are the best colors for nails christmas looks?
Red, green, white, gold, and silver are the classics, and they never fail. Burgundy, chocolate brown, and midnight blue are lovely for something different. Soft nude and milky shades are great if you prefer a quiet style. Choose the colors that make your skin glow and match your wardrobe. There is no wrong answer, only what makes you happy.
Can I do Christmas nail art on short nails?
Yes, short nails can look amazing with holiday designs. Small accents like tiny bows, dots, snowflakes, and thin stripes fit short nails perfectly. Solid glossy colors also look neat and polished on a short length. Keep the designs small and simple so they do not feel crowded. Many people find short nails more comfortable during busy holiday weeks.
How do I stop my polish from chipping so fast?
Good prep is the secret to long-lasting polish. Make sure your nails are clean and free of oil before you begin. Always use a base coat and a top coat, and cap the tip of the nail with each layer. Wear gloves for chores and avoid long soaks in hot water. A fresh layer of top coat every few days also helps a lot.
Are glitter and foil hard to remove?
Glitter and foil can be a bit stubborn, but they are not impossible. Soak a cotton pad in remover, place it on the nail, and wrap it with foil for five to ten minutes. Then wipe gently without scraping. Using a glossy top coat over glitter can make removal easier. Be patient, and rest your nails after the sparkle is gone.
What if I make a mistake while painting a design?
Do not worry, because mistakes are very easy to fix. Dip a small brush in remover and clean up any wobbly lines. If a whole nail looks messy, wipe it off and start again. Let each layer dry before painting the next one to avoid smudges. Remember that tiny imperfections give hand-painted nails their charm.
Final Thoughts
If you like things simple, try cherry red gloss, milky white snowflakes, or tiny red bows on a sheer base. These looks are soft, clean, and easy to wear to any gathering. They also take less time and suit short nails very well. A simple set can still feel festive and special. It is a great choice when you want to look polished without fuss.
If you love glam, go for silver chrome, champagne glitter, or burgundy velvet cat-eye nails. These styles catch the light and make you feel ready for a party. They shine at dinners, concerts, and New Year’s Eve. A little sparkle goes a long way in December. Pair them with simple jewelry and let your hands do the talking.
If you feel bold, pick candy cane stripes, plaid, or a playful Santa hat accent. These designs bring big personality and a lot of smiles. They are perfect for people who enjoy having fun with fashion. Try them on one or two nails if you want to ease in. Whatever you choose, the best nails christmas look is the one that makes you feel happy and festive.
Thank you for reading, friend, and happy holidays! May your nails be shiny, your polish stay chip-free, and your season be full of cozy moments. Come back anytime you need fresh inspiration.